
The Calendar Integration section of the Gamma AI Concierge portal allows you to setup your connection to the following calendar services:
- Google Calendar
- Calendly
- Microsoft Outlook
- Acuity Scheduling
- SimplyBook.me
Please note that integration with Acuity Scheduling or SimplyBook.me requires that service’s appropriate premium license.
Integrating AI Concierge with one of these calendar services is required before an assistant can create bookings.
Setting up your calendar #
Microsoft Outlook, Calendly and Google Calendar
- For the selected calendar, you will be required to sign in to your Microsoft, Calendly or Google account respectively.
Acuity Scheduling and SimplyBook.me
- For Acuity Scheduling and SimplyBook.me you will need to provide the system with additional information, all of which is outlined in the relative Connect pop up.
Acuity Scheduling
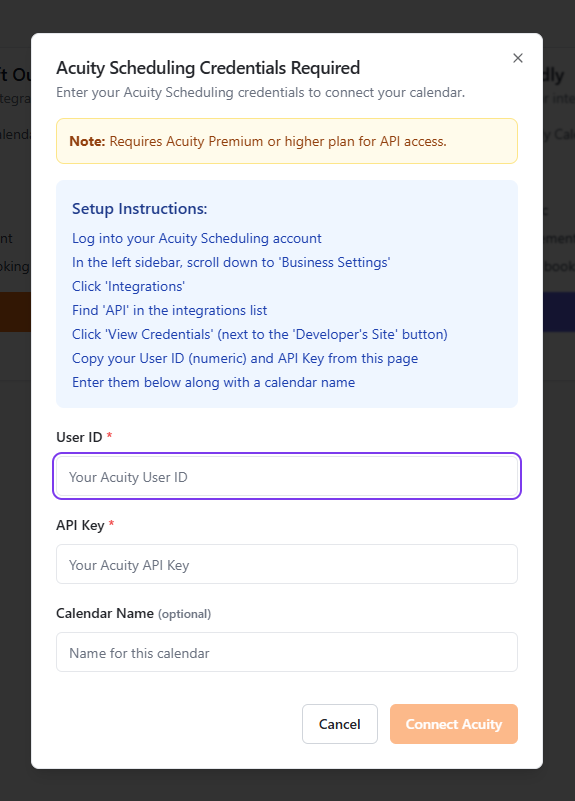
- You will need Acuity Premium or higher plan for API access
- Log into your Acuity Scheduling account
- Scroll down to Buisness Settings via the left sidebar
- Click Integrations
- Find API in the integrations list
- Click View Credentials
- Copy your User ID and API Key from this page
- Enter them in the fields, along with a calendar name if required
- Click Connect Acuity
SimplyBook.me
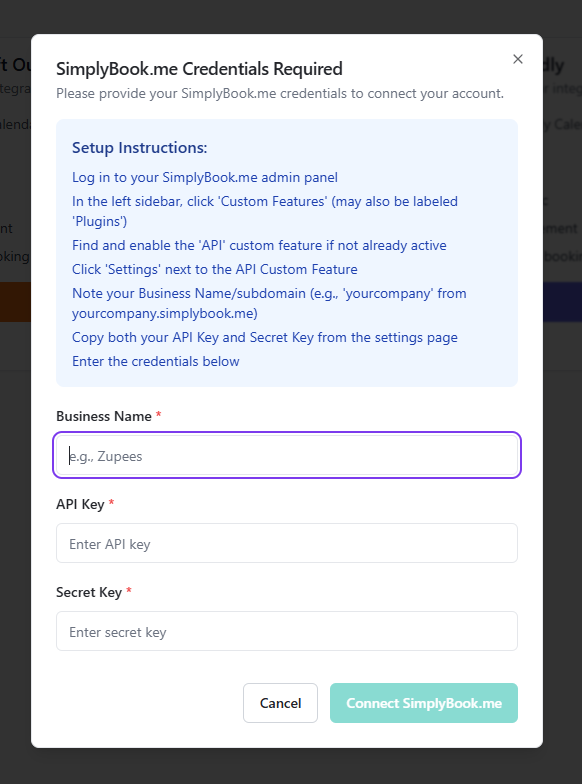
- Log into your SimplyBook.me admin panel
- In the left sidebar, click Custom Features (this may also be labeled Plugins)
- Find and enable the API custom feature if not already active
- Click Settings next to the API Custom Feature
- Note your Business Name/subdomain (eg if the business name is ‘yourcompany.simplybook.me’ then your subdomain is ‘yourcompany’)
- Copy both your API Key and Secret Key from the settings page
- Enter these credentials in the SimplyBook.me Credentials popup on the portal
Connecting your AI assistant to a calendar #
- Create an AI assistant – further information can be found here
- Select the assistant you wish to connect a calendar to
- Click Configure
- On the Assistant Details page, scroll down to Calendar and toggle Appointment Booking to on
- Select the Calendar Provider in the pop-up menu
- Select the specific calendar with the Use Existing button, or create a new one using the Create New option
- Your AI assistant will now be able to read your schedule and create appointments
