
This section contains all the information required for you to manage and support most models of handsets available in the UK. Gamma do not provide handset support, but where we have announcements to make regarding specific brands/models we will post them here.
iPhones and iPads #
iOS is the operating system created by Apple for its iPhones and iPads (known as “iOS Devices”). When connecting an iOS device to the Gamma network our Channel Partners need to be aware that there are some procedures that need to be followed to help give their customers the best possible experience.
Please note MMS is not supported on iOS6 and although it works on iOS7 we have had occasions when despite following best practise MMS has not worked using a Gamma* SIM.
How to set up iOS6 using Gamma SIM #
The data settings must be entered using Gamma’s OTA (Over-the-air) tools or manually.
We strongly recommend using Gamma’s OTA tool to do this as it installs a certified profile on the device which means that Gamma APN settings will still be present after a software upgrade or reset of the device.
Please note that the Profile used by the OTA tool only contains the Gamma APN data settings and not the MMS settings. MMS settings are not currently supported in Profiles by iOS6.
Gamma settings can only be restored following another hard reset of the device (hold down the on-off and menu buttons simultaneously until the white Apple logo appears). However, this will not resolve all instances and suggest an upgrade toiOS7 where the MMS settings are more stable.
The following method is the most reliable way of getting the correct internet access and MMS settings onto your iOS6 device, as well as getting the Profile onto the device that ensures APN settings will survive a future device upgrade or reset.
Step 1
If you are setting up an iPhone previously used on another network remove any existing Profiles since these may conflict with the Gamma Profile. If you are setting up a new handset, please go to step 4.
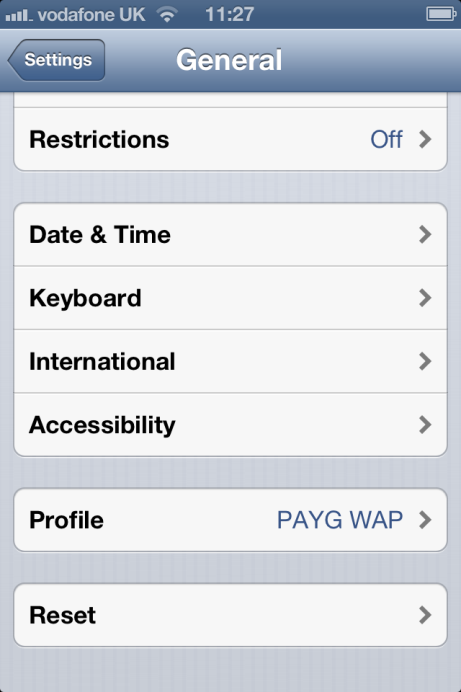
Go to Settings/General, scroll to bottom and select profile.
Step 2
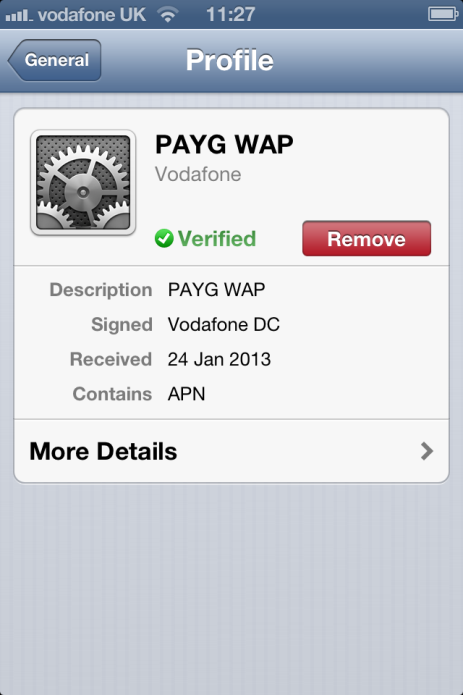
Click on the “Remove” button.
Step 3
A window will pop-up to confirm that you want to remove the profile. Click on Remove.

Step 4
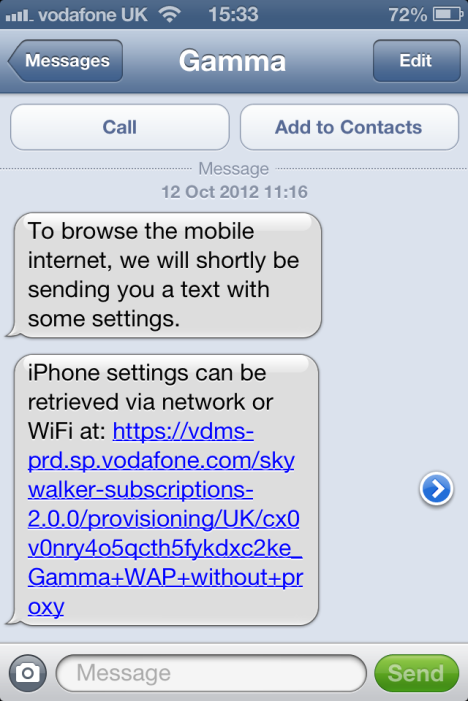
Open the Message app and follow the instructions below to download the Gamma settings.
Step 5
Text “settings” to 773000 to get the new device settings sent to the phone or use the OTA tool to send the settings. (Make sure your user is in a WiFi area)

Step 6
Click on the link in the message you receive to download and install the Profile that includes the correct APN settings for accessing the internet.
Step 7
The OTA settings will install a profile on the device as shown in the adjacent screen shot. This profile contains the Gamma APN settings and means that even after the device is reset, or the network settings are reset, the Gamma APN settings will still be installed.
Note: this profile does not contain the Gamma MMS settings so these will need to be entered manually if the device is ever reset or the network settings are reset.

Step 8
Reset the device by pressing and holding both the on-off button and the menu button until you see the white Apple logo appear.
Step 9
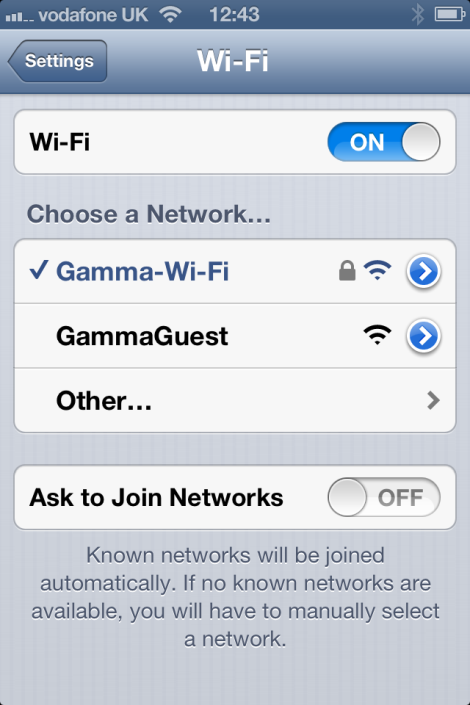
Go into Settings and turn WiFi off.
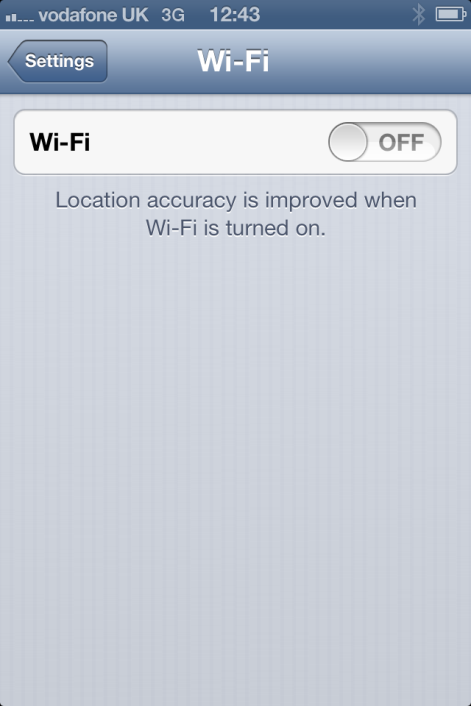
Step 10
You should now be able to access the internet over a 3G connection. Make sure you have a good 3G signal and try and browse a website using Safari. If this test is unsuccessful, please check that data access is enabled for your device from the Gamma portal and repeat step 5 – a reset of the device – and that the settings are correct.
Step 11
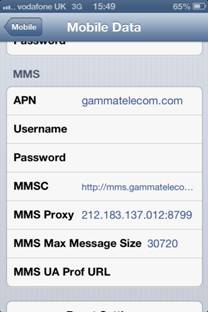
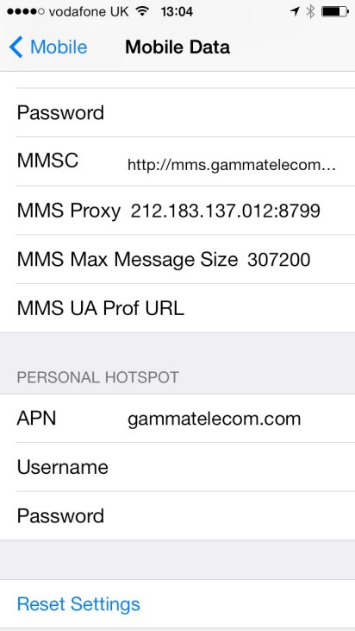
You will need to manually edit the MMS settings to get them to work. From the General/Mobile Data/Mobile Data Network page in the Settings App edit the MMS settings to those shown in the screen, as shown. The MMSC settings should be set to:
http://mms.gammatelecom.com/servlets/mms
Step 12
Reset the device by pressing and holding both the on-off button and the menu button until you see the white Apple logo appear. Then turn WiFi off before testing the MMS settings.
Test and confirm that MMS is now working by sending an MMS from the Messages application to a device that you know is capable of reading MMS messages. Please send to a non iOS device. Sending a message to an iOS device will use iMessage and not the network MMS.
Step 14
If you are unsuccessful in sending an MMS, please carefully re-check all of the MMS settings and ensure they are exactly as shown above. Also, please check that data access is enabled for this device from the Gamma portal.
How to set up iOS7 using Gamma SIM #
Apple released iOS 7 on 18th September 2013 for compatible models of iPhone and iPad. We have undertaken initial investigations of iOS 7 with a range of iPhone and iPad models in conjunction with Gamma SIMs and this document contains the main issues you should be aware of as well as step-by-step instructions in how to upgrade to iOS 7.
The key issues to note about the upgrade to iOS 7 are as follows:
-
- Once upgraded, your device should still contain the correct gammatelecom.com APN settings to allow it to connect to the internet over 2G or 3G if you previously used Gamma’s Over-the-Air (OTA) tools to set this up.
- In iOS 7 the Personal Hotspot APN is visible in the settings menu and by default this is incorrectly set to the default, which does not allow you to use your device for tethering until you have changed this APN setting. If tethering is required you should manually change the Personal Hotspot APN setting as described in the instructions below.
Step 1
Upgrade your software to iOS 7 using the “Software Update” feature, which can be found in the “General” settings section of the device “Settings”. Follow the on-screen instructions to download and upgrade to iOS6.

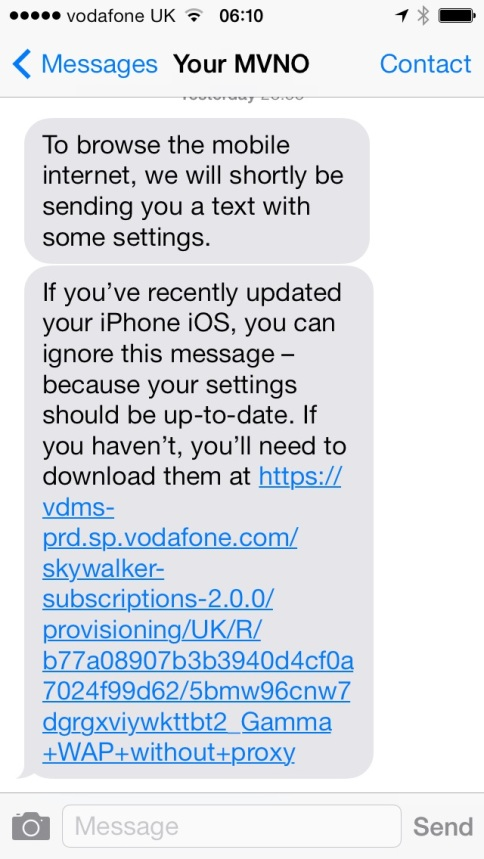
Step 2
After the iOS7 upgrade you should receive a text message with updated settings, as shown in the adjacent screen image. As message indicates you can ignore this message if you have previously installed the profile that ensures your Gamma Mobile settings are correct for accessing the internet. If you have not done this before then click on the link to download and install the correct Mobile Data APN settings profile.
Step 3
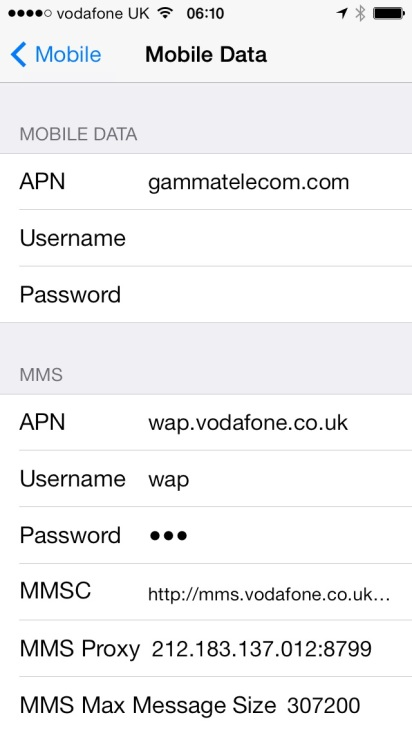
Check that the APN settings have updated successfully from the General/Mobile Data/Mobile Data Network page in the Settings App. Note that the MMS settings will still be incorrect at this stage – you will need to manually update them as described below.(Next screen shot in step 8, has correct settings)
Step 4
Reset the device by pressing and holding both the on-off button and the menu button until you see the white Apple logo appear.
You should now be able to access the internet over a 3G connection. To confirm this, turn the WiFi off, make sure you have a good 3G signal and try and browse a website using Safari. If this test is unsuccessful, please check that data access is enabled for your device from the Gamma portal and repeat step 5 – a reset of the device – and that the settings are correct.
Step 5
You will need to manually edit the MMS settings and Personal Hotspot APN to get both MMS and iPhone tethering working correctly. From the General/Mobile Data/Mobile Data Network page in the Settings App edit the MMS and Personal Hotspot settings to those shown in the screen. The MMSC settings should be set to: http://mms.gammatelecom.com/servlets/mms
Step 6
Test and confirm the MMS is now working by sending an MMS from the Messages application to a device that you know is capable of reading MMS messages.
If you are unsuccessful in sending an MMS, please carefully re-check all of the MMS settings and ensure they are exactly as shown above. Also, please check that data access is enabled for this device from the Gamma Portal.
iMessages #
If your customer changes their mobile number for whatever reason and retain their iOS device, the iMessage application (Apple’s own messaging facility) will “remember” the previous number and present that number as the number that the message came from. You can change it to the correct number by going to “Settings”, selecting “Messages” and then switching “iMessage” off. Switch the iOS device off for around 5 minutes and power back up. Then go to “Settings” and “Phone” and ensure that “My Number” reflects your new number. If not, you can tap this and edit it. Go back to Settings and select “General” and then “Date and Time” and ensure that it is set to automatic. Now switch iMessage back on it. iMessages will now be presented with the correct telephone number.
