
The provisioning and porting process follows a number of steps as outlined below or, alternatively, you can watch the “Provisioning and Activating your Mobile service” videos via the Gamma Academy.
Step 1
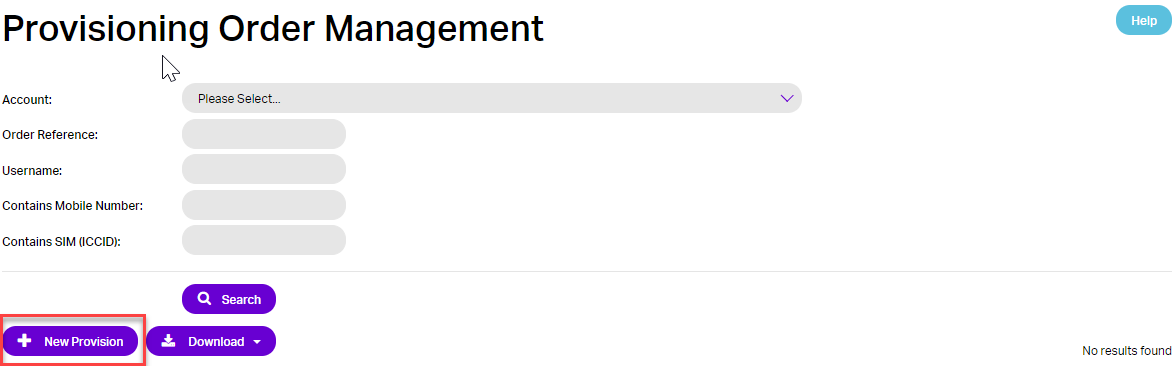
From the Gamma Portal, go to Provisioning & Service Management >> Mobile >> Provisioning Management
Step 2
When this page is loaded you need to select the “+New Provision” button, please note that this also covers ports and not just new provisions.
Step 3
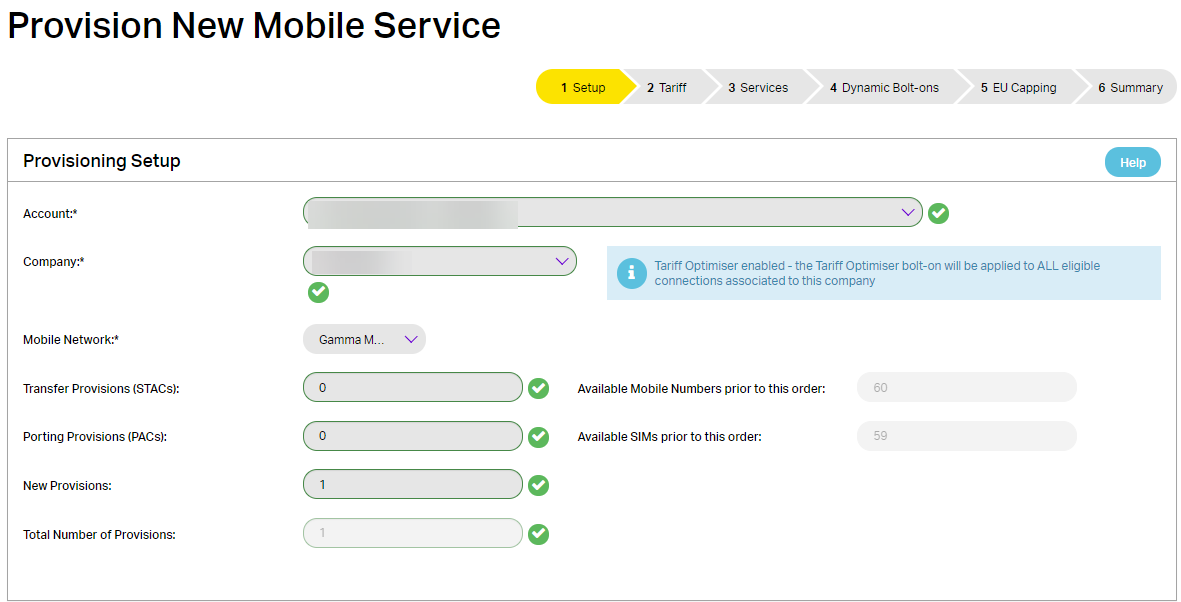
Select the Account & Company you wish to use for this provisioning order. Next, enter the quantity required for each type of provision:
- Mobile Network – This is the Gamma Mobile network the subscribers will be provisioned against
- Transfer Provisions – These are where your customer has provided a STAC and Mobile number & wishes to cease their previous service on their old network when they transfer to your new service
- Porting Provisions – These are where your customer has provided a PAC and Mobile number and wishes to port their existing number over from their old network.
- New Provisions. These are where your customer will simply get a new mobile number
The total number of provisions per order is limited to a maximum of 50.
Step 4
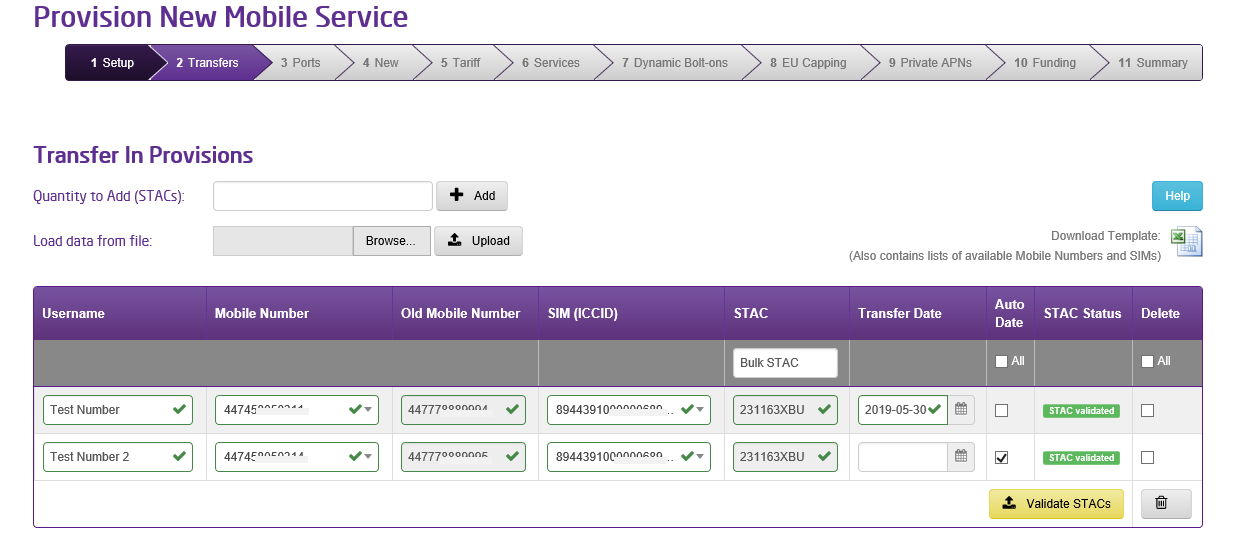
This step is for transferring a service from the customers previous operator, where the customer has supplied you with a STAC and their previous mobile number. If no Transfer In provisions were selected in Step 4 this screen will not be displayed.
This screen will display the number of rows matching the number of Transfer In provisions selected in Step 4. If more provisions are required, enter the extra number needed and select “+ Add”. If fewer rows are required, unwanted rows can be removed by selecting the row in the “Delete” column and clicking the dustbin icon.
For each row enter
- Username – a reference name that identifies the provisioned number
- Mobile Number – select from the drop down the new Mobile Number
- Old Mobile Number – this is the number the user has given you that will be ceased on their old network
- SIM – select from the dropdown for the SIMs that will be sent to the customer
- STAC – this is the code supplied by the customer ( 6 digits followed by 3 characters)
Once the above have been entered click “Validate STAC”. When validated a Transfer Date or Auto Date can be selected. Transfer date will be the date the user’s previous mobile number will be ceased ( as detailed in “Old Mobile Number”), or if Auto Date is selected the act of the user first registering their new Gamma SIM on the Gamma network will initiate the process to cease the Old Mobile Number. The number will be ceased the next working day.
Step 4a (Using a spreadsheet)
An alternative to populating the above screen manually is to use a spreadsheet to populate the screen. This can be more efficient for larger orders.
Click the “Download Template” button on the screen and open the spreadsheet. This spreadsheet has separate tabs containing all the available Mobile Numbers & SIMs for that account. This data can be used to populate the “Template” tab which contains the same columns as the provisioning screen (Username, Mobile Number, Old Mobile Number, SIM). Enable editing on the spreadsheet and populate the “Template” tab as you would do the Portal screen, again the maximum number of rows is 50. Once completed save the file to your computer. Then click the “Browse” button to find & select the file and then click the “upload” button. This will populate the Portal screen from the uploaded spreadsheet. Then follow the instructions above starting from the “validate STAC” stage.
Step 5
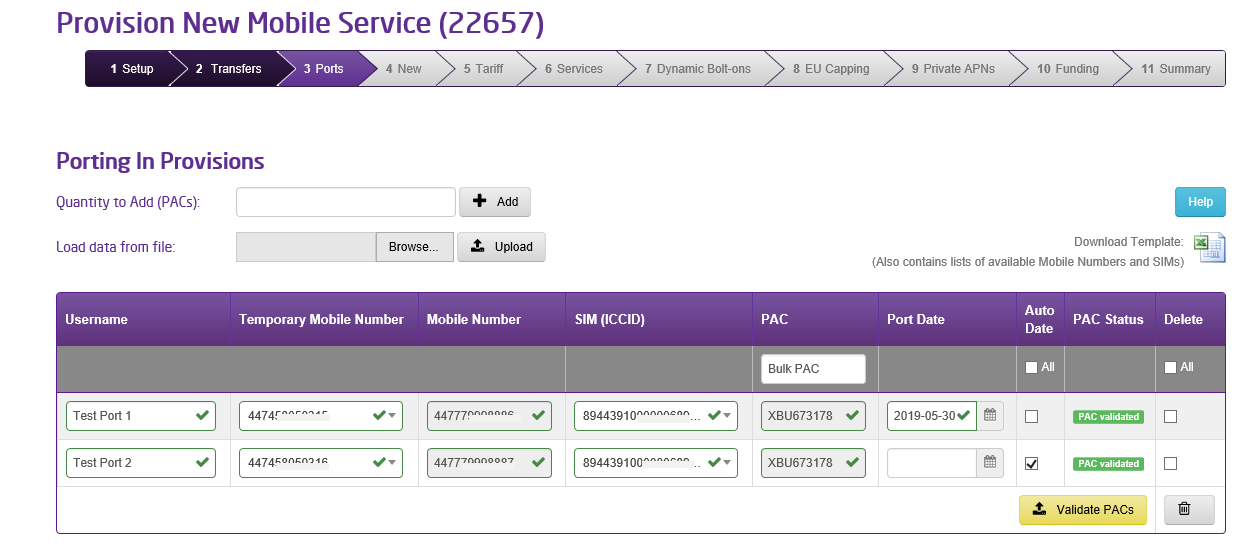
This step is for Porting mobile numbers from the customers previous operator, where the customer has supplied you with a PAC and the Mobile Number they wish to Port. If no Port In provisions were selected in Step 4 this screen will not be displayed.
This screen will display the number of rows matching the number of Port In provisions selected in Step 4. If more provisions are required, enter the extra number needed and select “+ Add”. If fewer rows are required, unwanted rows can be removed by selecting the row in the “Delete” column and clicking the dustbin icon.
For each row enter
- Username – a reference name that identifies the provisioned number
- Temporary Mobile Number – select from the drop down a temporary Mobile Number
- Mobile Number – this is the number the user has given you that will be Ported to Gamma
- SIM – select from the dropdown for the SIMs that will be sent to the customer
- PAC – this is the code supplied by the customer ( 3 characters followed by 6 digits )
Once the above have been entered click “Validate PAC”. When validated a Port Date or Auto Date can be selected. Port date will be the day the users Mobile Number will be ported from their previous network. If Auto Date is selected the act of the user first registering their new Gamma SIM on the Gamma network will initiate the process to port the Mobile Number. The number will usually be Ported the next working day.
Step 5a (Using a spreadsheet)
An alternative to populating the above screen manually is to use a spreadsheet to populate the screen. This can be more efficient for larger orders.
Click the “Download Template” button on the screen and open the spreadsheet. This spreadsheet has separate tabs containing all the available Mobile Numbers & SIMs for that account. This data can be used to populate the “Template” tab which contains the same columns as the provisioning screen (Username, Temporary Mobile Number, Mobile Number, SIM). Enable editing on the spreadsheet and populate the “Template” tab as you would do the Portal screen, again the maximum number of rows is 50. Once completed save the file to your computer. Then click the “Browse” button to find & select the file and then click the “upload” button. This will populate the Portal screen from the uploaded spreadsheet. Then follow the instructions above starting from the “validate PAC” stage.
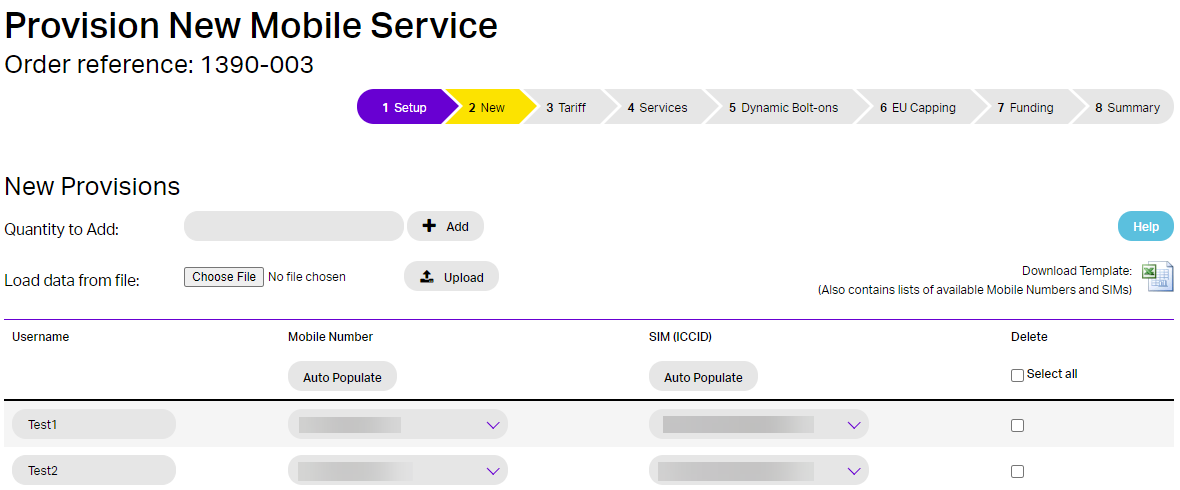
Step 6
This step is for provisioning new mobile numbers.
This screen will display the number of rows matching the number of New provisions selected in Step 4. If more provisions are required, enter the extra number needed and select “+ Add”. If fewer rows are required, unwanted rows can be removed by selecting the row in the “Delete” column and clicking the dustbin icon.
For each row enter
- Username – a reference name that identifies the provisioned number
- Mobile Number – select a new mobile number from the dropdown
- SIM – select from the dropdown for the SIMs that will be sent to the customer
When completed click Continue.
Step 6a (Using a spreadsheet)
An alternative to populating the above screen manually is to use a spreadsheet to populate the screen. This can be more efficient for larger orders.
Click the “Download Template” button on the screen and open the spreadsheet. This spreadsheet has separate tabs containing all the available Mobile Numbers & SIMs for that account. This data can be used to populate the “Template” tab which contains the same columns as the provisioning screen (Username, Mobile Number, SIM). Enable editing on the spreadsheet and populate the “Template” tab as you would do the Portal screen, again the maximum number of rows is 50. Once completed save the file to your computer. Then click the “Browse” button to find & select the file and then click the “upload” button. This will populate the Portal screen from the uploaded spreadsheet.
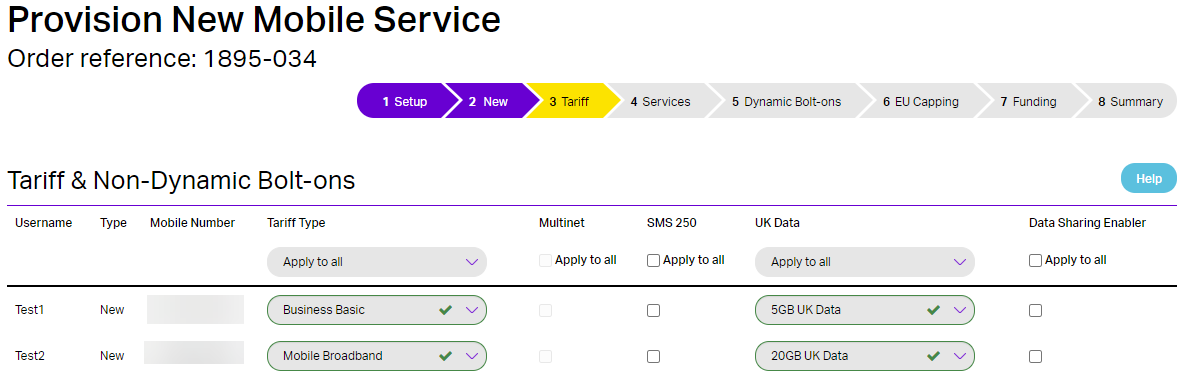
Step 7
The next step is where you can choose the Tariff for each of the services, you can use the drop downs or use the “apply to all” at the top of the page, when completed please select continue.
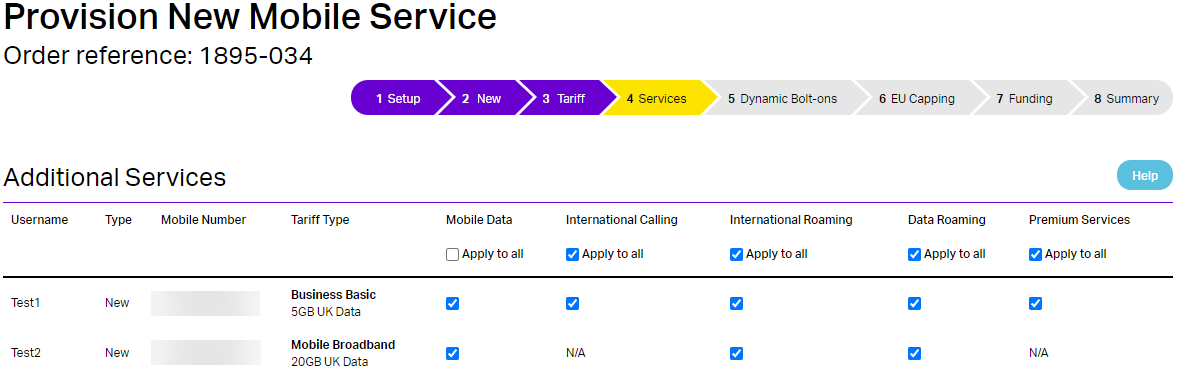
Step 8
Next is where you will be selecting the relevant services required for each Mobile Number. These are done by selecting the small boxes or use the Apply to all boxes if all number require that service. Mobile Data is automatically selected if there is a data bolt-on, international roaming requires international calling to be selected as well. Data Roaming requires international roaming and mobile data to be selected.
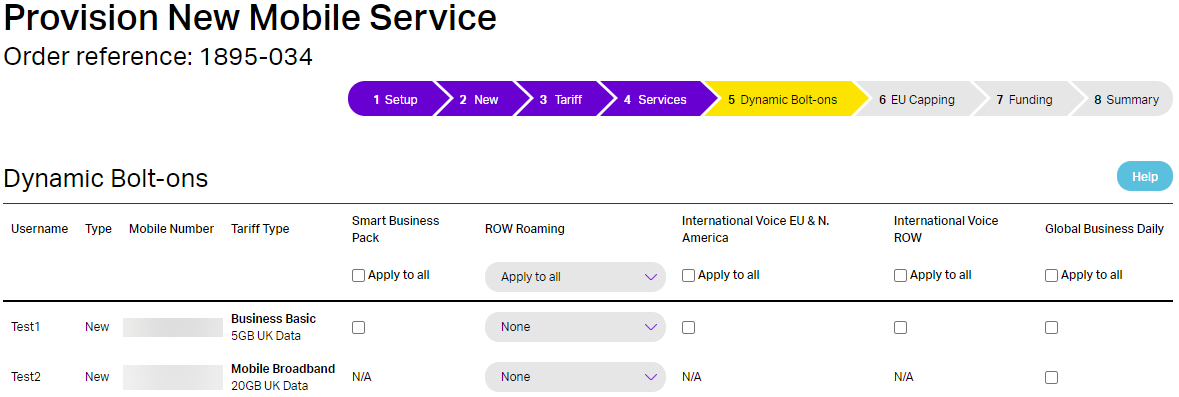
Step 9
Next is where you will select the additional bolt-ons to each mobile number, please note that if you want to check you have the correct service set up so that the bolt on will work, you can easily do this by clicking back and checking on the previous page. Once you have them selected click continue.
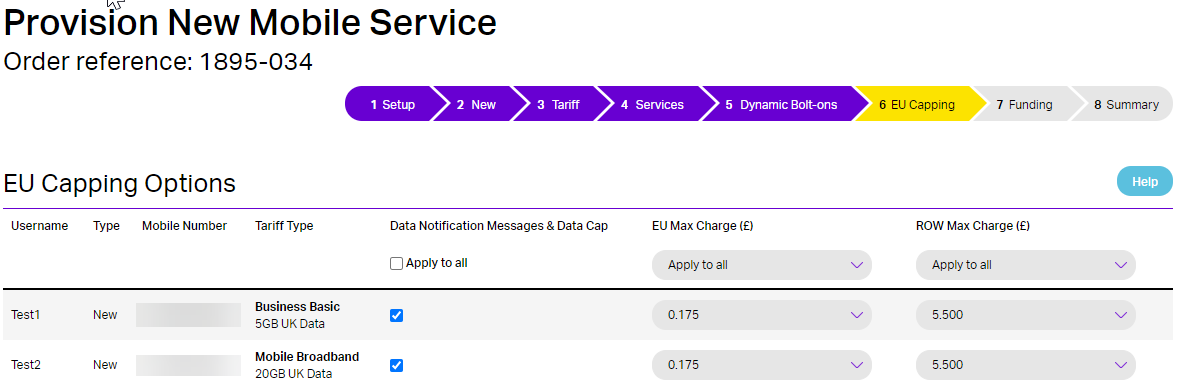
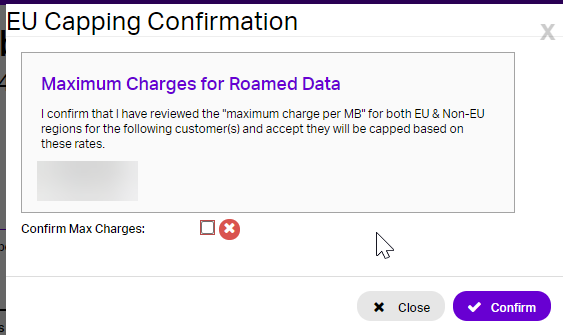
Step 10
EU Capping is the next section. This allows the setting of the maximum charge for data consumed in the EU & the Rest Of the World (ROW) so the £45 cap can be calculated. If not selected it means that Capping will not take place and you will be asked to confirm this choice. Once completed select Continue and you will be presented with the EU capping confirmation, please read this information and click to confirm the EU settings, then click confirm.
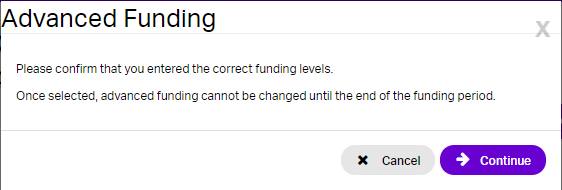
Step 11
The Advanced funding page is next and if required you can select the level of funding required and the repayment term, for information about what the levels are in pounds then please see your Account Manager or use the Mobile price book.

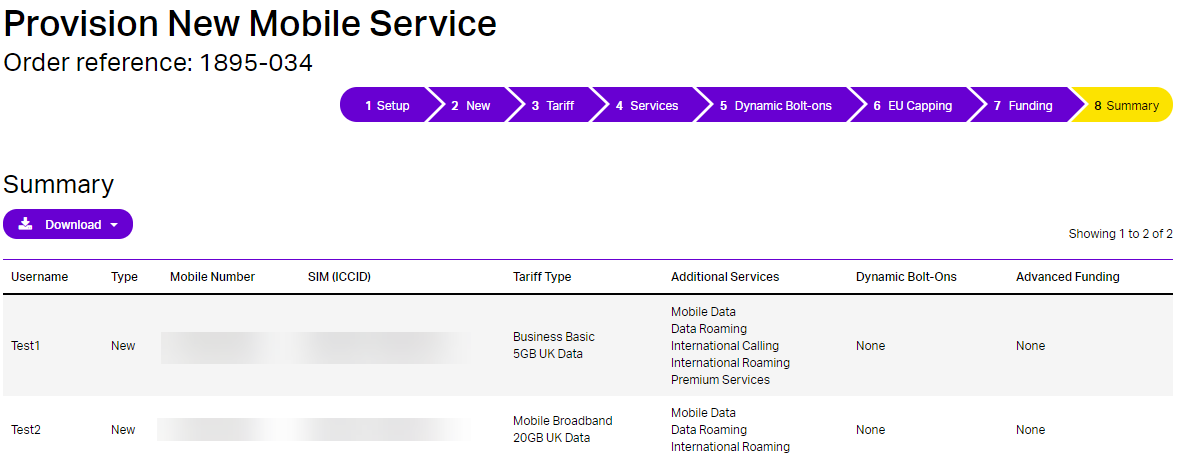
Step 12
The final step is the summary where you can review all the actions that you have just completed, once you’re happy with the information on your order click submit.
Step 13
Once the submit button is clicked above the Provisioning order will be sent for processing. The progress can be monitored on the Provisioning Management screen as seen below
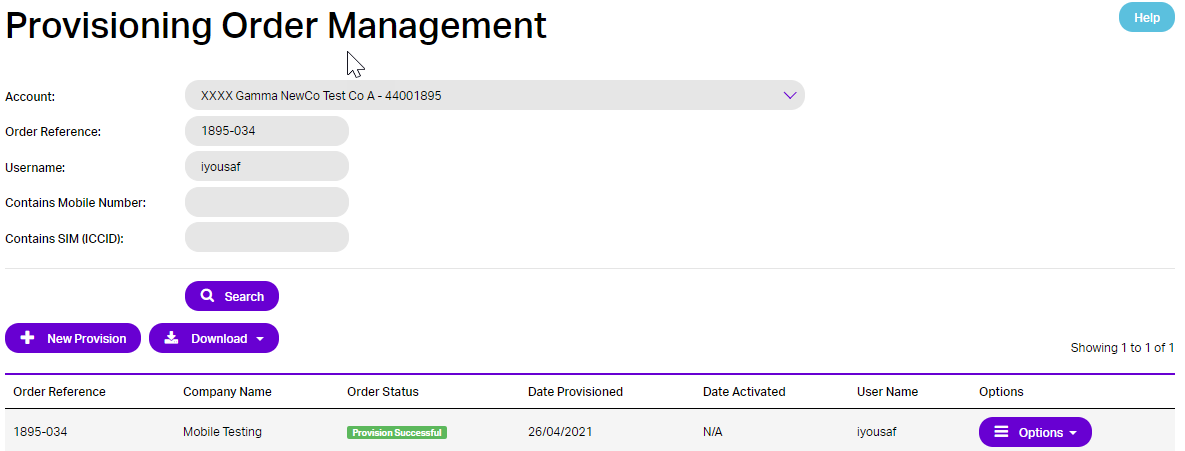
The Options button will display which operations can be performed on the Order. This varies depending on the status of the order. The table below shows the status of the provisioning order and a description of what the stage indicates.
Provisioning Order Status | Stage |
Provision Holding | The provisioning order has not been fully completed on the screens. Use “Amend Provision” to complete or “Cancel Provision” to cancel the Order. Any Mobile Numbers and SIMs in the order will have a status of “Paired” |
Provision Queued | The provisioning order has been submitted for processing. |
Provision Processing | The provisioning order is currently being processed |
Provision Successful | The provisioning order has successfully. The mobile numbers will be in “setup” status. Use “Activate Provision” to activate the numbers. |
Activated | All numbers have been activated. The provisioning order can be viewed. |
Provision Cancelled | Once a Provisioning order is cancelled the Mobile Numbers and SIMs are returned to “Available” status. Orders in “Provision Holding” or “Provision Waiting” can be cancelled. |