Skip to content
  • Academy KB Home Redesign
  • Broadband Home
  • CCaaS
  • Channel Partner Support
  • Circle Loop Home
  • Collaborate
  • Connectivity
  • Courses
  • Documentation
  • Ethernet
  • FibreXchange
  • FUSION IoT
  • Gamma AI Concierge
  • Gamma Plus
  • Gamma SIP for Cloud Connect
  • Gamma SIP Global Communications Enablement
  • Gamma SIP Trunks for Genesys Cloud
  • Hannah – Homepage WIP
  • Home
  • Horizon
  • Horizon Contact
  • Horizon Forms
  • Horizon Service Description Home
  • Horizon with Webex
  • Inbound
  • iPECS
  • Knowledge Base Intro
  • Knowledgebase Directory
  • LoginPress
  • Microsoft
  • Microsoft Teams Direct Routing Home
  • Microsoft Teams Operator Connect
  • Mobile
  • Multiple KB
  • My Courses
  • No Access
  • No active page
  • Numbering and Porting
  • Phoneline+
  • Product Homepage
  • Quick Download Button
  • Release Notes
  • Release Notes
  • SIP Home
  • Test
  • UCaaS
  • User Account
  • Voice
  • Voice Enablement
  • Webex for Gamma
  • Webex for Gamma Release Notes
  • Gamma Academy Knowledge Base
Gamma Academy Knowledge Base
  • Cloud Calling and Collaboration
    • Webex for Gamma
    • Horizon with Webex
    • Horizon
    • Phoneline+
    • Operator Connect
    • Direct Routing
    • Inbound
    • Akixi CX Analytics
    • Red Cactus
  • Connectivity and Networking
    • Numbering and Porting
    • Broadband
    • FibreXchange
    • Ethernet
    • SIP Trunking
    • Gamma FUSION IoT
  • CX
    • Horizon Contact
    • AI Concierge
  • Mobile Services
    • Gamma Mobile
  • CyberSecurity
    • SafeWeb
  • Partner & Portal Support
Gamma Academy Knowledge Base

Provisioning and In-Life Changes

  • Before Ordering Mobile
    • Mobile Short Codes
  • eSIM Functionality
    • Viewing eSIM stock whilst provisioning
    • Viewing SIM Type and Service Provider Name (SPN)
  • Configuring and Ordering Mobile
    • Quick Start Guide to Provisioning Mobile
    • Ordering Sims and Mobile Numbers
    • Mobile – Add Company
    • Mobile Provisioning Process (Including Ports)
    • Mobile – Activating a Service
    • Mobile Data and MMS Settings (Including APNs)
  • In-Life Mobile Configuration
    • Mobile Managing Companies
    • Mobile – Manage Phone Service
    • Porting a Number Onto an Active Gamma Mobile Connection
    • SIM Swap to the Enhanced Gamma Mobile Service
    • Mobile Roaming
    • Block Outgoing Calls
  • Configuring and Ordering Manage My Mobiles
    • Configure Manage My Mobiles Portal
    • Manage My Mobiles – New Company Provision
    • Manage My Mobiles – Allocating Numbers
    • Manage My Mobiles – Existing Company Provision
    • Manage My Mobiles – Tracking Your Order/Actions
  • In-Life Configuration - Manage My Mobiles
    • Manage My Mobiles Portal
    • Manage My Mobiles – Manage a Person
    • Manage My Mobiles – Groups
    • Manage My Mobiles – Branding
    • Manage My Mobiles – Audit Log
    • Manage My Mobiles – Call Forwarding Options
    • Manage My Mobiles – Statistics
    • Manage My Mobiles – Alert Types
    • Cease Manage My Mobiles

Features

  • Mobile Inactive Number Search
  • Mobile Usage Control Management
  • Gamma Roaming Countries and Networks

Technical Support

  • Guides for Problems with Mobile
  • Lost and Stolen Phone Help
  • Mobile Known Behaviours
  • Gamma Mobile FAQs
  • Mobile Glossary
  • Handset Support
    • Handset Support iOS
    • Using Nokia Lumia with Gamma SIM
    • Using MMS on Windows 8 Devices

Service Description

  • Gamma Mobile Service Descriptions

Mobile SLAs

  • Mobile SLAs
  • Home
  • Home
  • Gamma Mobile
  • Provisioning and In-Life Changes
  • Configuring and Ordering Manage My Mobiles
  • Manage My Mobiles – Allocating Numbers
View Categories

Manage My Mobiles – Allocating Numbers

Once you provision a new company on the Manage My Mobiles portal and click finish, you will be on the “New Number Setup” page. Here you can allocate people to numbers.

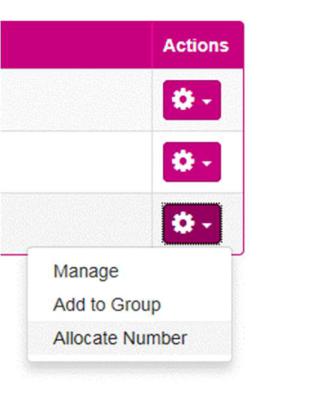
This page will show you a list of the active numbers that are already available on that company. These will have been pulled through from the Gamma Portal information. You can then allocate or suspend these numbers. If you click the dropdown under the actions tab you will be given those options.

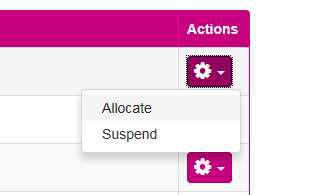
Once you click on the “Allocate” button, you will then be taken to “Allocate Number” window.

To allocate that mobile number, simply complete the details as required on the “Allocate Number” window. As visible from above, the Manage My Mobiles portal will pull through the available mobile numbers and once selected will also pull through any handset details that have been entered for that number. As this is the first time setting up it is unlikely you will be able to allocate to an existing person but you are given that option on the “Allocate to” dropdown for future reference.

Similarly with Group, it is likely you may not have a group setup at this point, so you have the option to have no group set or to add a new group. To add a new group, click on the “new group” button and then manually enter your chosen group name in the text field. Then click allocate. You can also add to a group at a later point.

If you were to select an existing group, you will also be given the options for that number/user to inherit the settings on the group by clicking a tick box to accept this.

Once you have clicked on allocate, you will be shown a banner confirming that number has been allocated to a person and also that a group has been created, if you chose to create a group.

To allocate the remaining numbers available on the account follow the same actions as before until all numbers you require to allocate to someone are allocated.

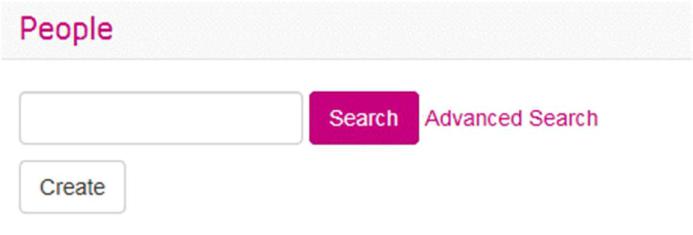
Alternatively you can also allocate numbers to people. Go to people page on the menu bar.

On this page you can create or search for an existing person.

On the People page, you will be able to see an overview of the people who have been created for this specific company. You will also be able to see if they have a number allocated and whether they are part of a group.

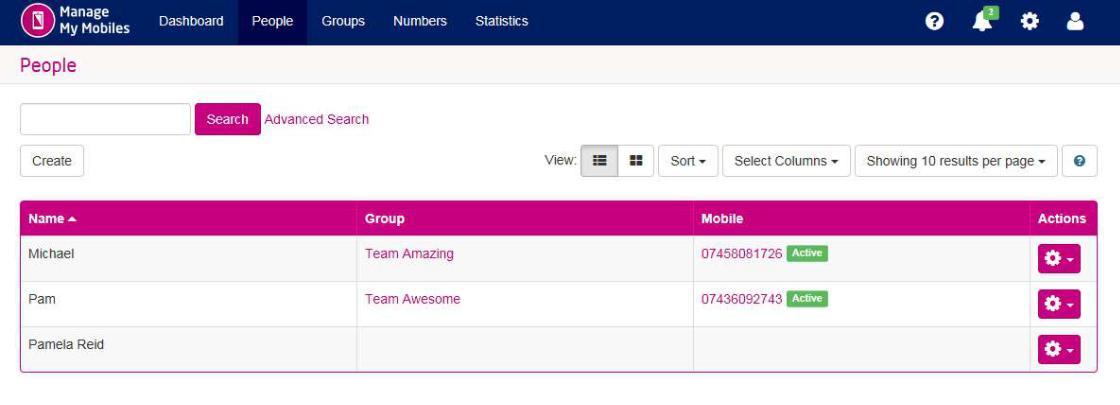
To allocate a number to a person, click on the dropdown under the actions tab and select “allocate number”.

This will open up an “allocate Number” window where you are able to choose an available number from the dropdown and click “Allocate”.

This will then show you a green banner to confirm this action was successful.

Please note that if there are no more numbers available on the account for allocation purposes then new mobile numbers will need to be provisioned through the Gamma Portal as per BAU.

Another thing to note is that is you assign a number to a person then they will receive an email to inform then that a change has been made to their account…

Updated on 16/01/2024
Manage My Mobiles – New Company ProvisionManage My Mobiles – Existing Company Provision

Copyright © 2026 -  Gamma Telecom Ltd

Gamma API
We use cookies to measure performance and make improvements to this service. This includes page views, device/browser, location, and page interactions. We do not collect any information you upload to this site. By agreeing, you consent for your data to be used for this purpose.