
Description #
Aliasing eliminates the need to create two or more identical call plans on Inbound numbers, that have the same routing
A typical use case would be a user wanting to share the behaviour of one Inbound Number with another Inbound Number. This is so they don’t have to maintain identical, Call Plans across different numbers. Using the Aliasing feature the Call Plan needs to be updated once and it will be reflected across all of the aliases.
Number Types #
With the introduction of aliasing, inbound numbers can now be described as one of three types:
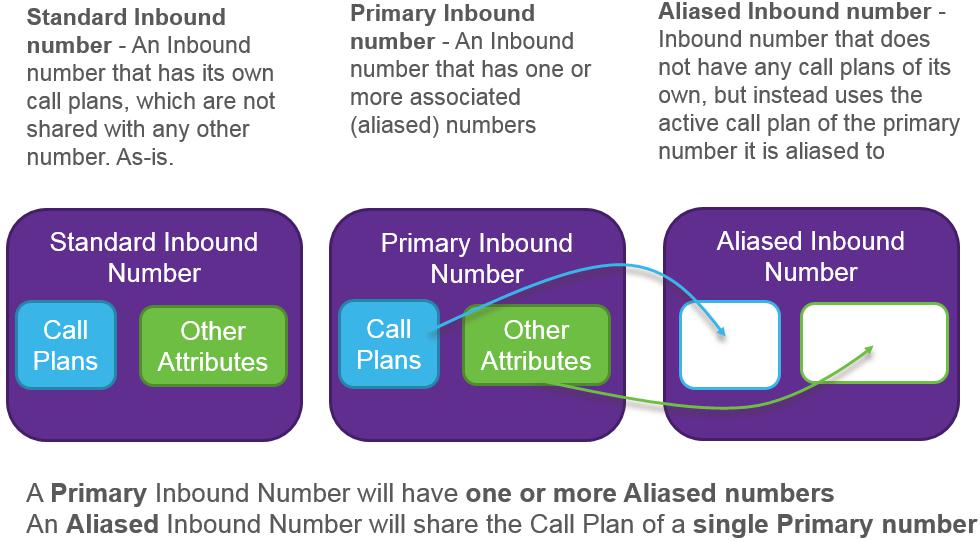
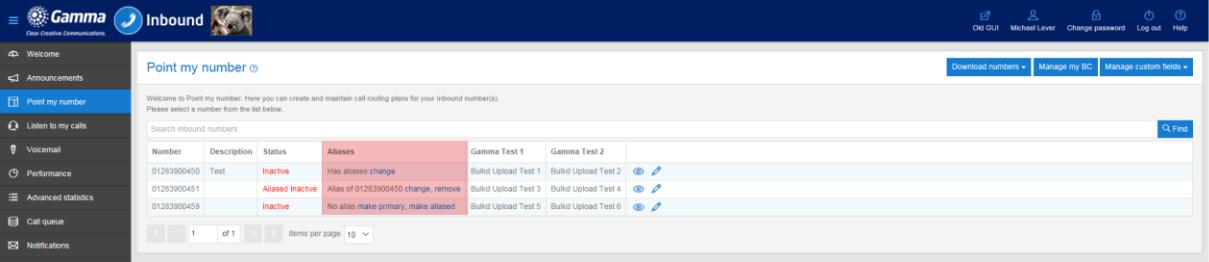
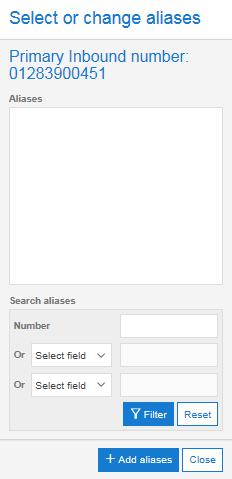
Aliases column on Point my number #
The aliases column on the ‘Point my number’ screen enables any number to become a Primary number with associated aliases or to become an alias of an existing Primary or Standard number.
The links give you the flexibility to make changes from either the Primary number or from the aliased number.
In essence there are actually only two fundamental actions that all the screens will allow you to perform:
- adding/changing aliases
- choosing/changing/removing Primary numbers.
The following sections give a complete breakdown on all the possible use cases.
Alias management use cases #
A pictorial summary of all the different actions that can be performed using the Aliasing feature is given below.
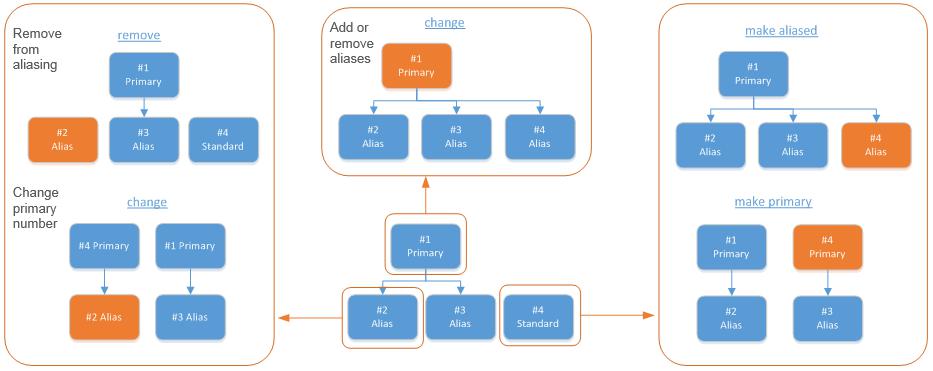
The relationship tree bottom-middle shows the starting position for the numbers. Small orange boxes indicate the number the action is being performed on.
The larger boxes around the outside show the outcome of each action. We will look at each of these actions in detail below.
Make a number an Alias #
After clicking make aliased the following screen will appear:

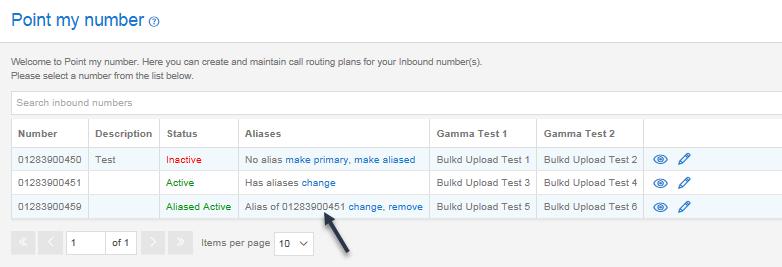
As you can see by the screenshot above, the number ending in 59 has been selected and this is the number that will be made a primary alias in this example. Once you have selected the number you would like to make primary, select save in order to create the alias (please note: you will be presented with a message confirming that you want to go ahead with this action, select yes to continue).
You will now notice that the number you have selected will now have a status as “Alias Active”. The new Aliases column shows whether the number is a Primary number or an Aliased number. In this example, the Aliases column shows “Alias of 50” for the ’59 number and “Has aliases” for the 50 number.
Make a number a primary alias #
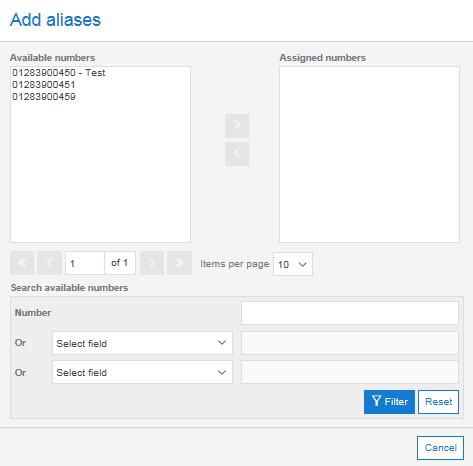
After clicking make primary the following will appear:
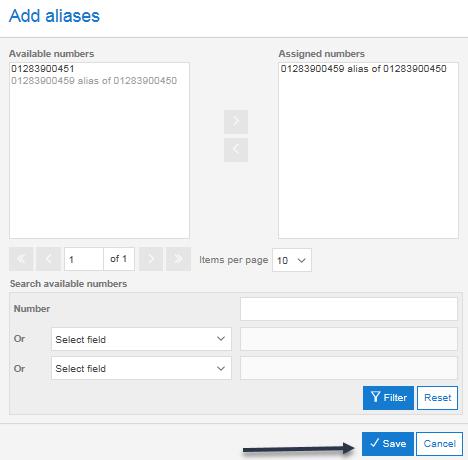
As you can see the Primary number currently has no aliases, if you wish to add an alias to this number select the “+ Add aliases” button, when you do this you will be presented with another pop up screen. This screen allows you to move or add aliases that are not currently aliased to anything, as well as move numbers that are already aliased i.e. the ones that have ‘alias of x’ after the number.
In the example given below the user has selected the numbers ending in 51 and 59 to be the aliases of the number ending in 50, once the use has done this they will need to use the save function to complete the action.
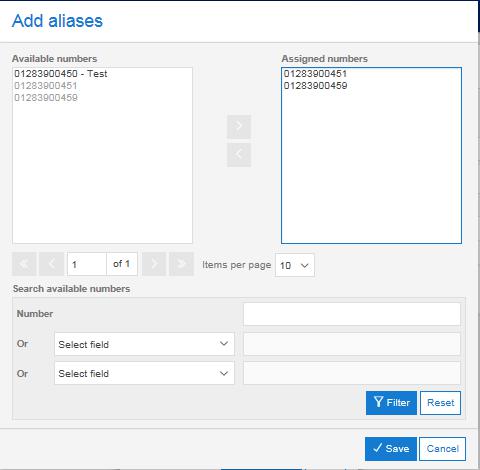
Once you have done this, you will be able to navigate back to the “Point My Number” screen and you will notice that the status and aliases columns have been updated accordingly.
Changing the primary number of another number #
In the example below you will notice that the number ending in 59 has a number ending in 51 associated to it as its primary number.
If you select the change option you will be presented with a pop up box, in this pop up box you can simply select another number to be assigned as the primary number. Once you have selected the number you would like to use, click the save button and these changes will be enforced with immediate effect.
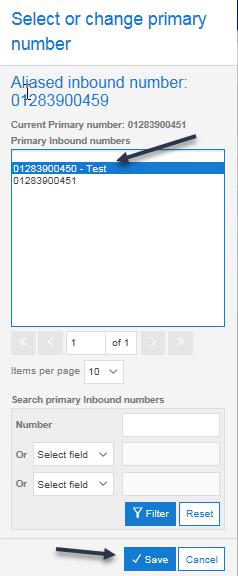
Once completed, the “Point my number” will update the status and aliases columns accordingly, we would advise that you double check this to make sure you haven’t made any mistakes when updating your aliases.
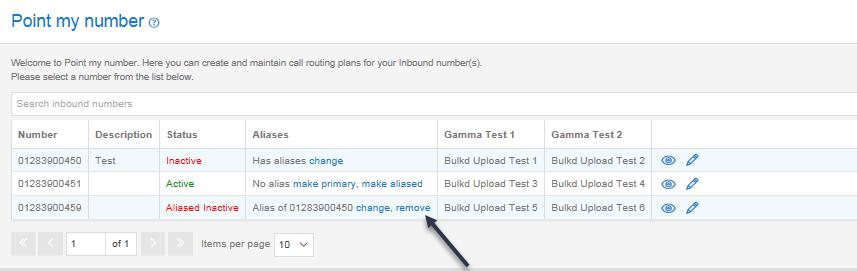
Remove a number from being aliased #
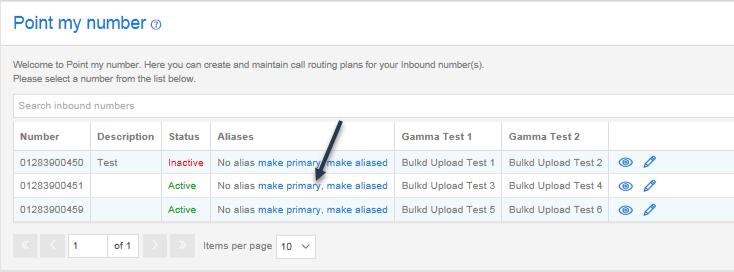
To remove a number from being aliased, simple navigate to the “Point My number” screen, from here select the “Remove” option, as highlighted in the screenshot below:
Change aliases of a number #
If you wish to change the aliases of a number simple navigate to the “Point My Number” screen, and select the “change” option which can found next to the number that has been aliased (see screenshot below
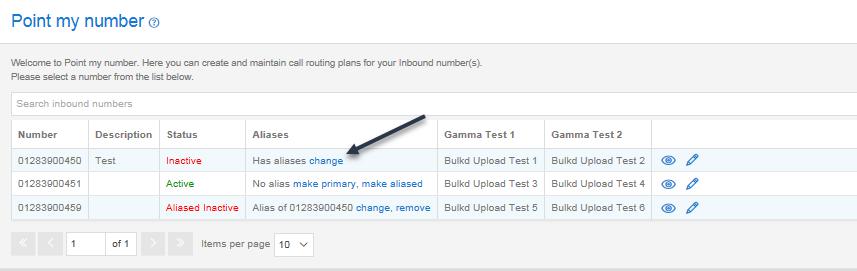
Once you have selected this you will be presented with a pop up box. Inside this box you will be able to add an additional alias by clicking “Add aliases”. The dialogue box that appears allows you to remove and add aliases.
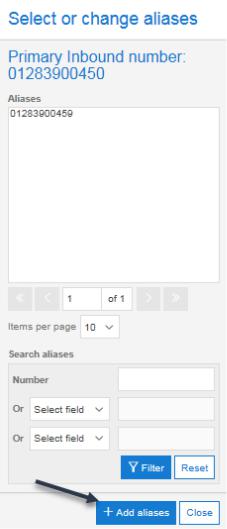
Once you have selected “+ Add Aliases”, you will be presented with a dialog box which will allow you to perform any actions you require.
Once you have done, simply hit the save button and then you will be able to navigate back to the “Point My Number” screen which will show you the current status and aliases of each number. (We would recommend double checking this to make sure you have done everything correctly).
Aliasing Constraints #
If you activate a Call Plan on a number that is an alias then it will lose its alias state. This number is now the copy of the parent call plan and it is not an alias anymore. If the number is deactivated now, it will not go back to be an alias of its’ old Primary number.
If you make a number an alias of another then it will deactivate any active call plans that they currently have.
It includes any scheduled activated plans that are configured to be triggered in the future
If a number is an alias then the batch BC activation will not activate a BC on this rather it will use the BC call plan on the Primary number it points to.