Description #
The Announce control enables you to play a predefined announcement either before a call is connected or on its own.
The announcement comes with a basic and advanced tab
Announce Tip #
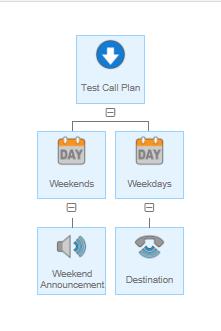
Use announcements out of hours to tell callers what your operating hours are or to suggest an alternative contact method or provide a change number announcement. For example, in the call plan below a caller will hear an announcement played if they call at weekends but will be routed to a destination number if they call on weekdays.
Announce Rules #
The Announce control is one of the three terminating controls, this means that it cannot have any siblings.
The Announce control can have children controls connected to it. This is to allow for example, an announcement to be inserted in front of an IVR to tell callers about a specific operational issue. Announcements can also be stacked on each other.
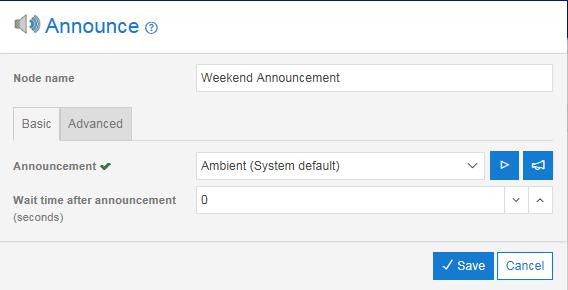
Announce Input Fields and Buttons in Basic Tab Mode #
If you want to modify your announcement, select the announcement mode and then click on ‘Modify properties’. In here you will automatically be placed on the basic tab to make some amendments, in this tab you will be able to:
- Give your announcement a name
- Dictate the amount of seconds you would like as your wait time after the announcement has been played
- Play your announcement
- Upload a new announcement
Announce Input Fields and Buttons in Advanced Tab Mode #
If you need to make some more specific changes to your announcement, you can select the advanced tab. In the advanced tab you will be able to do any of the following:
- Use all the same functionality/change anything that can be found in the basic tab
- You can enter a value in the ‘Number’ field, this field will play text to speech of any input number sequence and will play after the Prefix announcement.
- You will have access to the suffix announcement option, this drop down lists all of your pre-loaded announcements and will play after the Prefix and number announcements.
- You will be able to select the “Play announcement as early media” option
- Selecting this option will provide the announcement at no ppm cost to you, your customer or the caller. The tick box option will only appear if the announcement node is inserted as the first node in the call plan. If the announcement node is inserted at any other place in the plan, this option will not be visible. If you check the Early Media option then the node name will be automatically renamed to Early Media from its default name. If the end user has renamed the node then this will be preserved.
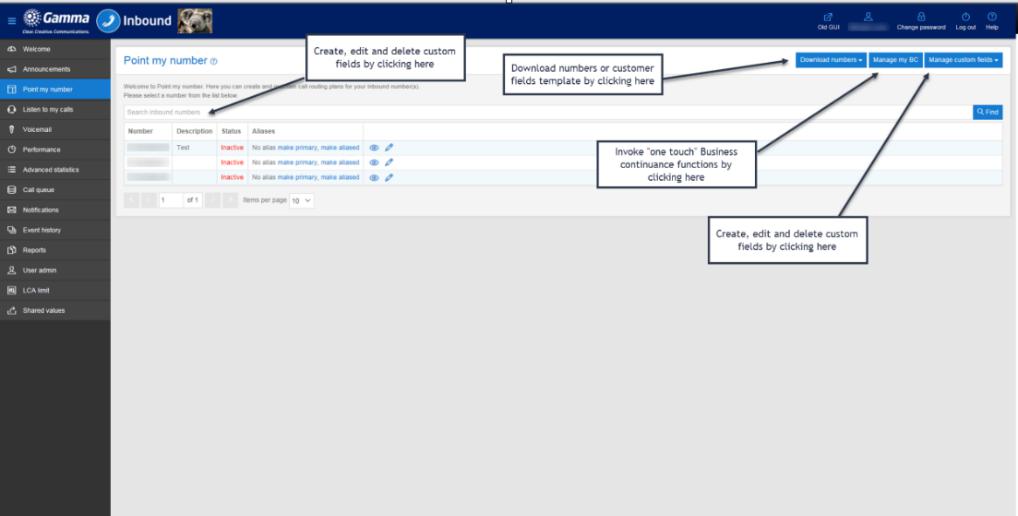
Announcements Access Restrictions #

You can only view this tab if your company has subscribed to Contact Pro, Voicemail or the Call Whisper product.
If your company has such a subscription then your user profile must have the ‘Manage Announcements’ role enabled. Please contact your Service Provider if you need to view this tab but cannot do so.
Announcement Storage Billing #
Refer to the billing page on the Gamma Academy for more information on the principles for storage billing.
The Max storage amount is updated each time an announcement file is successfully uploaded. The value is reset to the current storage used at the end of each month when the usage data is extracted for billing.
Recording Announcements #
Minimum Requirements #
There are many options for recording your announcements but the simplest is via a PC or laptop equipped with an input microphone. You will also require sound recording software to record the announcements. Again there are many available applications that can do this ranging from freeware to expensive professional studio applications. For most users Windows also comes with a sound recorder application that can also be used. The Windows application can be found by going to the Start menu and looking in the “All Programs\Accessories\ Entertainment” folder for the Sound Recorder application as shown below.
Recording tips #
The following tips will help you to achieve the best results when your pre-recorded announcements are played back.
Use a good quality microphone that is positioned close to the mouth. For example, telephone headset style microphones are generally better than those built in to webcams.
Make your recordings in a quiet area with minimum background noise.
Set you application capture settings to the highest quality settings available.
Check how your announcement sounds before you upload it. You may have inadvertently recorded more, or less, than you intended.
Uploading announcements #
Once you are satisfied you have a good quality recording save the file in MP3 or WAV format and note its name.
Log on to Myinbound.com as either an Administrator or as a user with “Manage My Announcements” role enabled.
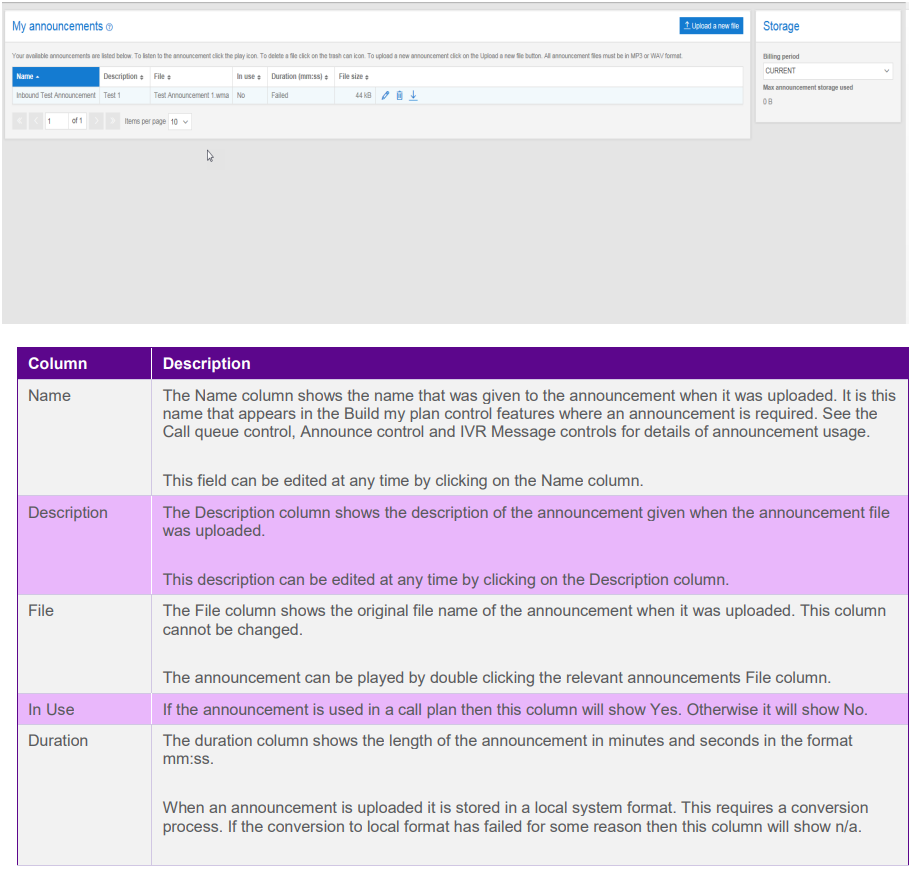
Go to the Announcements tab (screenshot below)
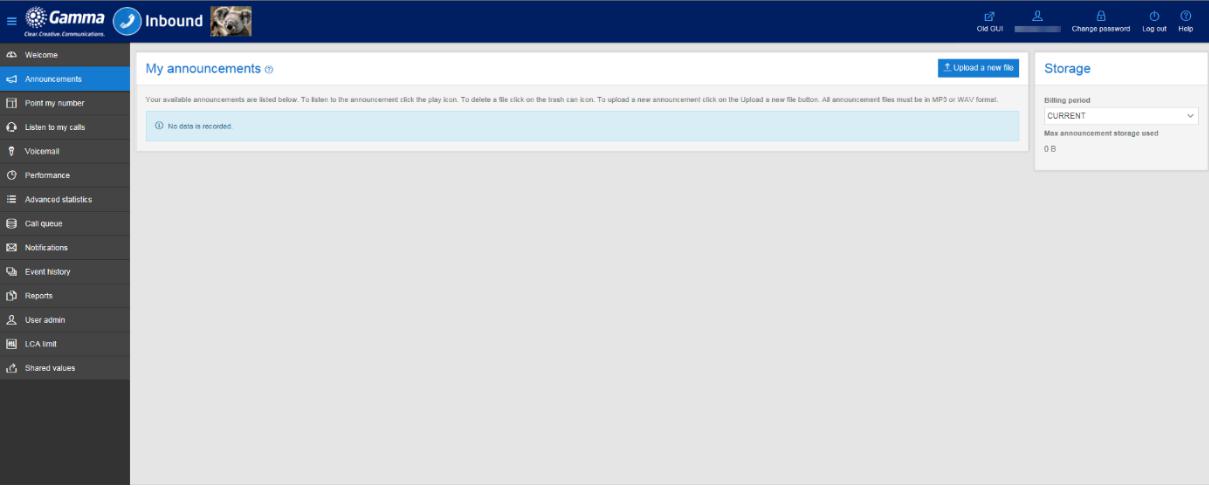
Click on the Upload a new file button
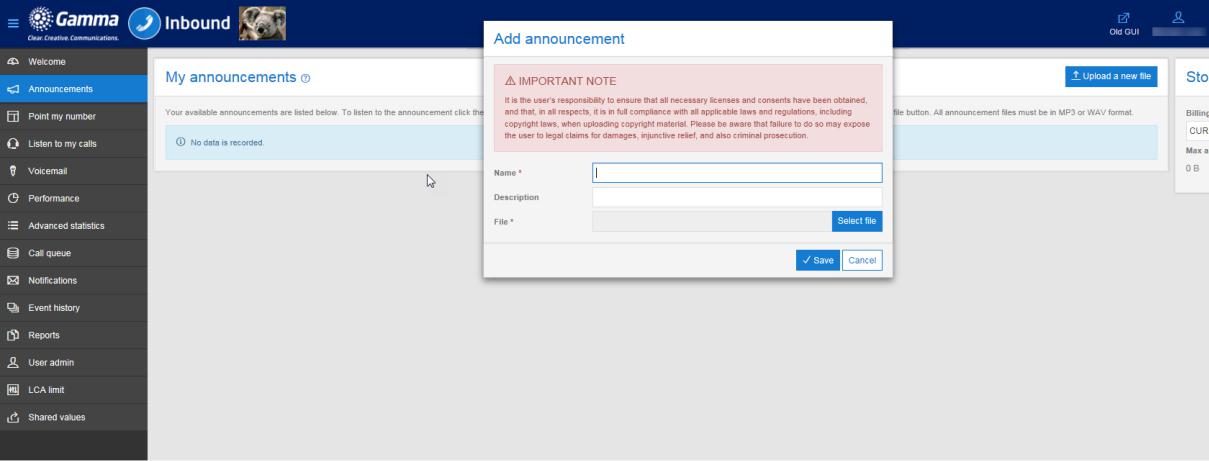
Enter a meaningful name and description for your announcement, this will help you identify what the announcement is when you have multiple announcements uploaded. Next, use the ‘select file’ button and find the file you wish to upload:
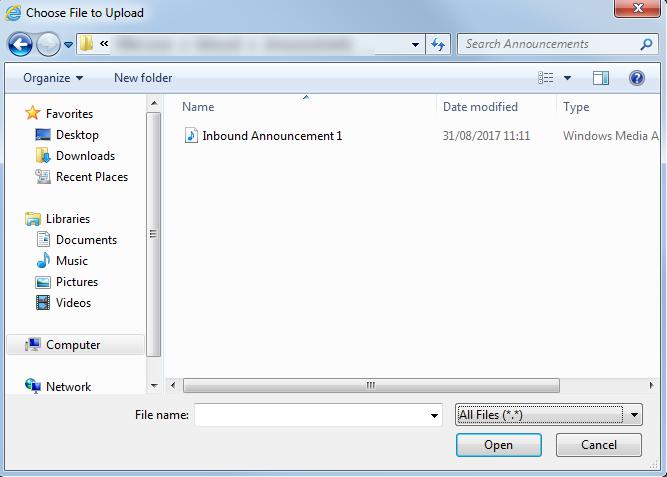
After clicking on Open you should see a popup window similar to the one below. Click on Save to upload your announcement file to the Inbound Portal. Once the file has been saved, you will be taken back the main announcements screen and your upload will be shown in the announcement list.
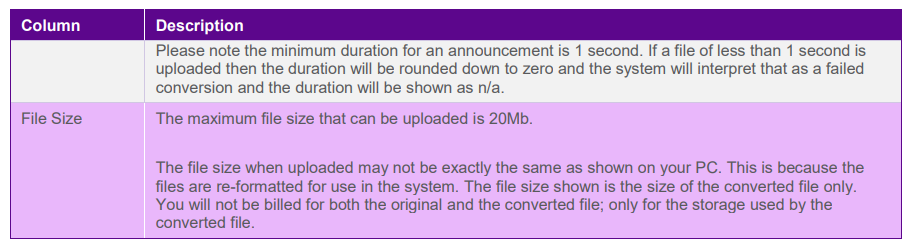
You will notice that the duration column says “Processing” for a short time after your announcement has been uploaded. This is because your announcement is being converted to the format required for use in call plans. The announcement cannot be used until the conversion process is complete. When the conversion process is complete the Duration column will show the length of the converted file in Minutes and seconds. You may need to refresh your browser window to see the updated Duration.
Once the conversion process completes, your announcement is ready to use in the Point my number controls (i.e. Announce, Voicemail to Email, IVR welcome message, Call queue).