
How to create a new call plan #
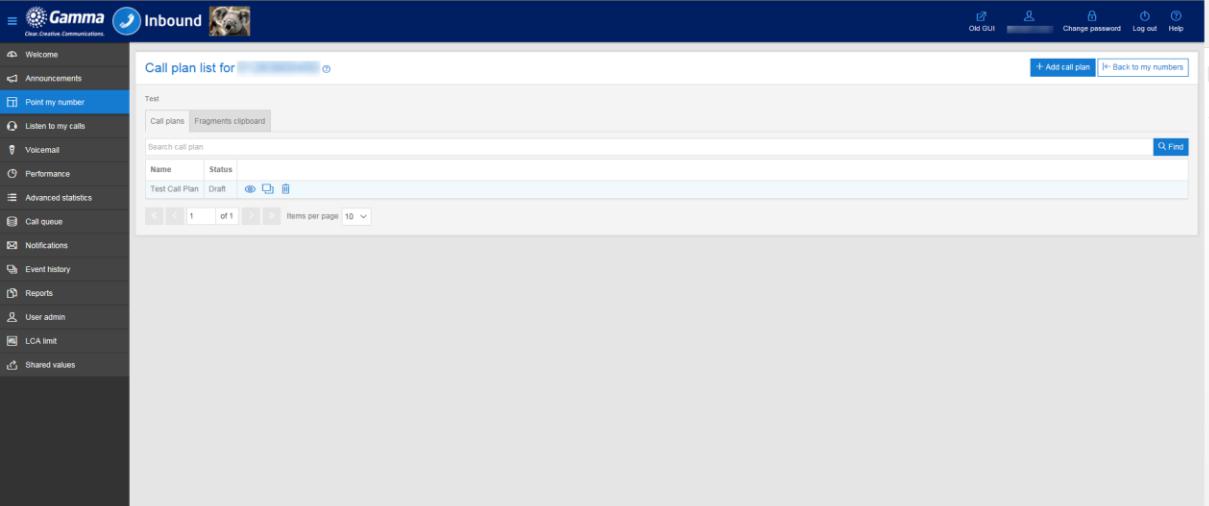
Firstly log into myinbound.com, once you have done this you will need to navigate to the “Point my Number” page which is the third tab down on the left hand side of the page. Once you have done this you will be presented with a list of numbers you have available, from here if you select the action button labelled ‘Open’ then this will open up a list of any existing call plans attached to this number. Simply select the “+Add call plan” button to start your new call plan. Once you have named your call plan, select the open button again, from here you will be presented with a blank screen for you to start to build your plan:
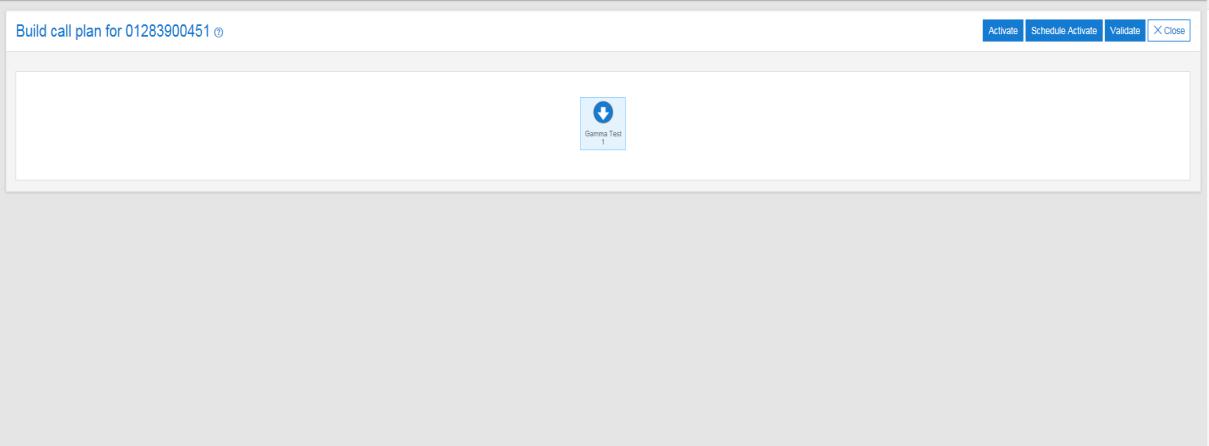
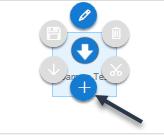
You may now proceed to add control features to your call plan, in order to do this simply select your node and select the “Add node” button, this is symbolised as the “+” button:
Once you have built the call plan, click on the validate button to validate it. Any errors in the call plan that make the call plan invalid will be detected and an error message provided. Once all errors are correct then you will be prompted to activate the call plan. If you do not wish to activate the call plan at that moment in time then it can be activated at a later date by opening the plan and clicking on the Activate button.
When you have finished editing the call plan it can be Saved and Closed using the Save and Close buttons at the top of the call plan window.
Point my Number #
Point my Number is the tab through which all call plans are created, edited and maintained by the User. Access to this tab is provided with all administrator logins for Contact Point, Path and Pro. It is possible to remove access or give read only access to this tab for subsequent user logins should there be a specific requirement to deny them access to this page which is central to call plan management. Call plans are shown in the homepage of Point my Number. Up to 100 call plans are available per number and they can be associated with a description to assist the user.
Point my number Access Restrictions #
In order to be able to access the Point my number screen your user profile must have the Point my number role enabled.
If you require access to these features but don’t have it then please contact your Service Provider.
Description #
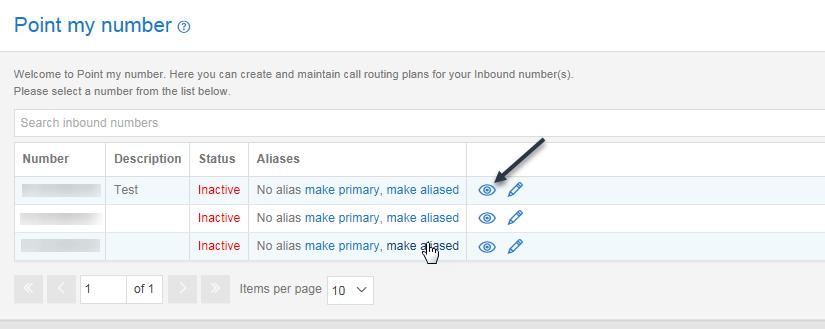
The Point my number tab allows you to search for the particular number that you wish to edit using the ‘Search Inbound Numbers’ function.
To begin creating a call plan or to view/edit the call plans associated with a particular phone number, there is a button which can be used to open the associated call plan (please see screenshot below
Manage my BC #
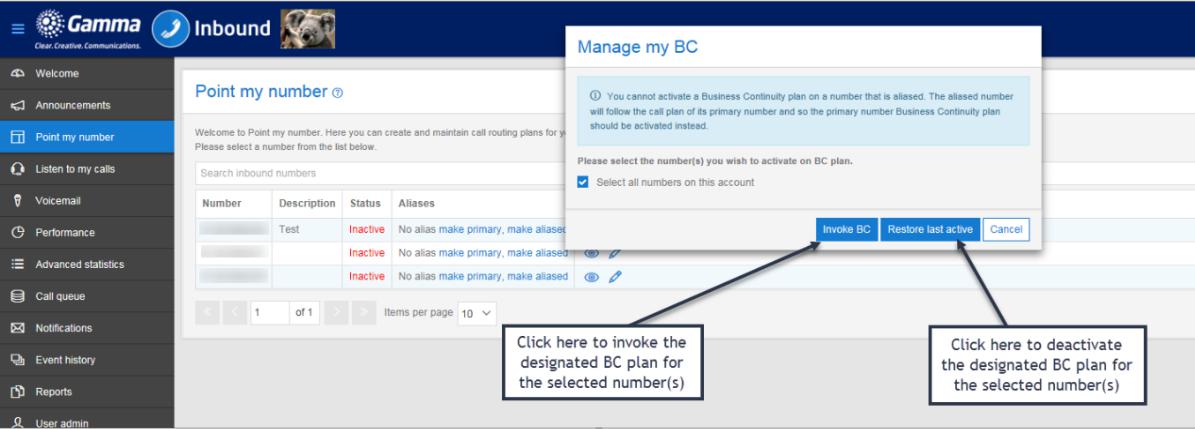
The Manage my BC button enables you to invoke a pre designated Business Continuity plan for your Inbound number(s). There is also the option to restore the last active call plan when the BC routing is no longer required (see How to use ‘One Touch’ for more detailed instruction on how to use the Business Continuity functionality).
After clicking on the Manage my BC plan you will see the popup window shown below.
Manage Custom Fields #
The Manage Custom Fields button enables you to create, edit and delete. Select the Manage custom fields button in order to view the pop up box, enter the title of the custom field you require and hit add. Once added to the database the Field name box will clear and you can enter further custom fields.
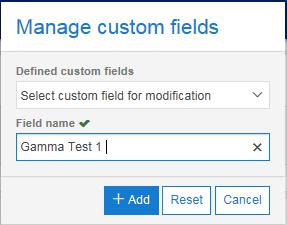
Please note it’s important that you plan the sequence in which you want to view the columns as they will be added to the point my screen in the order in which you create them. If you make a mistake, you will be able to clear your created by fields by selecting them and pressing delete, meaning you can then add the fields again. In the example below, Gamma Test 1 was added first, followed by Gamma Test 2.

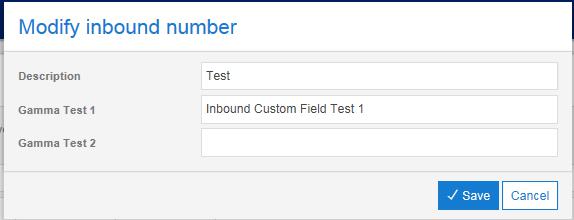
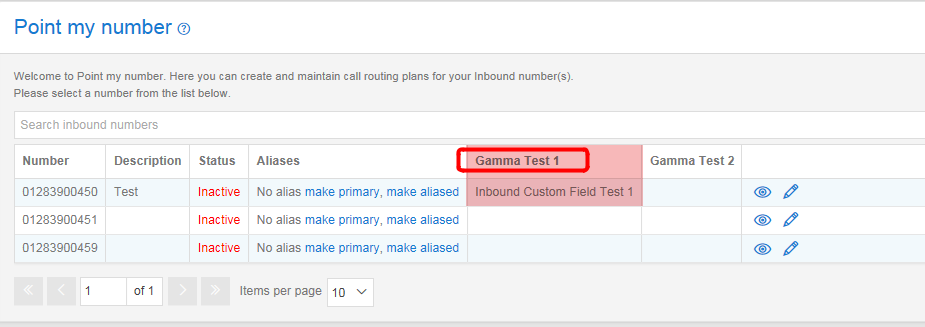
In order to enter data into any of the custom fields you have created you will need to select the modify option, once you have selected this a pop up box will appear entitled “Modify Inbound Numbers”. In this pop up box you will see a list of all your customer fields, each with a text box next to them, the information you enter into these text boxes will be displayed against your field. In this example, for the Gamma Test 1 field I entered a value of “Inbound Custom Field Test 1” (see screenshots below):
Download Numbers #
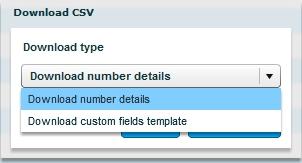
The Download Numbers button allows you to download a CSV of either Number Details or custom fields template, once clicked you will be presented with these options.
Download number details #
If you select Download number details then the platform will pull a list of all CLI’s on the account into a CSV as below.

Download custom fields template #
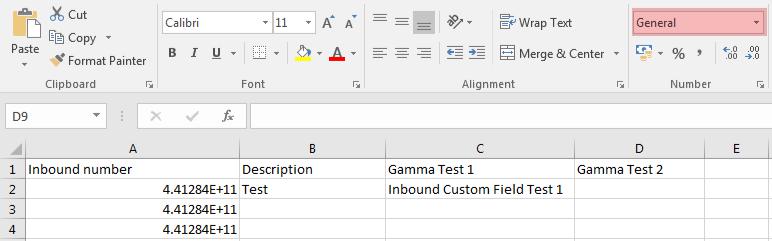
If you select Download custom fields template this will produce a CSV file that contains all of the numbers on the account, the Description and the column headers containing the name of your custom fields.
The header fields MUST not be modified or the upload will fail. When you open the CSV file within Excel you will need to correct the changes Excel made to the column format. The number field will be sent in e.164 and will need to amended before uploading back to the Inbound platform.
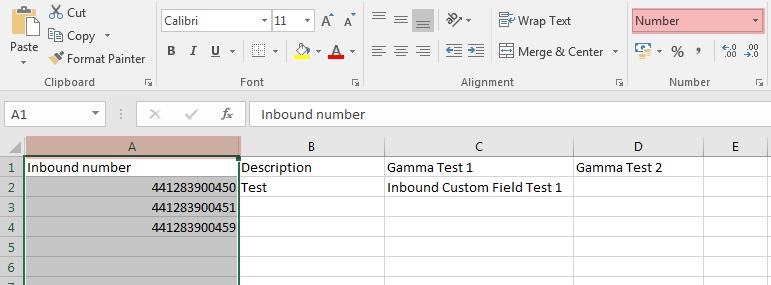
Highlight the entire Inbound Number column and change format from General to Number, then remove the decimal points to return the number back to e164 format as below.

Update the custom fields with the relevant data and save the spreadsheet, keeping it in CSV format, in a location you can return to for the purpose of uploading. We recommend you introduce a backup regime of the custom field values in the event that you need to restore.

Upload custom fields #
If you select the “Manage Custom Fields” option, you will be able to select the “Upload Customer Fields”
function:
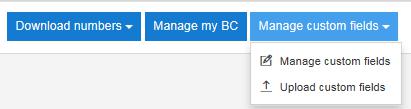
The following popup box will be displayed when you select this option, from here use the select file option to browse your PC and find the custom fields template that you would like to upload:

The custom fields will now be bulk uploaded (existing entries will be overwritten) with the values contained within the CSV file.

Build my plan #
Build my plan Access Restrictions: #
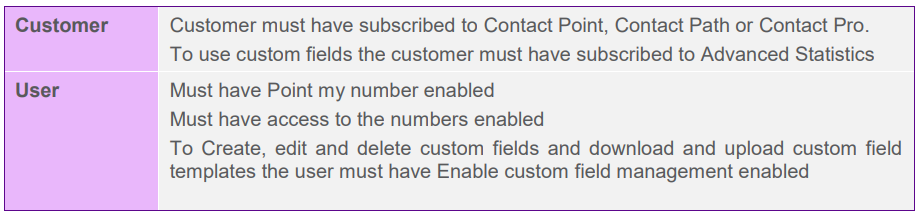
Customer Customer must have subscribed to Contact Point, Contact Path or Contact Pro
User Must have Point my number enabled
Must have access to the numbers enabled
In order to be able to access the Build my plan screen your user profile must have the Point my number role enabled.
Description #
The Build my call plan page is the main functional area of the Myinbound website. It is this page that gives you the power to build sophisticated call plans for managing incoming calls.
The features available within the Build my call plan page are dictated by the services that your company has subscribed to. For example, call recording functions are only available where your company has subscribed to Call recording as an add–on service.
Refer to your service provider for an up-to-date list of features and services available with the Myinbound products.
In order to get into the build my call plan screen, you will need to select the open function from “point my number” screen against a specific number. From here you will be able to see a list of the call plans you currently have created.
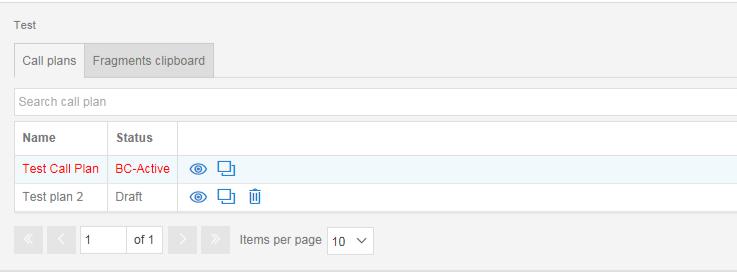
You will notice that against each call plan you have 3 options to select from, these options allow you to open, copy or delete a call plan. These are fairly self-explanatory, however there are some advanced options you can take advantage of when copying a call plan, for further information on these options please see the “Copy Call Plan” section below.
When a call plan is validated, there is the option to tick the Make this my BC box before closing the call plan, thus enabling the user to pre designate a call plan to be used in the event of a Disaster Recovery situation such as an office evacuation. When selected as a BC plan, the call plan status will be displayed as “BC-Active”.
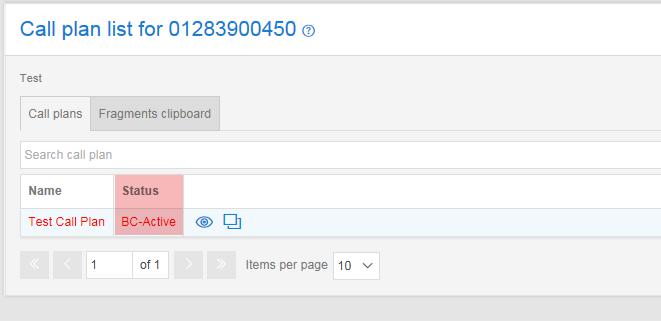
When the BC plan is active (see Point my Number page for how to do this), it will appear in red as the active call plan as shown here:
The previously active call plan will revert to validated status. Providing no changes are made to the last active call plan, it can be reinstated using the Manage my BC function on the Point my Number page.
Copy Call Plan #
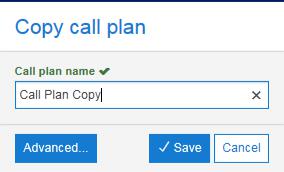
When the Copy button is selected the window below is displayed.
If you simply want to make a copy of the call plan available within the same number then enter the name of the copy and click on the Save button.
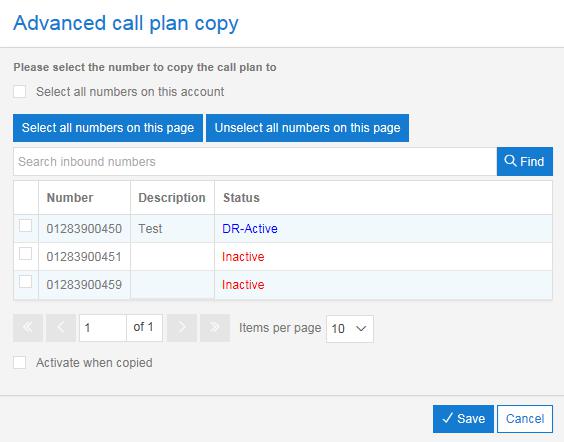
If you want to copy call plans between different numbers then use the Advanced button.
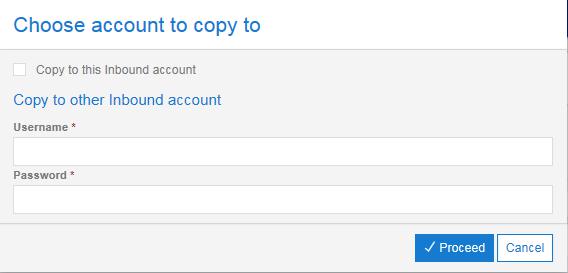
If the call plan is to be copied to other numbers within the same inbound account then check the Copy to this Inbound account box. This will cause the window below to be displayed.
Click on the Proceed button and you will be presented with a window like the one below showing the numbers available for you to copy your call plan to. Simple select the required numbers and then click on Save.
If you want the call plan to activate automatically when the plan is copied to the new number then check the Activate when copied check box. Please note, the call plan must already have been validated for this option to be available; if the plan has not been validated then the Activate when copied check box will not appear.
Then click on Save again when presented with the screen below.
In order to copy to numbers within another account the destination account logon details must be entered when presented with the screen below but otherwise the process is the same as copying to another number in the same account.
Notes
When a call plan is copied to another account the destination account must belong to the same channel partner.
When copying between accounts, any announcements used within the call plan will be copied across with the call plan.
The Activate when copied check box only appears if the call plan being copied has been validated or activated.
General Rules #
There are some general rules you should be aware of when building your call plan. An understanding of these will help you in understanding what a valid call plan looks like.
In general, a group of siblings must all be of the same type, e.g. Date controls, or Day controls. If you try to add a sibling that is of a different type then the website will not allow this. However, there is an exception to this rule. The special case is the Divert control which can be a sibling of a Destination or a Distribution control.
Within a group of siblings there can be only one control set to be the Default. In order to allow flexibility when building the call plan it is possible to add multiple Default controls during the edit stage. However, a call plan with multiple Default controls will be rejected when it is validated.
There is a maximum of 1000 controls that can be added to a call plan. This is far more than any real call plan should need so if you reach this limit then you should re-asses your call plan design
