
A call queue group is a basic simultaneous Hunt Group with the ability to queue up to 25 calls at the network level should all users be busy. Each Call Queue Group can be customised with its own welcome and comfort message as well as its own hold music and has the added capability of a user breakout.
Charge is only applied to a user who can be part of a Call Queue Group. Therefore, you could have 3 users over multiple groups and only be charged for those 3 users, rather than users per group.
Setup a Call Queue Group #
Call Queue Groups are set up by the Company Administrator
Before you start to set up your Call Queue Group, you need to make sure that you have Call Queue Group Add-ons to do this. This is done by completing the following actions:
- Log into the Gamma Portal and go to Provisioning and Service Management, Hosted, Horizon and Horizon Manage Company.
- Select your account and locate the company that you want to set up a Call Queue Group for.
- Using the “Actions” drop-down select “Manage Bolt ons”.
- From here you can see what bolt-ons you have and how many are currently in use. If you need to add any more Call Queue Group add-ons, scroll to the bottom of the page and click “Add More Bolt ons” and then you can add as many bolt-ons as you need by adding against “Call Queue Group User”
Step 1
Log into the Gamma Portal and go to Provisioning and Service Management, Hosted, Horizon and Horizon Manage Company.
Step 2
Select your account and login to the company that you want by using the “Actions” button and selecting “Login to Horizon”.
Step 3
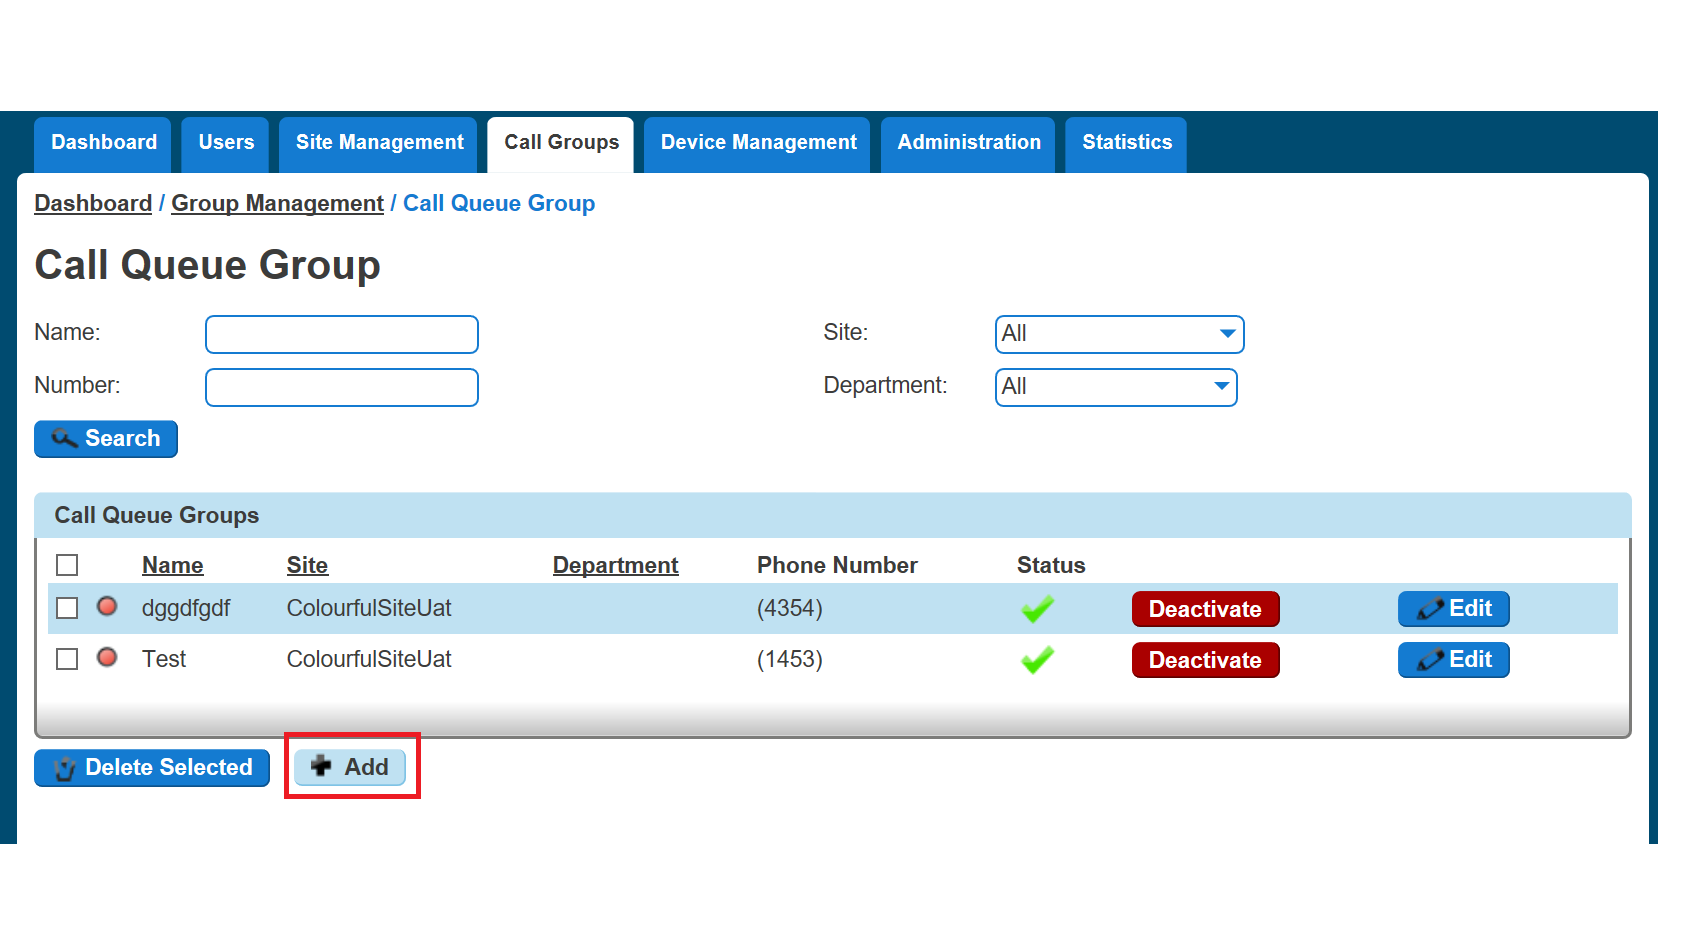
Click the “Call Groups” option and then select “Call Queue Group”. On the Call Queue Group page click “Add”.
Step 4
Click the “Call Groups” option and then select “Call Queue Group”. On the Call Queue Group page click “Add”.
Step 5
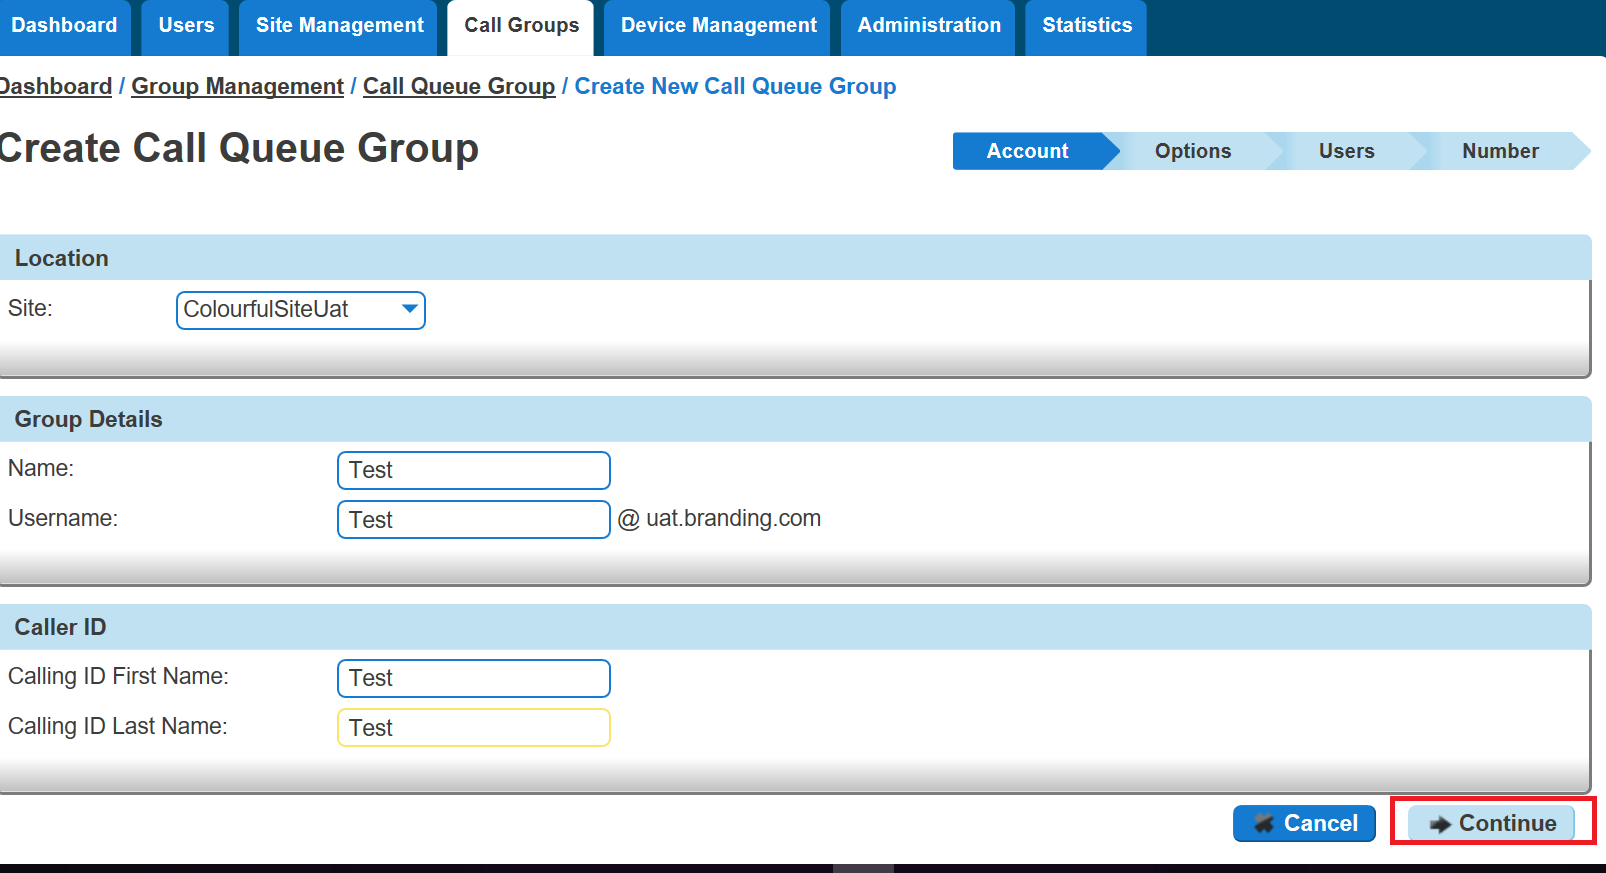
You will now be in the wizard for Call Queue Groups. On the first page you will be setting up the following:
- Site – the site that the Call Queue Group will be used for. All the users of the Call Queue Group will be on this site.
- Group Details – enter the name, username and department that you’d like the group to be assigned to. This is so that you can quickly identify the group if you ever need to edit or delete the group.
- Caller ID – this will be what is displayed on the handset when the Call Queue Group is used.
Step 6
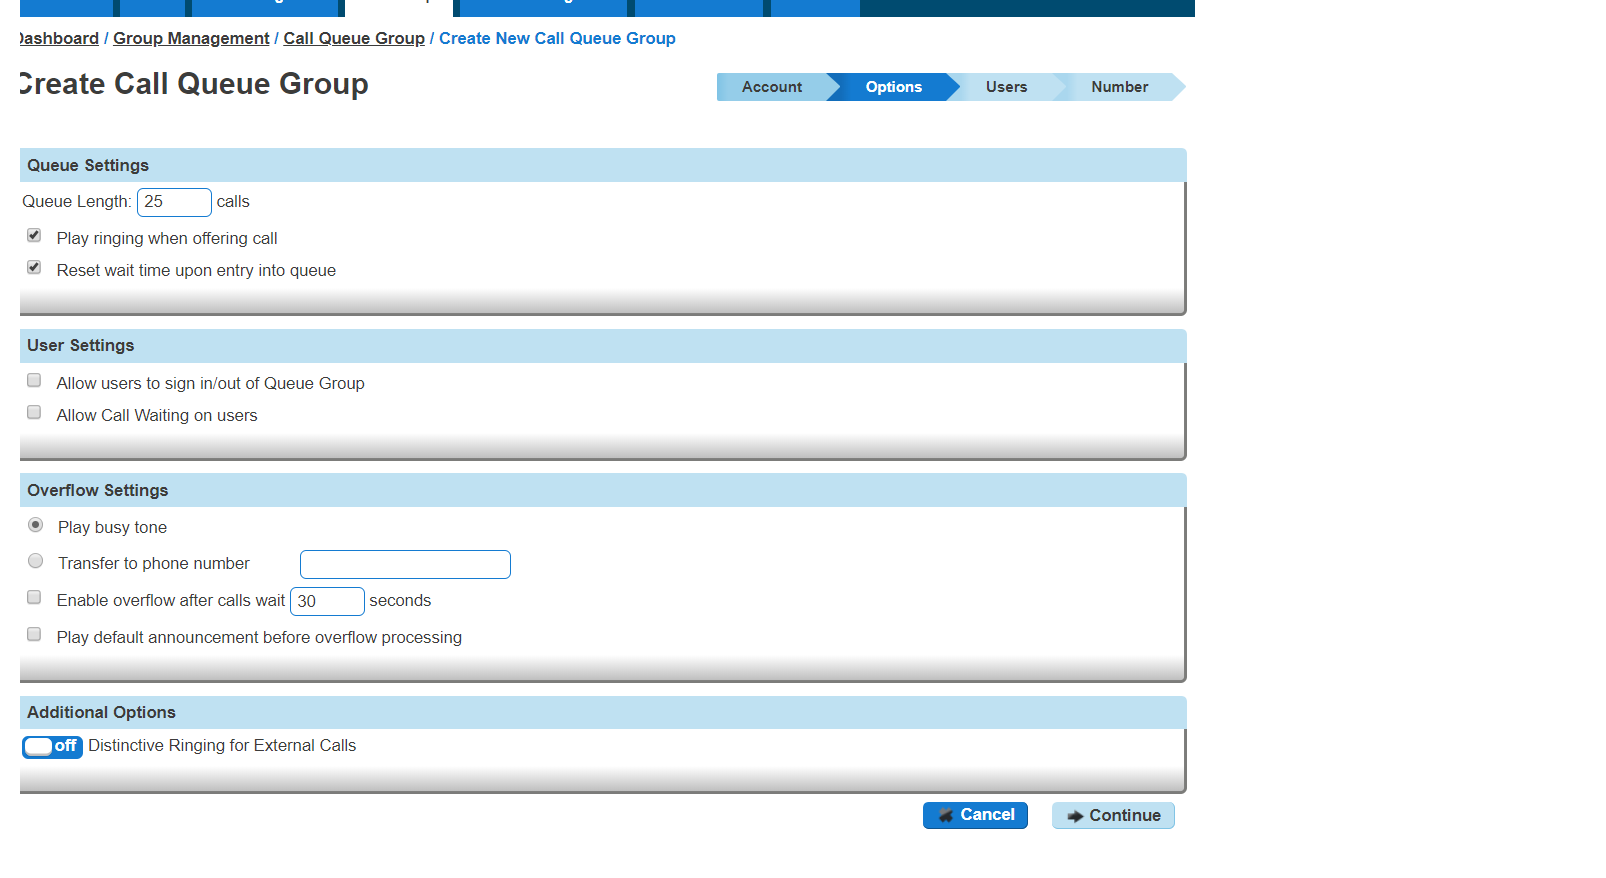
Now you can configure the options for the Call Queue Group. The available options during the setup of the Call Queue Group are:
- Queue Settings:
- Queue Length is how many calls you would like in the Call Queue Group, up to a maximum of 25 calls.
- If you want the call to play a ring tone when offering the call to a user
- If you want to reset the wait time for the Statistics when a call enters the group or not.
- User Settings
- If you want to allow users to be able to sign in or out of a Call Queue Group using the user’s Horizon Portal access
- If Call Waiting is allowed for users
Please Note: If “Allow call waiting on users” is on as well as “Play ringing when offering call” is on – the call will present on the phone and the calling party will hear ringing – even if no agent is free to answer. This is the nature of Call Waiting and we would recommend having one or the other on, rather than both.
- Overflow Settings
- If you want to enable overflow for calls that have been waiting for a defined number of seconds, and if this is to
- Play busy tone
- Transfer to a different phone number
- If you want to pay the default announcement before overflow processing
- If you want to enable overflow for calls that have been waiting for a defined number of seconds, and if this is to
- Additional Options
- If you would like Distinctive Ringing for external calls.
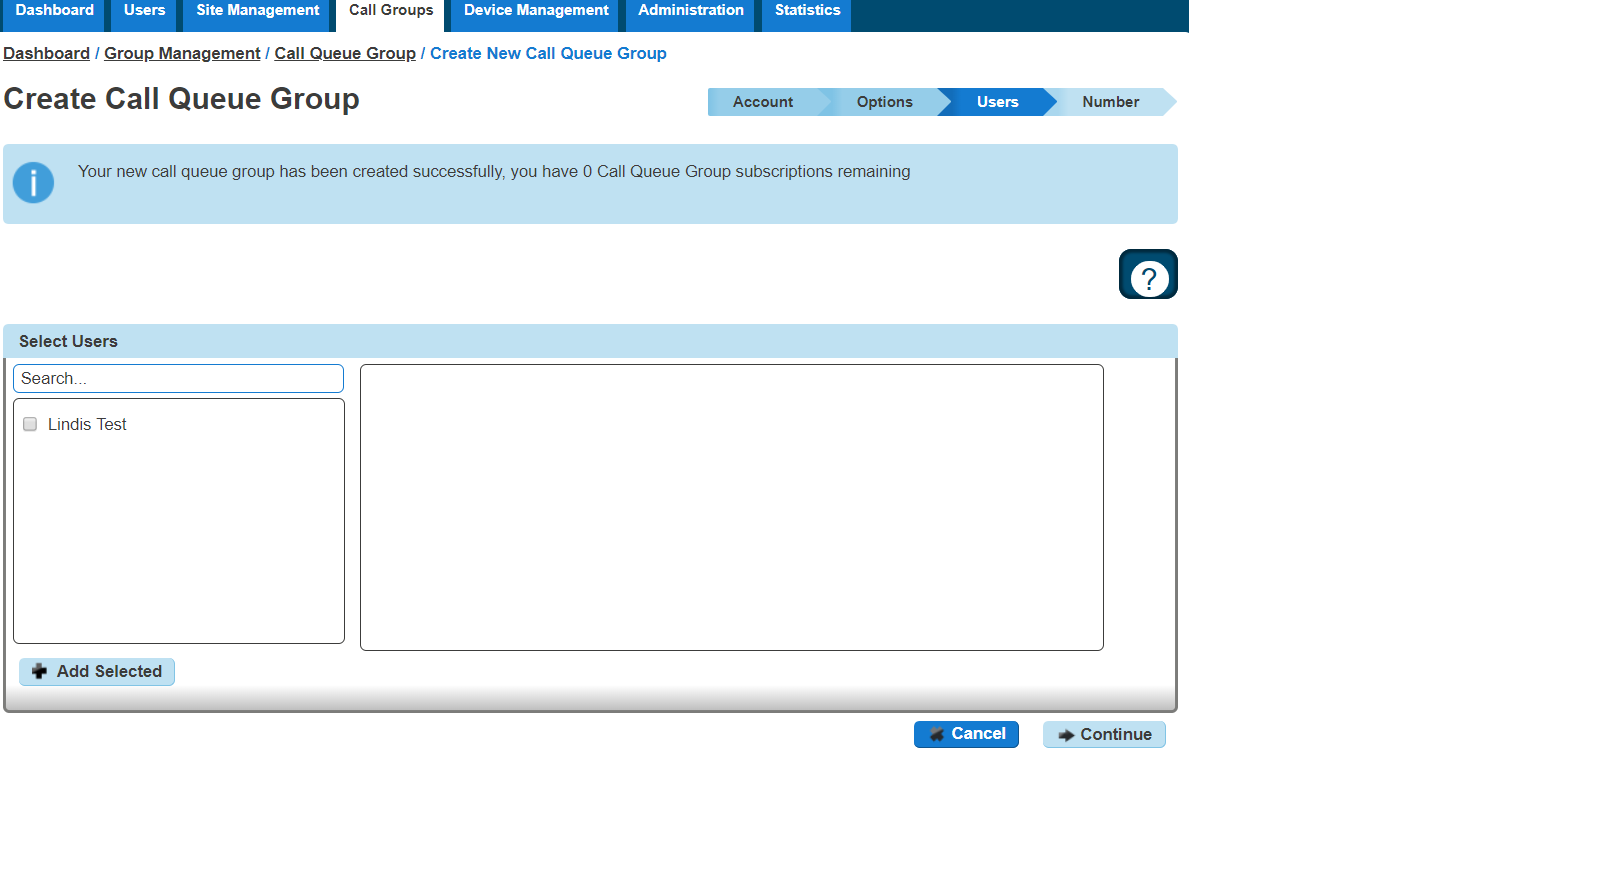
Step 7
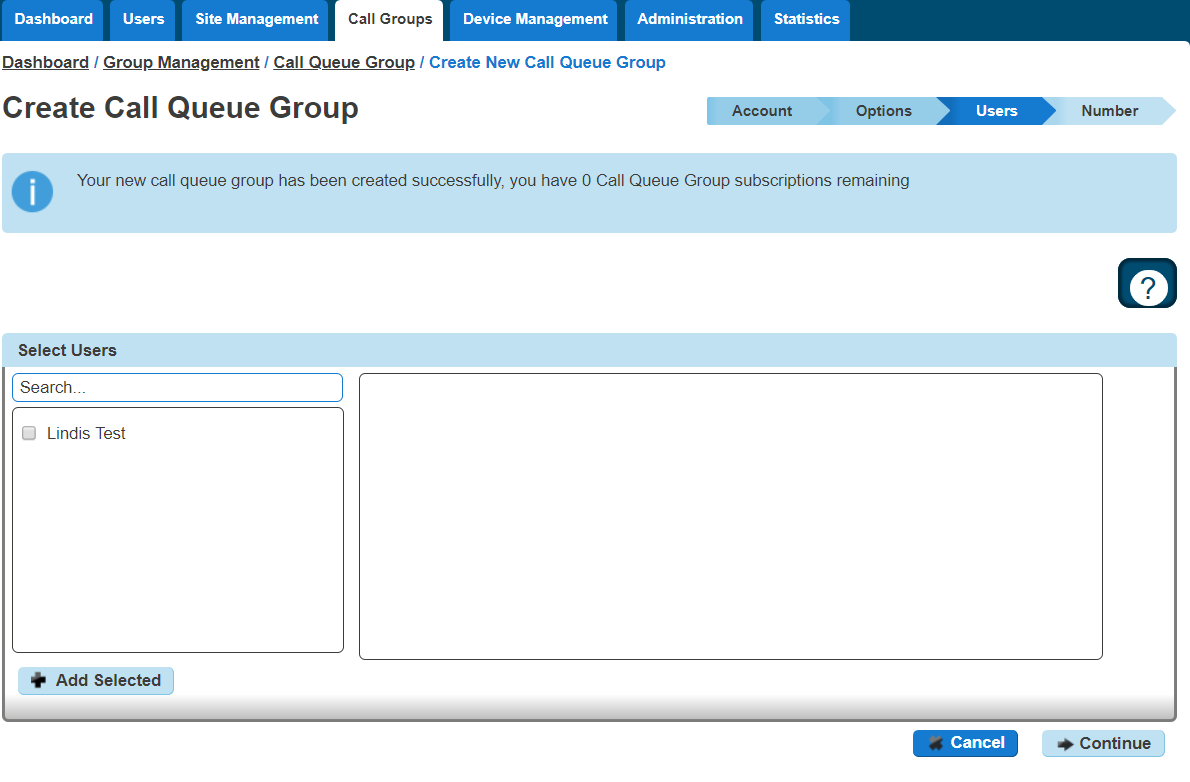
Select the users which you want in the Call Queue Group, click “Add Selected” so that they move to the box on the right-hand side of the screen and then click “Continue”.
A user needs to have the Call Queue Group User add-on associated with their Services. To do this go to edit a user, select the “Services” tab, tick “Call Queue Group User” option, and click Save.
Step 8
Find an available number that you have on your Horizon Company to assign to and type in a free extension.
“Finish and Show List” will finish the setup with basic settings of the Call Queue Group.
“Finish and Edit” will finish the setup with the basic settings of the Call Queue Group and allow you to edit some of the more advanced options. These include:
- Announcements
- Entrance Message (this is a message placed to the user when their call reaches the Call Queue Group)
- Comfort Message
- Music on Hold
- Call Recording
- Voicemail
- What announcement should be used for the voicemail
- If you want voicemail notifications to be sent to an email address
- If you want all calls to be sent to voicemail
- Change Voicemail Passcode for the Call Queue Group
- Scheduling (Advanced Settings)
- Call Forwarding (Advanced Settings)
- Call Forwarding when Busy (Advanced Settings)
Add/Remove Users to/from a Call Queue Group #
A user needs to have the Call Queue Group User add-on associated with their Services. To do this go to edit a user, select the “Services” tab, tick “Call Queue Group User” option, and click Save.
Step 1
Log into the Gamma Portal and go to Provisioning and Service Management, Hosted, Horizon and Horizon Manage Company.
Step 2
Select your account and login to the company that you want by using the “Actions” button and selecting “Login to Horizon”.
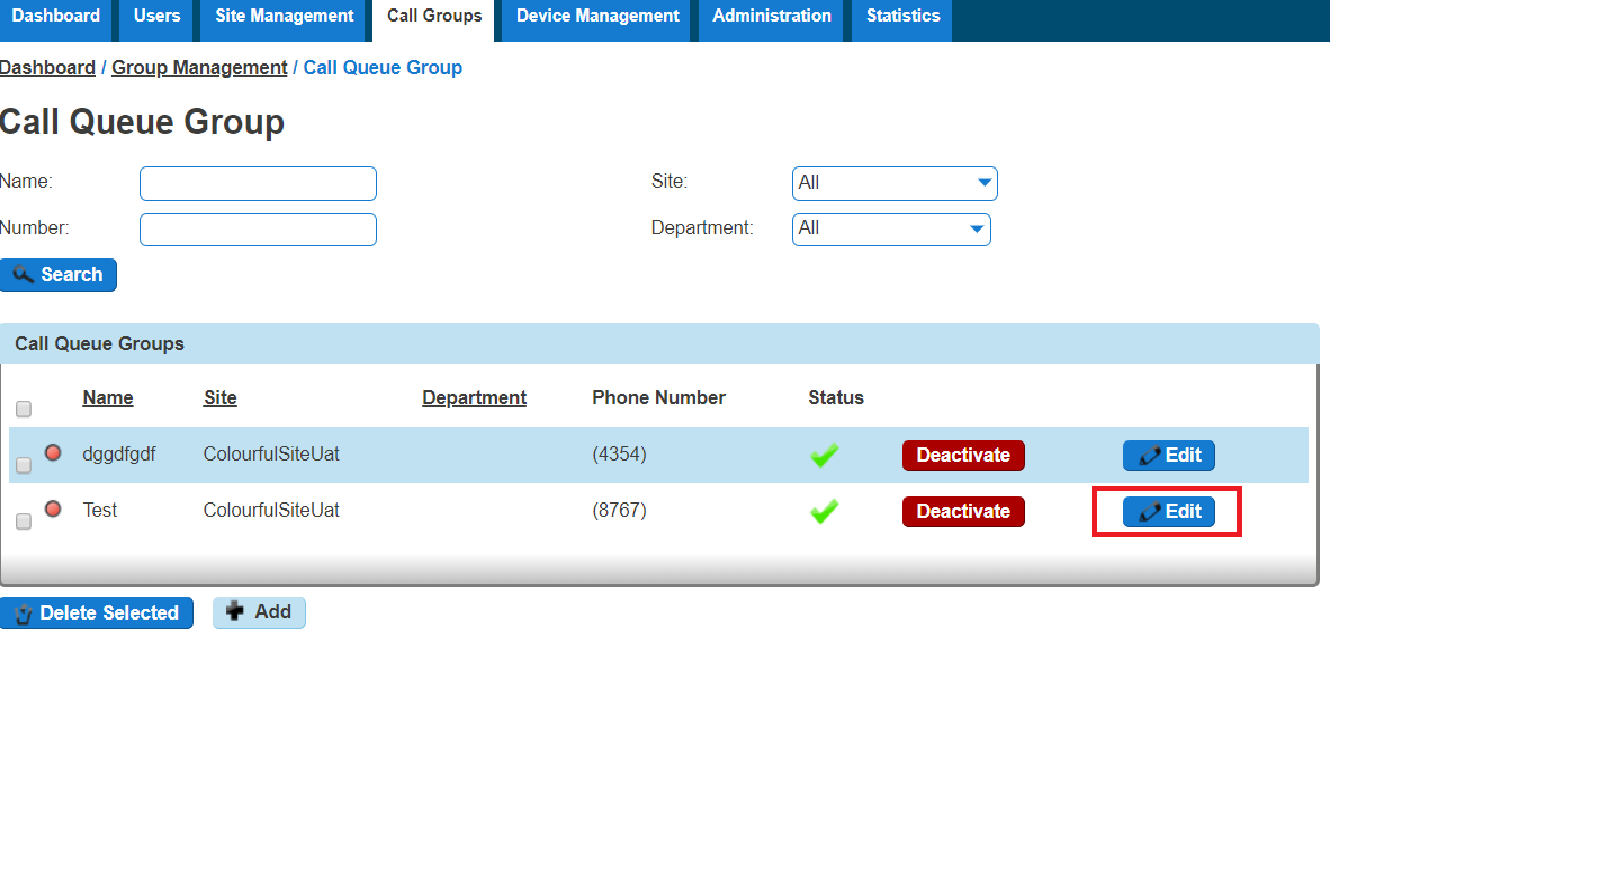
Step 3
Click the “Call Groups” option and then select “Call Queue Group”. On the Call Queue Group page click “Edit”.
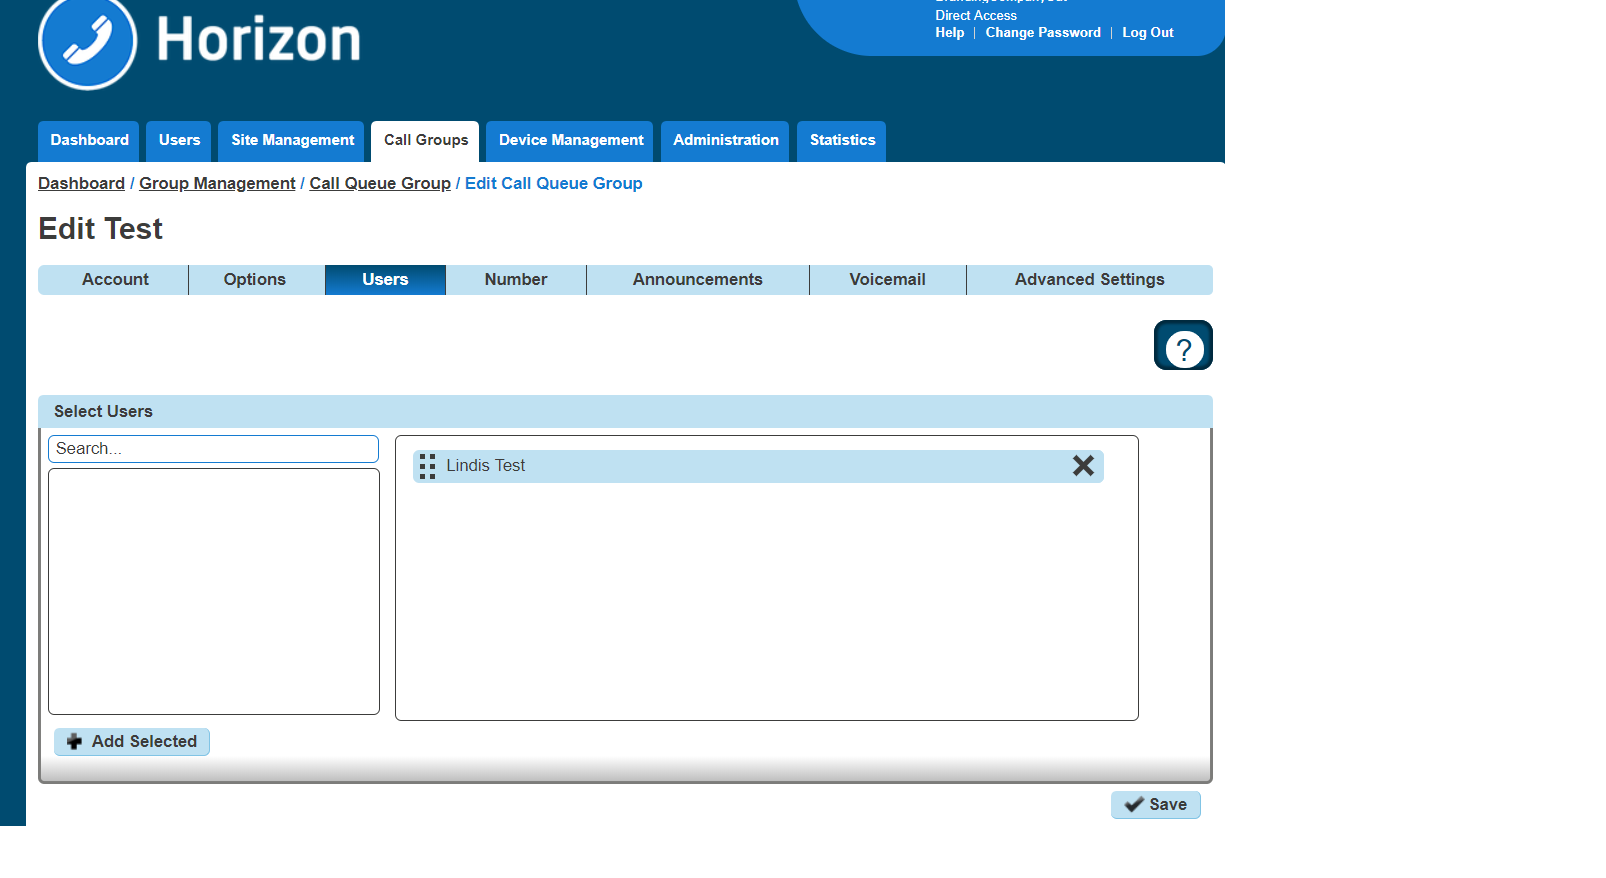
Step 4
Select the “Users” tab. From here you can add new users from the table on the left-hand side by clicking “Add Selected”, and remove users by clicking the white “X” next to the user you want to remove.
Edit a Call Queue Group Settings #
Step 1
Log into the Gamma Portal and go to Provisioning and Service Management, Hosted, Horizon and Horizon Manage Company.
Step 2
Select your account and login to the company that you want by using the “Actions” button and selecting “Login to Horizon”.
Step 3
Click the “Call Groups” option and then select “Call Queue Group”. On the Call Queue Group page click “Edit”.

Step 4
From here you will be presented with the following options:
Account #
- Change the name and Caller ID settings
Options #
- Change the Queue Settings, including:
- Queue Length
- Play ringing when offering a call
- Allow users to dial a number to leave a message
- Reset the wait time when a call enters the call queue group
- Change the user settings:
- Allow users to sign in/out of a Call Queue Group
- Allow call waiting for users
- Overflow settings
- Enable overflow after a call is waiting for a defined amount of seconds
- To send the call to voicemail or transfer to another phone number
- Play a default announcement before overflow processing
Switch on Distinctive Ringing for external calls
Users #
- Add or remove users from the Call Queue Group
Number #
- Change the telephone number of the Call Queue Group
- Change the extension number of the Call Queue Group
Announcements #
- Entrance Message (this is a message placed to the user when their call reaches the Call Queue Group)
- Comfort Message
- Music on Hold
Call Recording #
Voicemail #
- What announcement should be used for the voicemail
- If you want voicemail notifications to be sent to an email address
- If you want all calls to be sent to voicemail
- Change Voicemail Passcode for the Call Queue Group
Delete a Call Queue Group #
Step 1
Log into the Gamma Portal and go to Provisioning and Service Management, Hosted, Horizon and Horizon Manage Company.
Step 2
Select your account and login to the company that you want by using the “Actions” button and selecting “Login to Horizon”.
Step 3
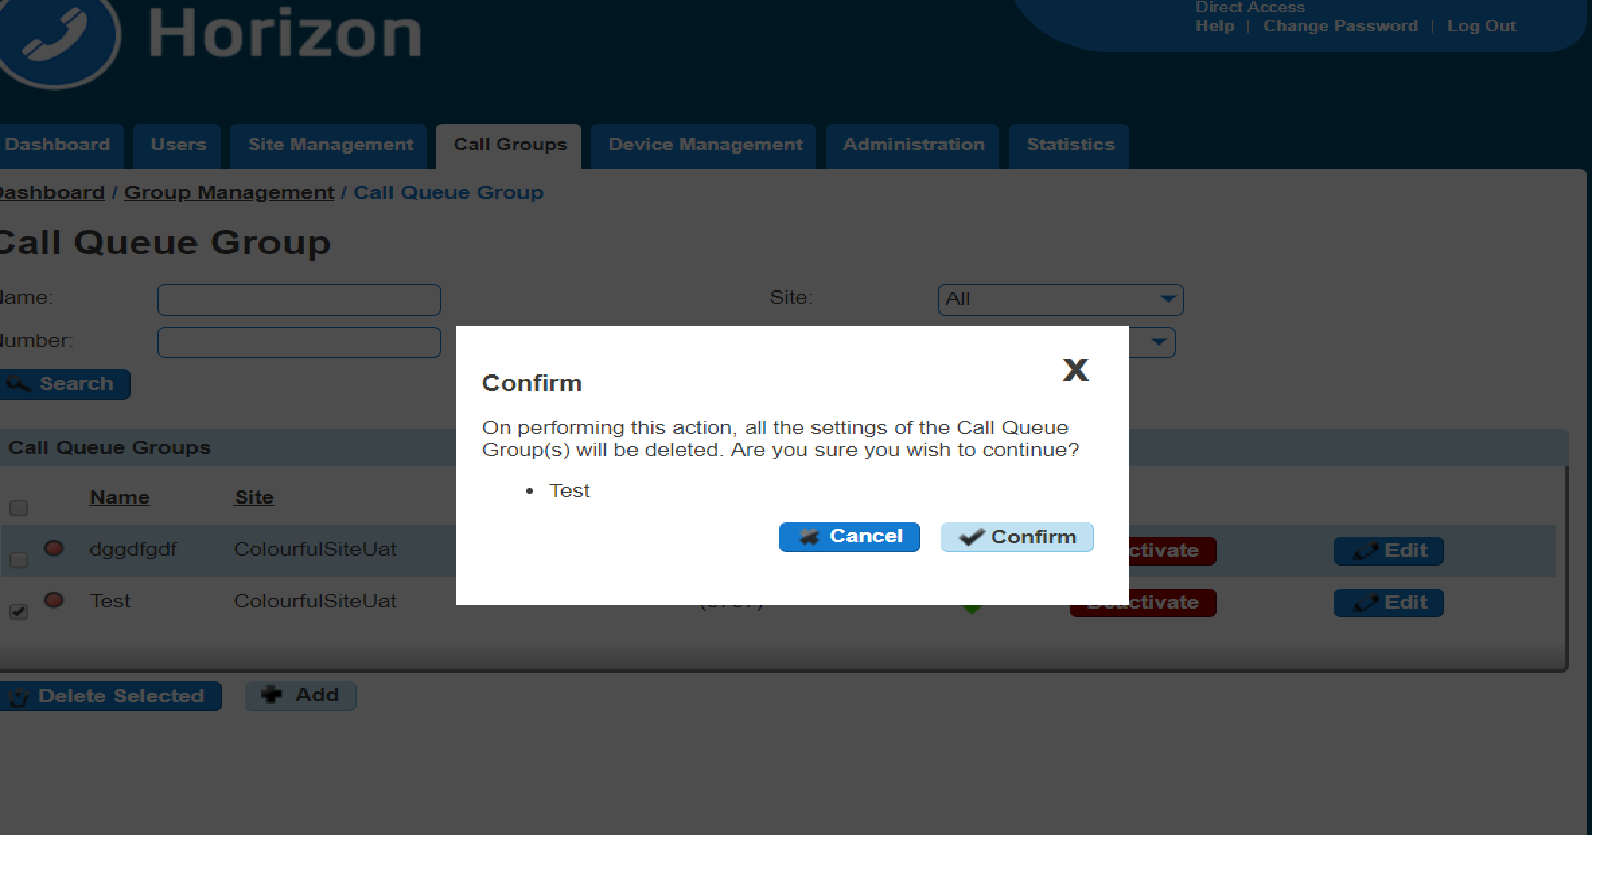
Click the “Call Groups” option and then select “Call Queue Group”. On the Call Queue Group page select the Call Queue Group(s) that you want to delete and then click the “Delete Selected” option.
Click “Confirm” when asked if you are sure that you want to continue deleting the Call Queue Group.
User Logging in and out of a Call Queue Group #
A user can log in and out of a Call Queue Group in their Horizon Portal using their login details if the Call Queue Group has the “Allow users to sign in/out of a Call Queue Group” option selected in the Call Queue Group Options (see Editing Call Queue Group)
Once this option is selected, when a user logs into the Horizon Portal they will see “Queue Groups” in the menu. They will then be able to click “Sign In” or “Sign Out” depending on what their status with the Call Queue Group is.