
Introduction #
The Horizon Call Centre is a cloud-based service that provides an extensive range of inbound call centre capabilities.
These can be configured and managed via an easy-to-use web portal, allowing customers to easily administer, monitor and control call centres from anywhere.
This document will detail the features and options available for a Horizon Administrator when creating a call centre, while also exploring the clients and the handsets listed below.
The call centre is compatible with the following handsets
- Polycom VVX310
- Polycom VVX410
- Polycom VVX500
- Polycom VVX600
- Cisco SPA 504
Please be aware the call centre is not compatible with the Horizon iOS or Android Mobile Clients. Also, a user cannot be in a Call Queue Group at the same time as a Call Centre group.
Call Centre Call Flow Model #
The Call Centre solution is made up of various components that work together to provide the full solution. The steps below describe the different stages of an inbound call being directed to a call centre
A caller calls a main number that reaches an Auto Attendant/interactive voice response (IVR).
The Auto Attendant provides a series of routing options to the caller, based on the time schedule. Multiple tiers of Auto Attendant options can be provided to reach the correct group of agents. For example, the options start with “Press 1 for English, and 2 for Spanish”, followed by another Auto Attendant that offers “Service” or “Support”, followed by another Auto Attendant that offers support for specific products.
The caller selects an option and is immediately routed to a call centre that handles the call according to the assigned policies.
A call received during normal business hours or received by a call centre with no active special policies is queued in the call centre to be processed by an available agent staffing the call centre. While remaining queued, the caller hears various audio announcements, if enabled.
The call centre offers the call to an agent when the agent becomes available. Calls in a queue are typically ordered by wait time, with the longest waiting calls prioritised to the top of the queue. Calls can be reordered by a supervisor and calls that were offered to an agent and bounced are always prioritized to the top of the queue. In addition, a call may be transferred by a supervisor or an agent from one call centre to another, in which case the wait time of a call can be preserved by policy.
Company Level Settings #
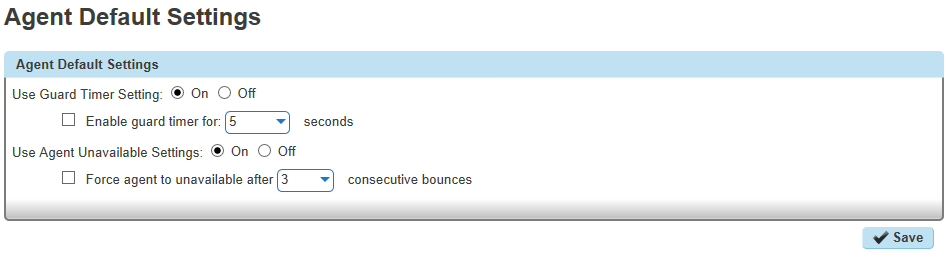
The Horizon company level settings will affect every call centre that the administrator creates on the Horizon GUI. These are located in the Administration menu. There are two options, Agent Default Settings and Agent Unavailable Codes.
From here, the administrator will be able to set
Guard Timer Setting
Agent Default Settings #
 #
#
Agent Unavailable Settings
The Guard Timer determines the gap between each call for an agent. This will affect all agents, and is separate from the other agent states such as available or wrap up. In the picture above, Guard Timer is set to 5 seconds, meaning there will be a 5-second gap between 1 call ending, and the next one being routed to the agent.
Settings | Details | Default Value |
Guard Timer | For the Use Guard Timer Setting, select “Off” or “On”. If the “Off” is selected then the system parameters will be disabled If you want to change the default settings then select “On” and apply your own settings (disable or enable the guard timer and then set the amount of time from the Seconds drop-down list to configure the amount of time). When the guard timer is enabled then the agent will not receive any call (for the specified time) once he hangs up from the previous call. Note: If guard timer is enabled it will affect also the Call Queue Groups. | Disabled |
Agent Unavailable settings | For the Use Agent Unavailable Settings, select “Off” or “On”. If the “Off” is selected then the system parameters will be used (where the “Force agent to unavailable after X consecutive bounces” is disabled) If you want to change the default settings then select “On” and apply your own settings. | ‘Force agent to unavailable after X consecutive bounces’ is disabled |
Agent Unavailable Codes #
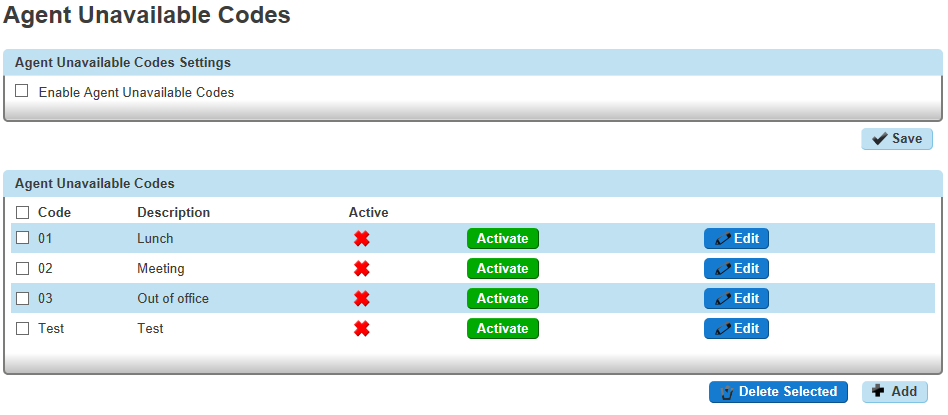 Agent unavailable codes are configurable attributes that are applied when an agent becomes unavailable. Agents may select a reason for changing their agent (Automatic Call Distribution – ACD) states to Unavailable using their handset or client. These reasons can be reported on using Akixi, and are a useful tool in evaluating an agent’s performance during the day.
The administrator can create new unavailable codes (Lunch, Meeting etc.) and manage existing unavailable settings through the Horizon GUI.
The unavailable codes are applied to all Call Centres under the same Horizon company. By default the unavailable codes are not enabled.
Settings | Details | Default Value |
Enable Agent Unavailable codes | The agents will be able to select an unavailable code when they change their state to unavailable. Other options: 1. Select the default code to apply to agents when they enable their Do Not Disturb service. From the Default Code on Do Not Disturb Activation drop-down list, select the code. 2. Select the default code to apply to agents whose ACD state changes to unavailable because of the configured number of consecutive bounced calls. From the Default Code on consecutive bounces drop-down list, select the code. 3. To force use of Agent Unavailable Codes, check the Force use of Agent Unavailable Codes with Default Code option and select the default Agent Unavailable Code from the drop-down list. When this option is enabled, the selected Unavailable Code is used when either an invalid or inactive code is received, or when no code is received at all. | Disabled |
Add Unavailable Codes | Click “Add” and on the new page provide the code and the description. Then press Save. | N/A |
Modify or delete an unavailable code | To modify an unavailable code select “Edit”. To delete a code, select it and then press “Delete Selected” | N/A |
Creating a Call Centre #

This section will take you through the steps required to create a call centre on the Horizon GUI. The Call Centre option can be found in the Call Groups option on the main menu.
Once selected, the steps below will take you through a logical order to follow when creating a Call Centre.
More details on some of the settings can be found in the Customising the Call Centre section.
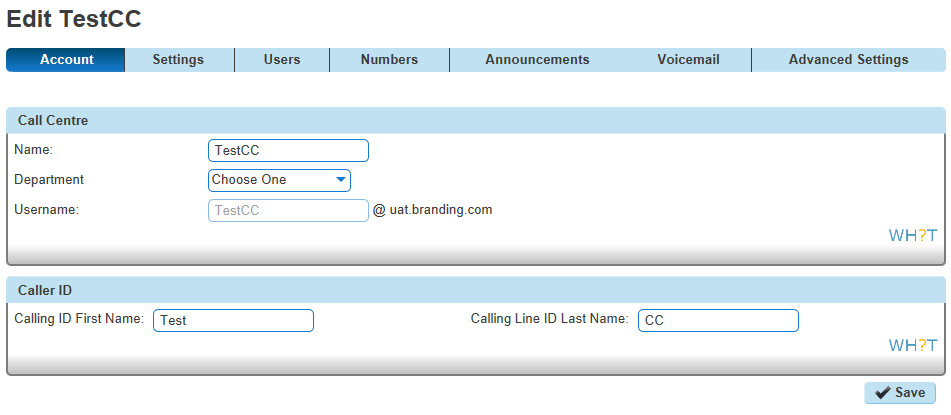
Account #
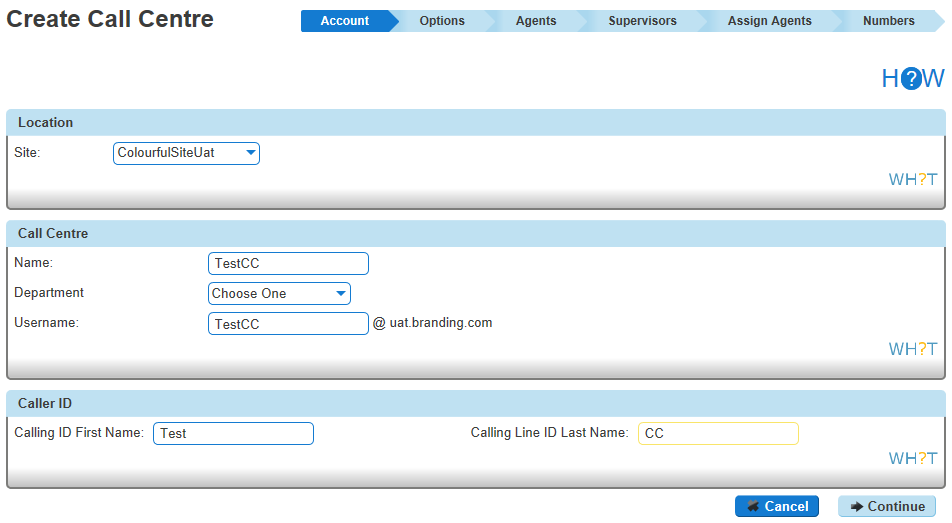
Working from left to right on the options across the top of the screen, the Account would be the first place to start. The initial steps will be to select the:
- Site where the Call Centre belongs. This would be from the existing sites for the customer. In this example Manchester is selected.
- Call Centre ID (username)
- Call Centre name
- Department
- Caller ID First and Last name
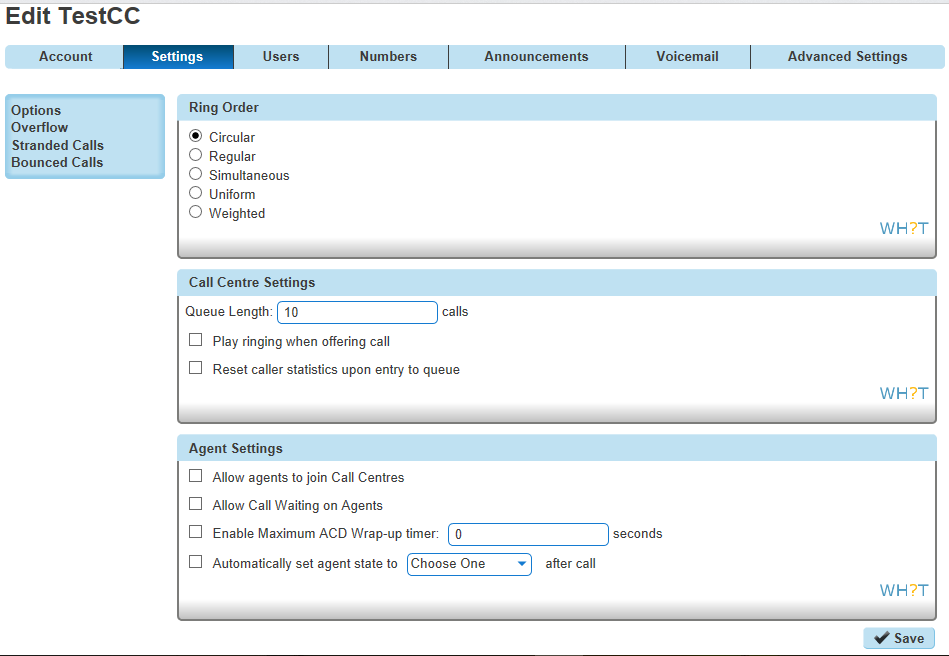
Options #
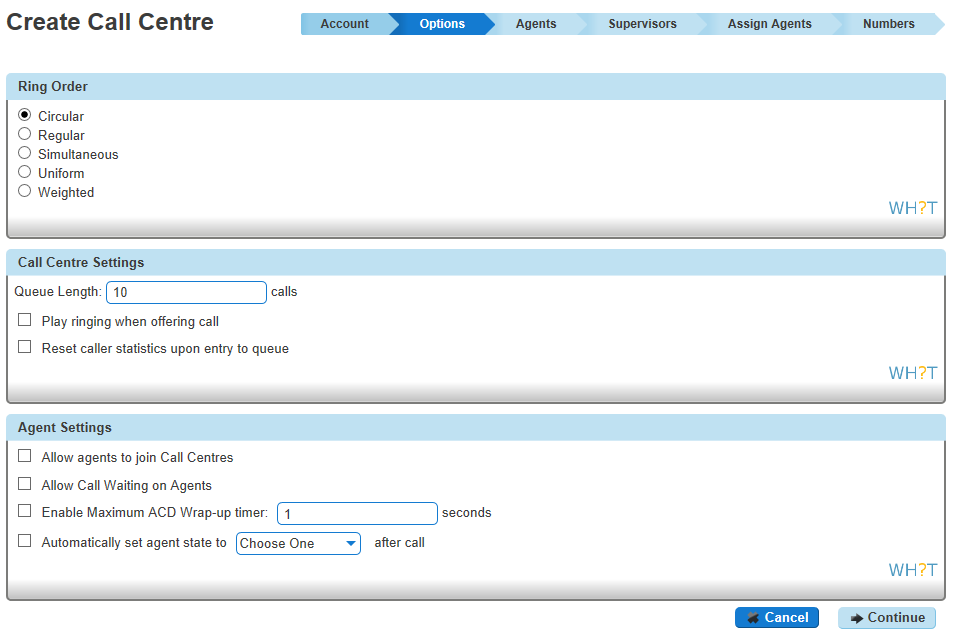
From here the administrator can start to define how many calls can be queued at once, and how these calls are distributed.
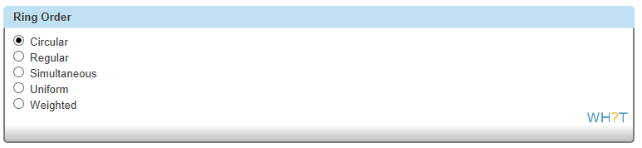
Ring Order #
The different settings determine how the calls are sent to each agent. The options are:
- Circular: sends calls in a fixed order. The call is sent to the first available user on the list, starting with the user following the last user to receive a call
- Regular: sends calls to users in the order they are listed. The call is sent to the first user in the list, always starting with the first user.
- Simultaneous: sends calls to all users within a group. The first user to pick up the phone will have the call routed to them.
- Uniform: sends calls to the user who has been idle the longest. Once a call is completed that user will be moved to the bottom of the list. Calls received but not routed through the Hunt Group will not be applied to this routing.
- Weighted: sends calls to users based on a weighted % of calls to answer. For example out of 10 calls 2 users may be weighted as 40% and 60% meaning 4 calls and 6 calls are delivered as defined to the associated users.
Call Centre Settings #
- Queue Length (maximum value is 50): This is the number of calls that can be queued at one time. Each caller will move ahead in the queue, as calls ahead of them are answered.
- Play ringing when offering call: Callers can either hear ringing or an entrance message (explained in the entrance message section later in this article)
- Reset caller statistics upon entry to queue: This is used for reporting and is useful if you are purely measuring the performance of the call centre
Agent Settings #
- Allow agents to join Call Centres: With this feature selected, when agents sign in they can choose which call centres to join using the GUI, Agent Client or Akixi. If this feature is off, then when the agent signs in they will automatically join all call centres at once.
- Allow Call Waiting on agents: Callers can have a 2nd call waiting while on a call. Might be used if a DDI call needs to get through, but most call centres would not allow this and it is not recommended.
- Enable maximum ACD wrap-up timer: X seconds (The maximum time is 3600 seconds). Agents have the option to select wrap up, which will give them a short period of time before the next call comes through. This may be used to place an order or carry out some administration following the previous call. This option sets the maximum amount of time an agent can be on wrap up. Please note the following:
- Automatically set agent to available after call will ignore the wrap up timer and guard timers, and the agent will be available immediately
- Automatically set agent to unavailable after call will mean the agent stays in unavailable regardless of any timer. The agent will need to manually change their agent state via their handset / Horizon User Portal / Soft Client
- Automatically set agent to wrap up after call means the agent will remain in wrap up for the amount of time defined in the Call Centre group under wrap up timer, becoming available to take calls again after this time. If wrap up timer seconds are not specified in the Call Centre group then Horizon will use the Company guard timer settings seelected.
- Automatically set agent state to (Available or Unavailable or Wrap-Up) after call. This determines what happens after a call. The agent can remain in available, ready for the next call or automatically switch to unavailable where they would have to switch to available themselves. Wrap up is also an option.
Agents #
Here the agents for the call centre are selected. Any user who has the Call Centre agent license associated with them will appear on the list on the left.
Click on the users required, then press add selected. They will then move to the box on the right.
The “Barge-In Exempt” feature is disabled for all the assigned Agents, so the supervisors will be able to Barge-In to their calls.

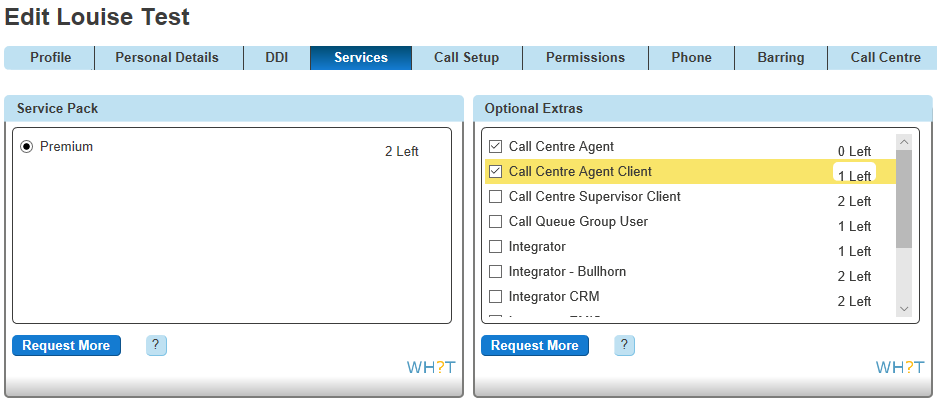
In order for the agent to be able to use the call centre application (agent client), the “Call Centre Agent Client” must be assigned to this user (Please refer to the Clients section for more information).
Supervisors #
In this step, the Call Centre supervisors are selected. The list on the left will contain all users. A supervisor does not need a Call Centre Agent License. Simply select which users are required, hit ‘add selected’ and they will appear on the box on the right of the screen.
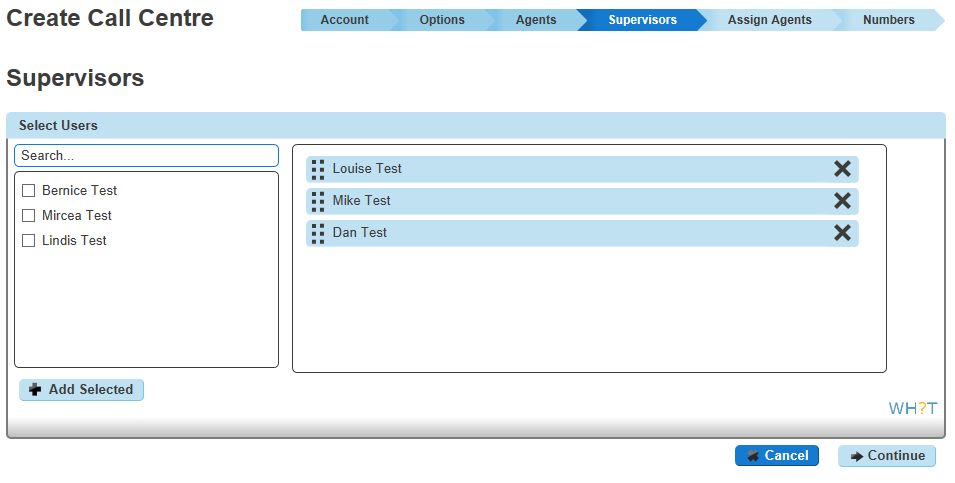
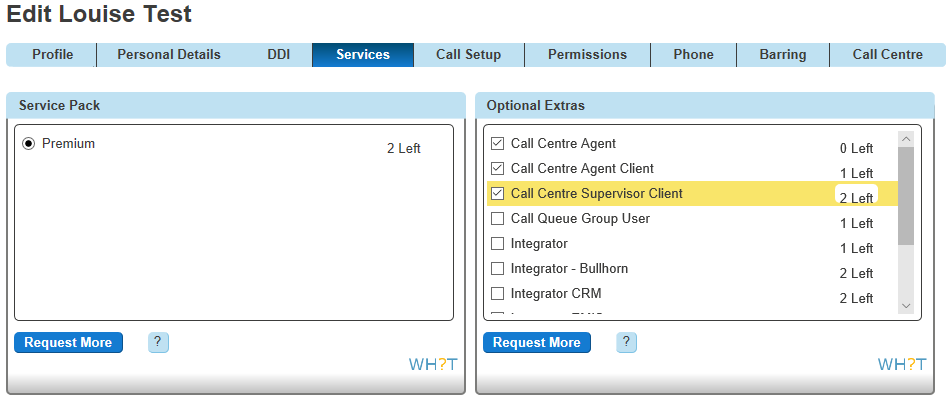
A supervisor can monitor agents, all queues and have calls escalated to them. The “Call Centre Supervisor Client” licence must be assigned to this user in order to activate this functionality (Please refer to the Clients section for more information).
Without the Supervisor Client, a user who is selected as a Supervisor can still have calls escalated to them, but cannot monitor queues or agents.
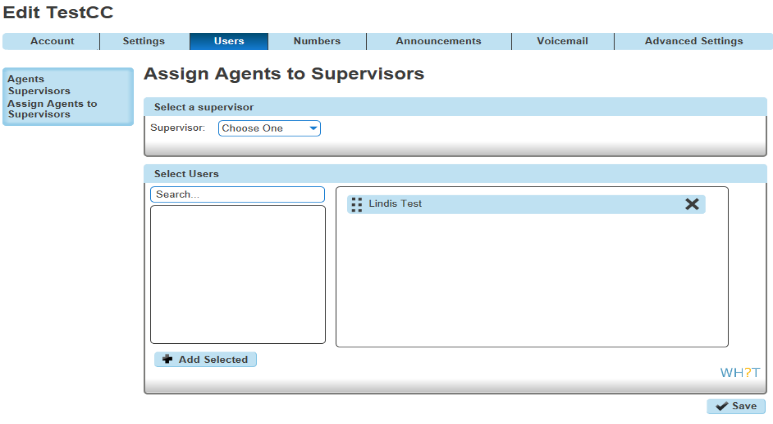
Assign Agents #
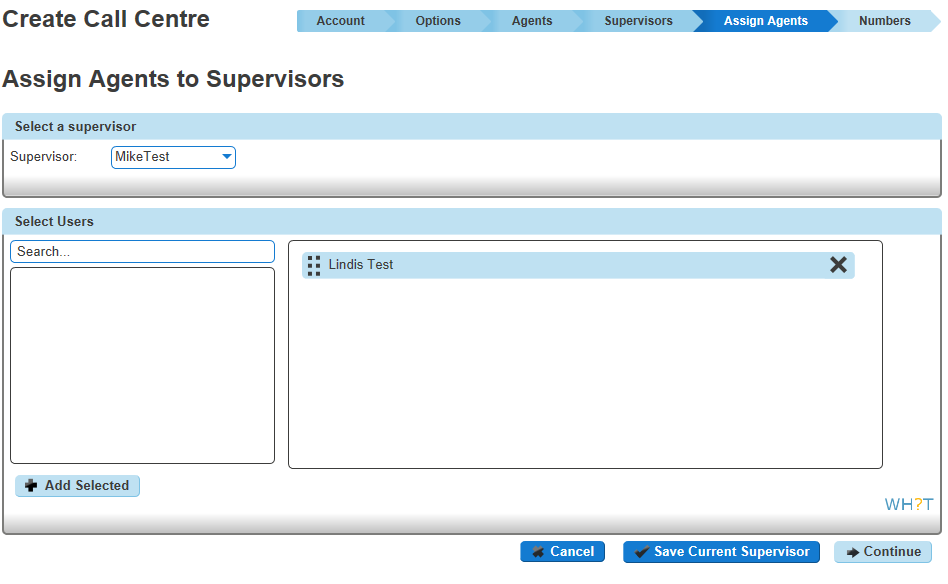
Here the Horizon administrator can assign the agents to be managed by specific supervisors. Each supervisor can supervise any agent and each agent can have more than one supervisor.
Select the supervisor from the dropdown menu, then choose which agents they will manage from the users that will appear in the left-hand box. Once done, click Add Selected and they will appear on the right-hand side of the screen.
Press the “Save” button, then repeat for each supervisor.
Numbers #
This is the last step where the administrator has to select the phone number and extension for the call centre.
The screen will show the list of phone numbers available. The extension can be typed in.
It is worth noting for the call centre, an outbound call from an agent will not display the Phone Number selected here. This is for inbound calls only.

Once the administrator finishes the above process, they will be able to customise more settings/features, which will be described later in the document.
Deleting a Call Centre #
In some instances, it may be necessary to remove a call centre. This can be done by clicking on Call Centre in the Call Groups menu. From the list on screen select the Call Centre and press the “Delete Selected” button in the bottom left corner.
This will only delete the call centre. Agents that were part of the call centre can still be assigned to other call centres.
Any call recordings that were made against the call centre telephone number will also be permanently deleted once you have deleted your Call Centre. Please ensure that you download all the call recordings you need before you delete your Call Centre.

Customising the Call Centre #
This section will go through the areas that can be customised once a call centre is created while looking at some of the ways the call centre can be modified further.
To customise, the call centre will need to be selected from the Call Groups menu. This section will go through each of the menu options across the top of the screen.
 #
#
Account Settings #
On the Account tab the administrator will be able to customise the:
- Call Centre Name
- Department
- Calling Line ID
- Calling Line ID First & Last Name
Settings #
The settings menu will bring you to this page. This section will take you through the menu options on the left-hand side of the screen, starting with the options.
Options #
These will have been set already in the Create a Call Centre section. However, they can be customised.
 #
#
Ring Order #
A different ring order can be chosen.
Call Centre Settings #
The administrator can customise the settings below:
- Queue Length: (1-50) calls
- Play Ringing when offering call
- Allow callers to dial (0) to leave a voicemail: Callers who are queued can press a key to be sent directly to the call centre voice mailbox instead of waiting for an available agent. This will only appear when the voicemail feature is enabled.
- Reset caller statistics upon entry to queue
Agent Settings #
The following options can be customised for the agents:
- Allow agents to sign in and out of Call Centre via the Horizon Portal or user’s handset. By not selecting this option the agent will always be logged in to the Call Centre.
- Allow Call Waiting on agents
- Enable maximum ACD wrap-up timer: X Seconds (The maximum time is 3600 seconds)
- Automatically set agent state to (Available or Unavailable or Wrap-Up) after call (If the Unavailable state is selected, then the unavailable codes will appear if applicable)
Overflow #
The overflow will describe the calls that cannot be handled either when the queue is full (this can be set to up to 50 calls), or when a queued call is not handled (either by an agent or by another Queue policy) within a specified amount of time. This area defines what happens to these calls
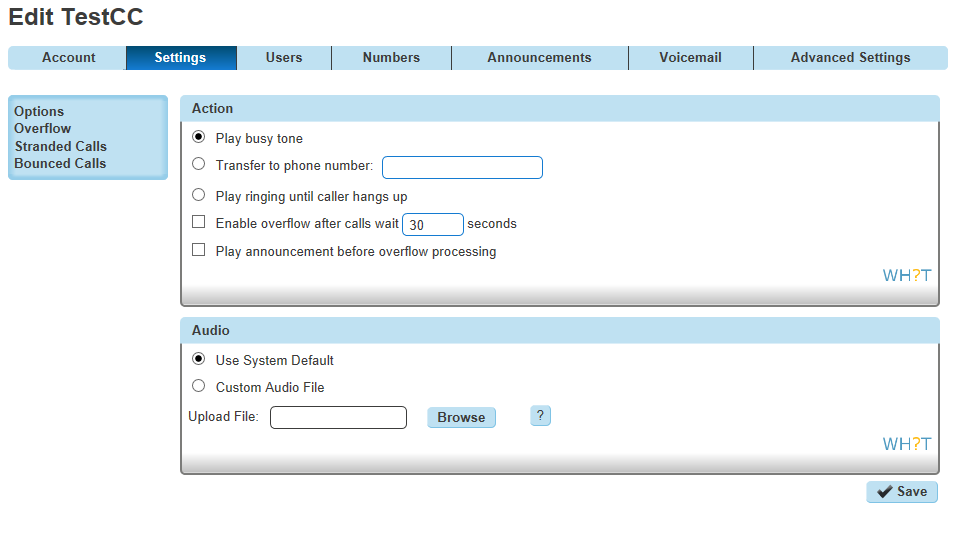
Action #
- Play busy tone. An overflow call will hear the busy tone if they cannot join the queue. The call will not route anywhere else.
- Send to Voicemail (not shown on the image). If voicemail is enabled, then the play busy tone option will be replaced with send to voice mail.
- Transfer to phone number. The call will not join the queue, but will instead be routed to the number defined here.
- Play ringing until caller hangs up*. This will not route the caller elsewhere, but instead the call will hear ringing. This choice needs to be used with caution, as the ringing will give the caller the impression that their call will be answered. It will not join the queue and will not route elsewhere to be answered.
- Enable overflow after calls wait (0-7200) seconds. This is optional, and will set the time before the overflow settings take affect for a caller.
- Play announcement before overflow processing. This will play a message before the overflow settings begin. This is optional.
Audio #
Default. Choice of either the inbuilt pre-set message
Custom (WAV file). Or upload a customer message.
- Encoded with CCITT u-Law
- Formatted at 8000Khz sample rate
- 8-bit mono
- 7 kbps
- Maximum length is 625 seconds and size is 5MB
Stranded Calls #
A stranded call is a call that is being processed by a queue that has no agents signed in, referred to as staffed. If the last agent staffing a call centre signs out, then all calls in the queue become stranded.
If an incoming call is received by a queue with no agents staffing the call centre, then the call is initially put in the queue. Once the queued call is ready to be offered to an agent then the call is processed as a stranded call.
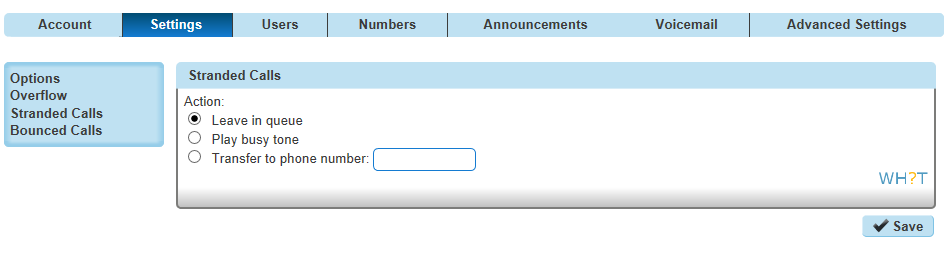
Below are the available options:
- Leave in queue
- Play busy tone
- Transfer to phone number. This is the only option that can route the calls elsewhere, whether to another hunt group or voicemail.
Bounced Calls #
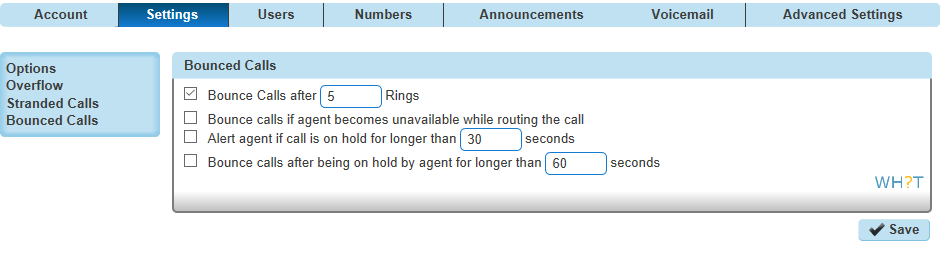
A bounced call is a call that is being routed to the agent but the call is not answered. This might be due to the agent leaving their desk, the device becoming unregistered, or the agent changing to unavailable as the call is routed.
Options are configurable to flag a call as a bounced call if the agent fails to answer a call within the specified amount of time (as determined by the number of rings and the applicable ring cycle). A bounced call is treated with the highest importance and is placed ahead of the rest of the queued calls in the queue. The options are:
- Bounce Calls after (1-20) rings. Default is 5 rings.
- Bounce calls if agent becomes unavailable while routing the call
- Alert agent if call is on hold for longer than (30-600) seconds. This will provide a single beep as an alert.
- Bounce calls after being on hold by agent for longer than (30-600) seconds. When setting this it is worth evaluating the nature of the queries the agents will receive, and how long a call is likely to be on hold for. In some scenarios, 30 seconds is not a long time and you may not want the call to bounce to another agent if a call is on hold for this short period of time.
Agents #
Call Centre agents can be found under the “Users” tab. Agents are Horizon users who have been assigned to Horizon Call Centres. In order for Horizon users to be able to act as agents the “Call Centre Agent” licence should be assigned to them as shown below:
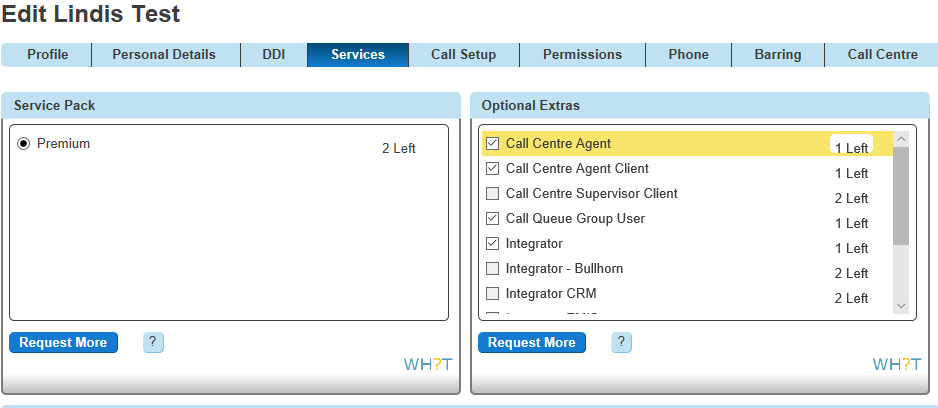
The agent functionality can be split into 2 main types: call control functions and agent availability functions. Below are some additional details for each function.
- Call control functions: These are the functions for answering, initiating, or managing calls. They include the ability to answer/auto answer, hold, transfer, conference, and escalate calls to supervisors.
- Answer/Auto Answer: The agents can decide whether they prefer to manually answer a call or if the call will automatically be answered.
- Hold: Active calls can be placed on hold. The calling party hears the group Music On Hold (not the Call Centre Music On Hold), if configured.
- Transfer: Calls can be transferred to other individuals or to alternate call. The transfers can be either consultative (attendant) or blind.
- Conference: Agents can bridge additional parties into active calls using either a consultative (attendant) or blind conference method.
- Escalate calls to supervisors: Agents can escalate a call to their supervisors. This places the original calling party on hold while calling the supervisor. The call can be made to a selected supervisor or Horizon can automatically select an available supervisor based on the supervisor’s line and DND status. To escalate a call the shortcode is *33.
- Emergency escalation of calls to supervisors: Agents can escalate a call to their supervisors using the Emergency Escalation button on the Horizon Agent client. This initiates an immediate bridging of the original calling party, the agent, and the supervisor in a conference. The call can be made to a selected supervisor or Horizon can automatically select an available supervisor based on the supervisor’s line and DND status.
- Other Horizon call control services are available, such as call park
- Agent Availability functions: These are functions used by the agent to manage their availability to receive inbound calls from the call centres. They include Join/“Unjoin”, Sign-in, Sign-out, Available, Unavailable (with Unavailable codes if applicable), and Wrap-up.
- Join/“Unjoin”: The most fundamental agent state is the Join/Unjoin state. An agent must be “Joined” to a call centre to receive calls from the call centre. An agent can join or “unjoin” call centres from the web portal or from the Horizon Agent client. Administrators can configure whether an agent is allowed to change their Join status by using the “Allow Agents to Join Call Centres” option on the Call Centre Agent Settings.
- Sign-in/Sign-out: Indicates whether the agent is “in the office/out of the office”. The Sign-in state only means they are present. Calls are not routed to an agent that is in Sign-in state. Sign-out means they have left for the day.
- Agent ACD states: Agents in Horizon call centres can set additional states that apply to call centres to which they are “Joined”:
- Available: Indicates they are available to accept new calls or are on active calls.
- Unavailable and unavailable codes: Indicates they are not available to accept new calls.
- Wrap-up: Indicates they are performing post-call work, such as paperwork. They may or may not be available to accept calls when in this state.
An agent is considered to be staffing a call centre when this agent has been assigned to a call centre, has joined the call centre, and is not in the Sign-out state. Agents staffing call centres may be in different states to indicate their availability to receive calls.
The following table summarises when agents receive calls based on their selected states as well as the status of current phone calls:
User ACD Join Status | User ACD State | Phone Status of User | User’s Call Waiting Setting | ACD Call | Direct Call |
Not Joined | N/A | Off Hook | Off | Not Offered | Not Offered |
Joined | Sign In | N/A | N/A | Not Offered | Offered |
Joined | Available | On Hook | N/A | Offered | Offered |
Joined | Available | Off Hook | Off | Not Offered | Not Offered |
Joined | Available | Off Hook | On | Not Offered | Offered |
Joined | Available | Off Hook | On | Not Offered | Offered |
Joined | Unavailable | Off Hook | Off | Not Offered | Not Offered |
Joined | Unavailable | On Hook | N/A | Not Offered | Offered |
Joined | Wrap-Up | On Hook | N/A | Not Offered | Offered |
Joined | Wrap-Up | Off Hook | Off | Not Offered | Not Offered |
Joined | Wrap-Up | Off Hook | On | Not Offered | Offered |
Joined | Sign Out | On Hook | N/A | Not Offered | Offered |
Not Joined | N/A | Off Hook | On | Not Offered | Offered |
Note: Activation of Call Waiting is not encouraged for any agents.
Supervisors #
Call Centre supervisors can be found under the “Users” tab. Supervisors are Horizon users who are responsible for call centres and agents who service those call centres. They can (optionally) act as agents as well. First of all the Horizon administrator has to assign supervisors to the call centre. Any user can be a supervisor.

Once the supervisors have been defined, then the administrator has to assign agents to specific supervisors. Each agent can have more than one supervisor.
 #
#
In order to perform the supervisor role the “Call Centre Supervisor Client” licence should be assigned to the user (Please refer to the Clients section for more information). Usually the supervisor who does not have the Horizon supervisor client is called a “team leader”.
The Supervisor’s functionality can be divided into 2 main types: queue monitoring functions and agent monitoring functions. Supervisors can manage queues and agents, can retrieve and reorder calls and also can barge-in to calls (only if they have the supervisor client) that are handled by agents.
The supervisor functionalities will be explained in detail in the “Clients” section.
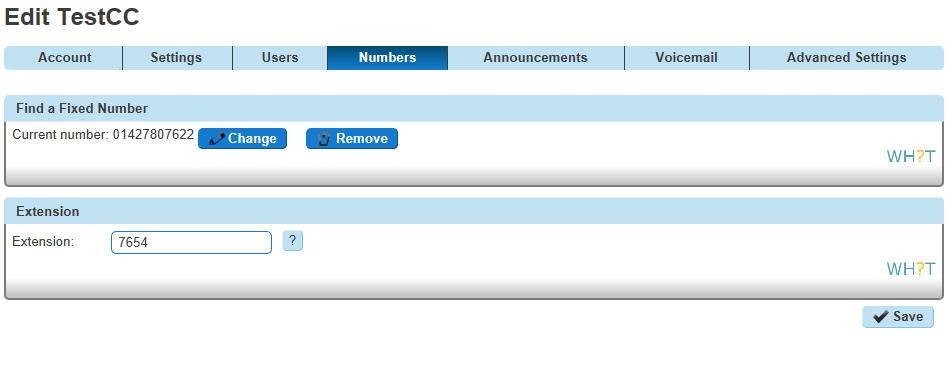
Numbers #
Under the “Numbers” tab the Horizon administrator will be able to change the extension number of the call centre, to assign a new DDI number or to remove the current one. All the available DDI numbers will appear on that list.
Announcements #
The announcements of the call centre can be found under the “Announcements” tab. When a call is received by the call centre, various audio announcements can be configured to be played to the caller.
 #
#
The administrator can customise the Call Centre voice prompts that are played to callers while waiting in the queue. There are 4 different announcement types:
- Entrance Message
- Estimated Wait Time
- Comfort Message
- Music on Hold Message
Entrance Message #
The entrance message is the first message played to the caller when their call reaches the call centre. The entrance message is optional. If the entrance message option is enabled, it is played under the following conditions:
- There are no agents available to accept the call -or-
- Agents are available, and the ‘Play ringing when offering’ call option is not enabled
Once the entrance message has finished playing, Music On Hold and comfort messaging are provided to the caller, if enabled. Below are the available options:
Announcements #
Default. Uses the pre-configured announcement
Custom (WAV file) – The administrator can upload up to 4 audio files
- Encoded with CCITT u-Law
- Formatted at 8000Khz sample rate
- 8-bit mono
- 7 kbps
- Maximum length is 625 seconds and size is 5MB
Entrance Message Settings #
Selecting ‘Entrance message is mandatory when played’ will mean every caller hears a message before being put through to an agent.
Estimated Wait Message #
The Estimated Wait Message (EWM) provides queue information to the caller. When a new call is added to the call queue, the EWM is played after the entrance message and before any other announcement. If the entrance message is disabled and the EWM is enabled, the EWM is played.
- Two types of estimated wait message can be used:
- Queue Position. This will let the caller know their position in the queue, and will count down until their call is answered.
- Wait time. This will give an estimated time until their call is answered.
Estimated Wait Message #
- This can be switched on or off. When the call centre is created, it is switched to off. This feature provides an option to enable playing the Estimated Wait Message periodically and there is a field to specify the message playing frequency in seconds. This field can be set between 10 and 600 seconds.
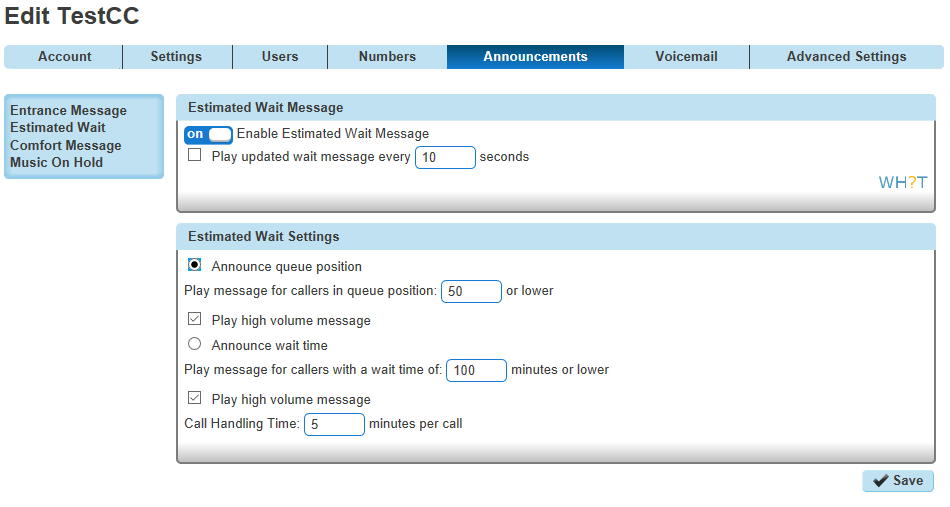
Estimated Wait Settings #
Announce queue position. If this is selected the next 2 settings are relevant.
Play message for callers in queue position: (1-100) (or lower)
Play high-volume message. This would be used to announce that the call centre is going through a busy period. This can only be switched on or off, there is no trigger for this to automatically be played.
- Announce wait time. This would be instead of queue position. The next 3 settings would be relevant.
- Play message for callers with a wait time of: (1-100) minutes or lower
- Play high volume message: This would be used to announce that the call centre is going through a busy period. This can only be switched on or off, there is no trigger for this to automatically be played.
- Default handling time: (1-100) minutes per call: This is the period of time measured to work out the estimated wait.
The following behaviours are applied for the Estimated Wait Message announcement and the service will operate to the below conditions:
- The Estimated Wait Message announcement is played periodically when the call is queued or when the call is bounced back to the queue because an agent is unavailable.
- The Estimated Wait Message announcement is played periodically at the specified interval.
- The estimated wait time or queue position is re-evaluated immediately before an announcement is played.
- The updated Estimated Wait Message announcement is not played when the queued call reaches the high volume threshold. The high volume announcement is played instead if enabled. Once the queued call transitions out of the high volume condition, the Estimated Wait Message announcement is played again.
- The updated Estimated Wait Message announcement is stopped when the agent is available, the call is offered to the agent, and the caller hears ring back (if play ringing when offering call is enabled). The updated Estimated Wait Message announcement is played again if the call bounces back to the queue.
- The updated Estimated Wait Message announcement is stopped when the overflow condition is met, such as when a call has been waiting in the queue longer than a configured threshold. The overflow announcement is played if configured.
- The updated Estimated Wait Message announcement is stopped when the caller terminates the call.
- The updated Estimated Wait Message announcement is not played if the Stranded Call policy chooses not to leave the call in the queue.
- The updated Estimated Wait Message announcement is played before or after the comfort message announcement if they conflict; however, it does not interrupt/replace the comfort message.
- The updated Estimated Wait Message announcement is played with music playing in between the announcements if Music On Hold is enabled.
- The updated Estimated Wait Message announcement is played with digit collection enabled to allow the caller to escape the queue by pressing a digit. For instance, pressing “0” when the EWM announcement is playing or during digit collection duration allows the call to exit the queue. Any other key pressed is ignored.
Comfort Message #
The comfort message is played to the caller after the entrance message (if configured to play). The comfort message keeps playing to the caller in a loop until the call is answered by an agent or until action is taken by a Call Centre policy (i.e. Overflow). The options are below.
Comfort Message #
Enable Comfort Message. Toggle on/off. When the Call Centre is created the “Comfort Message” announcement is enabled and the default audio is used.
Comfort Message Settings #
Time Between Messages: (10-600) seconds. Determines the gap between each comfort message.
Audio #
Default. Uses the pre-configured messages.
Custom (WAV file) – The administrator can upload up to 4 audio files
Music on Hold #
The Music-On-Hold (MOH) message is played after the entrance message (if configured to play) and before the comfort message, when configured. The MOH message keeps playing to the caller in a loop until the call is answered by an agent or until action is taken by a Call Centre policy (i.e. Overflow).
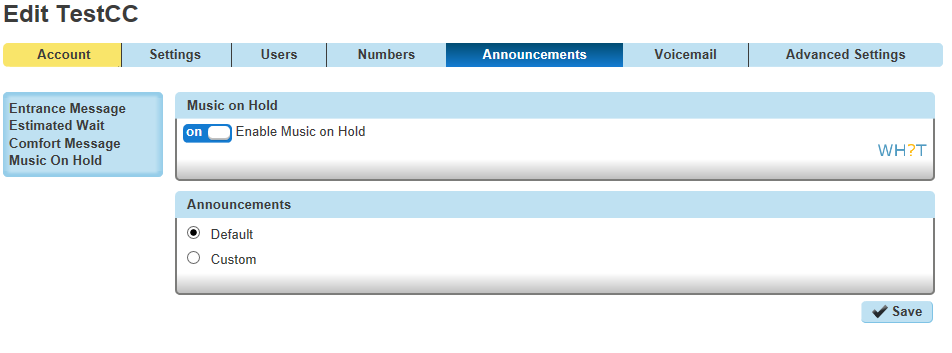
Music on Hold #
Enable music or video on hold for queued calls. When the call centre is created the “Music on Hold” is disabled.
Audio #
Default. Plays the default MOH
Custom (WAV file) – The administrator can upload up to 4 audio files
Call Recording #
The call recording feature can be found under the “Call Recording” tab. With this feature the administrator can record calls of the call centre, where the terminating calls are recorded. Recording starts when the call is accepted/answered.
It is possible that the customer will have Call Recording already enabled on Horizon. In this scenario, a separate call recording is made with one for the call centre and one for the user. Through the Horizon GUI the administrator can download the recorded files, which will be available for up to 6 months.
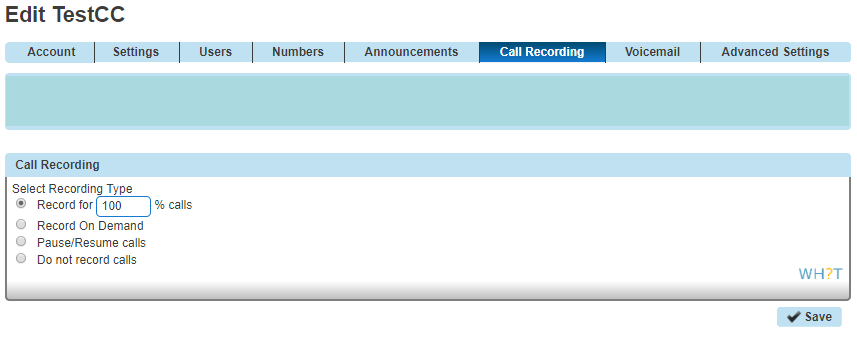
There are 4 call recording options that the administrator can select:
- Record for (1-100)% Calls
- Record on Demand
- Pause/Resume Calls
- Do not record Calls
Note: In order for the administrator to be able to enable the call recording feature, a DDI must be assigned to the Call Centre.
Voicemail Settings #
The voicemail feature can be found under the “Voicemail” tab. Once the administrator enables the Voice Mail, the “Voice Messaging User” licence will be assigned to the Call Centre.
The Administrator can customise the voicemail options (i.e. Announcements, Notification Settings and Voicemail Options) as shown below:
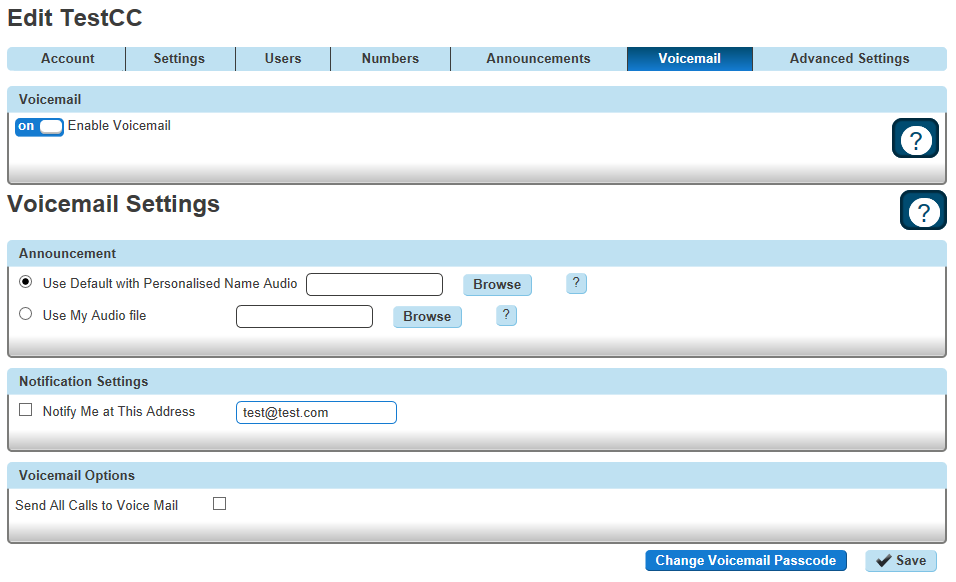
The administrator can select the “Send All Calls to Voice Mail” option if they would like to forward all the incoming calls to the voicemail. Also the administrator can select the default system message or they can upload their own message. Finally, an email with the voice mail can be sent to a specified email address as shown below if the “Notify me at this address” option is enabled with a valid email address:
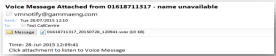
In order for the user to retrieve a voice message from the Call Centre they have to call the voice mail portal from their device and provide the Call Centre mailbox ID that has the message. The administrator can change the voicemail PIN by pressing the “Change Voicemail Passcode”
The voicemail feature is disabled by default.
Advanced Settings #
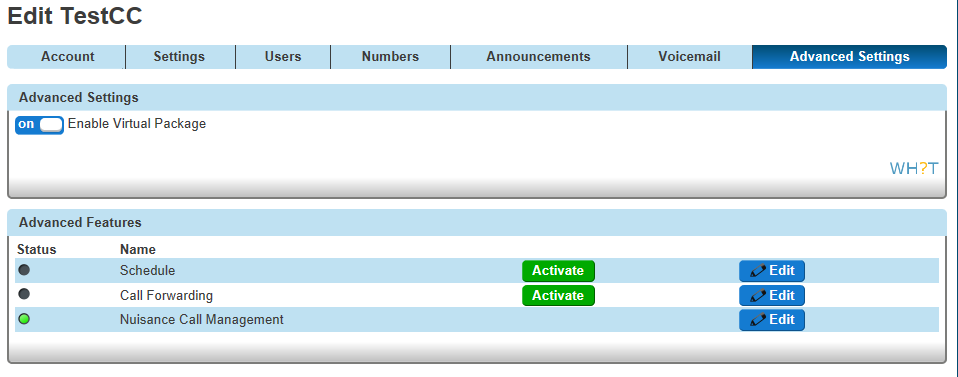
Once the administrator enables Virtual Package on the Advanced Settings, the following licences will be assigned to the call centre:
- Call Forwarding Always
- Call Forwarding Busy
- Call Forwarding Selective
- Anonymous Call Rejection
- Selective Call Rejection
On the advanced settings the administrator has two options. The first option is to Forward the calls based on a schedule (closed hours and/or Additional Routing) and the second option is to always forward all the calls to a specific number.
Note: Advanced Settings/Virtual Package is disabled by default.
Schedule #
On the schedule option the administrator has to define the number that the calls will be forwarded to, based on the schedule hours (Closed Hours and/or Additional Routing Schedule) as shown above.
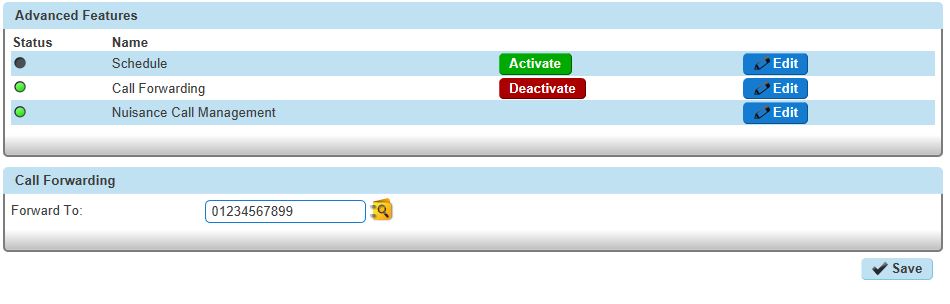
Call Forwarding #
In order for the administrator to activate the Call Forwarding they have to define the number where all the calls will always be forwarded to and then press the “Activate” button, as shown below:
Agent State Management on Horizon Portal #
The agents will have the option to change their status using the Horizon GUI. The agent state will be synchronised with the end devices (Cisco SPA504G and all Polycom VVX’s) and also with the Horizon Client (if applicable). Also the agents can Join/Unjoin specific Call Centres if the “Allow agents to join Call Centres” option is enabled by the administrator for a specific Call Centre.
Call Centre Settings #
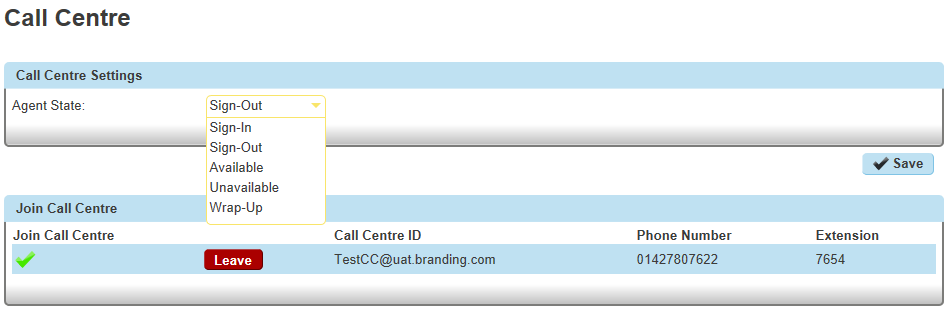
The Agent State can be set here. 5 options are available:
- Sign In
- Sign Out
- Available
- Unavailable (with codes)
- Wrap Up
Join Call Centre #
If the administrator enables the “Allow agents to join Call Centres” on the Agent Settings then the end-user has the option to select if they would like to join a specific Call Centre. If this option is not enabled then the agent will be always joined to the call centre.

In order for the agent to manually join a call centre, they have to press the “Join” button.
To leave the call centre press the “Leave” button as shown above:
Later in the document, within the Agents section, a table is displayed explaining when an agent will/will not receive calls based on different scenarios.
Handsets #

The Horizon Call Centre is compatible with the handsets below. This means only users that have been associated with these devices will be able to act as agents and/or supervisors within the Call Centre
- Cisco SPA 504G
- Polycom VVX310
- Polycom VVX410
- Polycom VVX500
- Polycom VVX600
Once a user is assigned the call centre agent license, the phone will restart and the following options will appear.
Cisco SPA504G #
When the user is not logged in then the “login” soft key will appear in position 10. If they press this once, they will log in.
Once logged in, then the “logout” and “agents” soft keys will appear in positions 11 and 12 respectively.
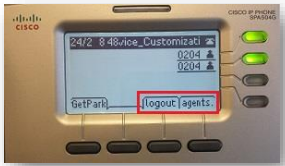
By pressing the “agents” soft key the user will be able to manage his state (Available, Unavailable, Wrap-up).
The users will be able to change the soft keys position through the device customisation page.
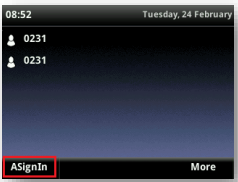
Polycom VVX’s #
When the user is not logged in then the “ASignIn” soft key will appear in the last position (or first available position) automatically.
Press “ASignIn” to log in as an agent.
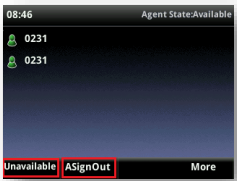
If the user is logged in then the “Unavailable” and “ASignOut” soft keys will appear in the last (or first available) positions.
Wrap Up #
In order to change the agent state to Wrap-up on a Polycom VVX device you have to go to the main menu
- Settings
- Features
- ACD
- ACD Agent State
The soft keys position cannot be altered on the VVX range.
Hoteling (Guest In) #
If the ACD and hoteling features are enabled to the end devices, then both functions can be used under the “ASignin” soft key.
ACD
- To use the ACD (VVX310 and VVX410): Press “ASignIn” -> More -> UseHost
- To use the ACD (VVX500 and VVX600): Press “ASignIn” -> UseHost
Hoteling
- To use the hoteling (VVX310 and VVX410): Press “ASignIn”, define the User ID (extension number) and password (voicemail passcode) -> More -> OK
- To use the hoteling (VVX500 and VVX600): Press “ASignIn”, define the User ID (extension number) and password (voicemail passcode) -> OK
Clients #
In this section the process to Assign/Un-assign the client agent and client supervisor licenses will be described. Assigning one of these licences to the user means that they can use the Call Centre Client (Application).
The clients themselves will also be described in detail.
Assign Agent Client Licence #
On the service page of the Horizon GUI the administrator can enable the Agent Client Licence to a specific user as shown below:
Assign Supervisor Client Licence #
The administrator can enable the Supervisor Client Licence from the services tab on Horizon GUI for a specific user as shown below:
Login Credentials for Call Centre #
When the administrator enables one of the above licences, the user will receive 2 emails.
The first email will contain
Username (i.e. Cisco_DC_504@eng.lab1)
Call Centre Client URL (https://clients.unlimitedhorizon.co.uk/callcentre/). Both clients are available via the web browser and there is no need to download any program on the PC.
The second email will contain
Client password (i.e. 784a646e-991a-4174-b830-5d2cefe3e29c).
The login credentials for the Call Centre Client are always the same as the other soft clients, Receptionist and Integrator. If the user already has one of the other clients, then they will receive only one email that will contain the Call Centre Client URL.
Horizon Call Centre Clients #
Sign In #
Go to the URL on the email provided. Enter the login credentials and press the “Sign In” button.
Sign Out #
To sign out of the Call Centre, click Sign Out at the top right-hand side of the main interface.
 #
#
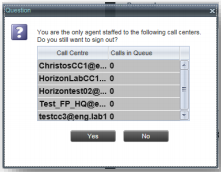
If you are the last agent to sign out of a call centre, a message appears, providing the details of queues in which you are the last agent to sign out and asking you to confirm that you want to sign out.
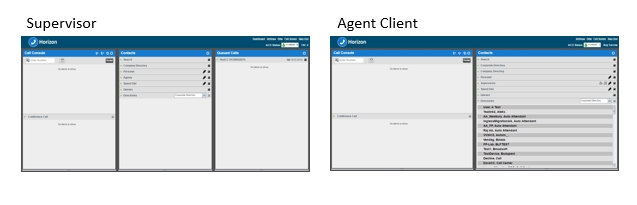
Call Centre Workspace (Agent & Supervisor) #
When you sign into Call Centre, the main page appears where you perform most call tasks. In addition, the main page provides links to other pages and windows of Call Centre, where you perform functions such as configuration settings.
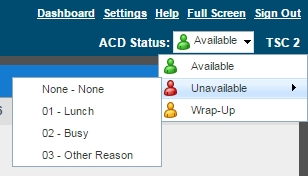
Change Your ACD State (Agents) #
At the at the top right-hand side of the main window, click the ACD states box and select your ACD state from the drop-down list.
 #
#
If you selected Unavailable and your company requires you to provide a reason for your unavailability, select an Unavailable Code from the drop-down list as shown below:
Call Console #
You can use the Call Console to view and manage your current calls. Conference calls can also be managed here:
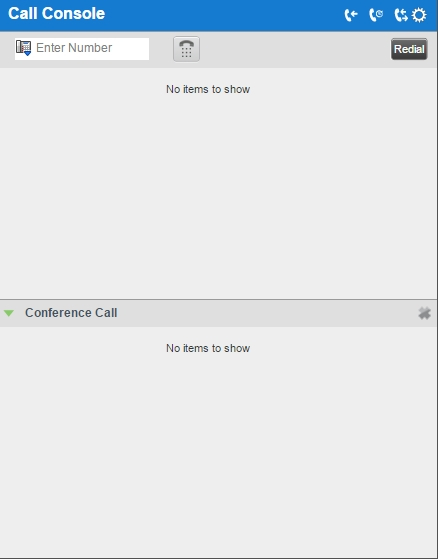
The table below provides the actions available to manage the calls:
Function | Steps |
Answer Incoming Call | In the Call Console, click Answer for the target call |
Turn Auto Answer On/Off | In the Call Console, click Auto Answer |
Place Call on Hold | In the Call Console, move the mouse over the call and click Hold. |
Resume Held Call | In the Call Console, move the mouse over the call and click “ANS” to resume the call. |
Blind Transfer Call | Drag the call onto the target contact and click Transfer for that contact. Alternatively, enter the target number in the Dialler and click Transfer on the Dialler. |
Transfer with Consultation (Attendant) | While on the call, enter a number in the Dialler or select a contact in the Contacts pane and click Dial. When the new call is connected, consult with the party. When ready to transfer, select the original call. Move the mouse over the new call that is not selected call and click Transfer. |
Transfer to Queue | Drag the call onto the target queue in the Queues panel and click Transfer for that queue. |
Make Emergency Call to Available Supervisor | Drag the call to escalate onto an available supervisor in the Supervisors panel and click Emergency for that supervisor. |
Blind Escalate Call | In the Call Console, select the call to escalate. In the Supervisors panel, click Escalate or click an available supervisor and click Escalate for that supervisor. In the Call Console, move the mouse over the call to the supervisor and click Transfer before the supervisor answers the call. |
Escalate with Consultation | In the Call Console, select the call to escalate. In the Supervisors panel, click Escalate or click an available supervisor and click Escalate for that supervisor. Consult with the supervisor. When ready to transfer, in the Call Console, move the mouse over the call to the supervisor and click Transfer. |
Escalate with Conference | In the Call Console, select the call to escalate. In the Supervisors panel, click Escalate or click an available supervisor and click Escalate for that supervisor. In the Call Console, move the mouse over the new call and click Conference. |
Start Three-Way Conference | In the Call Console, select a call. Move the mouse over a call that is not selected and click Conference. |
Add Participant to Conference | In the Call Console, move the mouse over a call and click Conference. |
Hold Conference | In the Conference Call panel, click Hold. |
Resume Conference | In the Conference Call panel, click “ANS” to Resume. |
Hold Conference Participant | In the Conference Call panel, select the call to put on hold and click Hold for that call. |
Take Conference Participant Off Hold | In the Conference Call panel, select a held call and click “ANS” to Resume that call. |
Leave Conference | In the Conference Call panel, click Leave Conference. |
End Participant | In the Conference Call panel, select the target call and click End. |
End Conference | In the Conference Call panel, click End Conference. |
Dial a Number | In the Dialler, enter the number to call and click Dial. |
Re-dial Recent Number | In the Dialler, click Redial and select a number from the list. |
Dial Recent Number | In the Dialler, start entering the number to dial. A list of numbers starting with the entered digits appears. Select a number from the list and click Dial. |
Dial Contact | In the Contacts panel, click the contact and then click Call for that contact. |
Dial from History | In the Call Console, click the Call History button. Select Missed calls, Received calls, or Dialled calls from the drop-down list. In the Call History dialog box, move the mouse over a call log and click Call. |
Dial from Search | In the Search panel, select a contact and click Call. |
Header Bar #

From the header bar the agent can :
- Enable / disable the “Auto Answer”
- Enable / disable the call waiting
- View the call history.
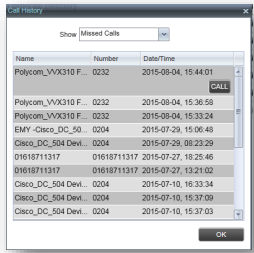
When the Call History button is pressed, the “Call History” window will appear. Each call log is displayed on a separate line. Call logs are grouped in three categories:
- Missed calls
- Received calls
- Placed calls.
The following information is displayed for each call log:
The name or phone number of the remote party
The date and time when the call was initiated
When you click a call log, the Call Action button appears, allowing you to place a call to the remote party.
Dialler #
![]() The Dialler, located at the top of the Call Console, below the header bar, allows you to make a call
The Dialler, located at the top of the Call Console, below the header bar, allows you to make a call
To call type a number in the white box, then press the handset key to the right.
Current Calls #
The Call Console displays your current calls, both direct and ACD, and allows you to perform actions on them.
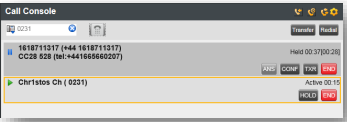
Direct calls are placed from, or received on, your own phone number.
ACD calls are calls routed to you from a call centre that you are staffing as an agent.
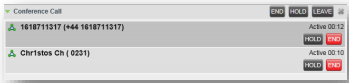
Conference Call #
The Conference Call panel displays your current conference and allows you to manage your conference calls as shown below:
 #
#
This panel will list the participants, as well as the ability to:
- End the conference Call
- Place the conference call on hold
- Leave the conference call
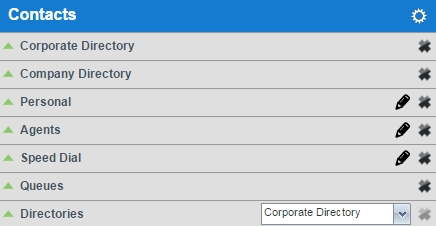
Contacts Panel #
The Contacts panel contains your contact directories and allows you to use these contacts to make or manage calls.
 #
#
Each option is listed in more detail below:
Search #
You can use the Search panel to look for specific contacts in your contact directories. Once you search for a contact you will be able to see all available information for this contact and also the actions that you can do (i.e. to call this contact) as shown below:

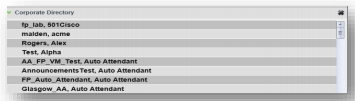
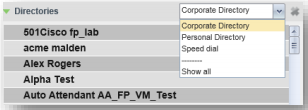
Corporate Directory #
The corporate directory shows all the users that are on the enterprise directory as shown below:
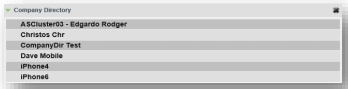
Company Directory #
The company directory contains all the external numbers that have been added by the Horizon administrator:
Personal Contacts #
The personal directory contains the contacts that you added via the Horizon GUI. Also you can edit your personal contacts through the client.

Supervisors Panel (For Agent client) #
The Supervisors panel, available to agents, contains the list of your supervisors. The main purpose of this directory is to allow you to contact a supervisor quickly.

The agent will be able to check the status of the supervisor (i.e. if he is available or busy), as the selected supervisors have their call status displayed. Supervisors who are not monitored have their state set to “Unknown”.
Call Centre client allows you to monitor the phone state of selected supervisors (up to 50). This is useful when you are escalating a call and want to find a supervisor who is available to take a call quickly.
The list of selected supervisors is saved when signing out as part of your workspace and is restored on subsequent logins.
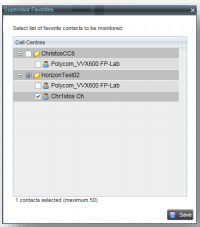
In order to select the supervisors to monitor, click “Edit” and the supervisor favourites box will appear. Then check the box for the supervisor that you would like to monitor and press “Save”.
Agents Panel (For Supervisor client) #
The Agents panel is used by supervisors to monitor, manage and perform actions to agents under their supervision.
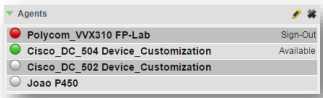
Call Centre client allows you to monitor the call and the ACD state of selected agents, but agents are not automatically monitored. To monitor the state of an agent, you must select the agent.
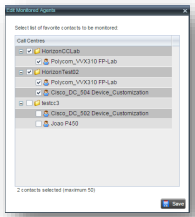
In order to select the agents to monitor, click “Edit” and the “Edit Monitored Agents” box will appear. Then check the box for the agent that you would like to monitor and press “Save”.
If an agent is staffing multiple call centres, by selecting that agent for monitoring in one call centre, you are also selecting them for monitoring under all call centres that they are staffing.
Monitored agents have their phone and ACD state displayed. A single icon, to the left of the agent’s name, represents the agent’s combined phone and ACD state, which indicates the agent’s ability to take calls. In addition, the agent’s ACD state is also displayed in text following their name. If the agent’s ACD state is set to “Unavailable”, the unavailable code is also displayed (if applicable). The state of agents who are not monitored appears as unknown (dimmed).
The possible agent’s phone and ACD states are as follows:
Phone State | ACD State | Icon | Description |
Idle | Available | 
| Agent’s phone is on-hook and the agent is available to take ACD calls. |
Idle | Available | 
| Agent’s phone is on-hook and the agent is available to take ACD calls. |
Ringing | Available | 
| Agent’s phone is ringing and the agent is available to take the call. |
Any | Unavailable Sign-In, Sign-Out | Agent is not available to take ACD calls | |
Idle | Wrap-Up | 
| Agent is performing post call work |
Busy | Available | 
| Agent’s phone is off-hook, which means that the agent is on a call. Calls may be delivered to agents depending on their call waiting settings and the call centre’s call waiting |
Do Not Disturb | Any | 
| Agent has enabled the Do Not Disturb service. ACD calls are not delivered to agents in the Do Not Disturb call state. This state is not recommended for Call Centre agents. Agents should use the Unavailable ACD state when they need to block new incoming calls temporarily. This state is not recommended for Call Centre agents. Agents should use the Unavailable ACD state when they need to block new incoming calls temporarily. |
Call Forwarding Always | Any | 
| Agent has enabled the Call Forwarding Always service. |
Agent details #
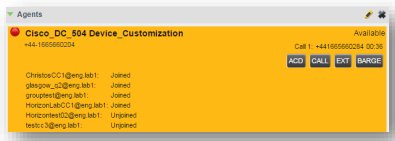
Clicking an agent expands the entry to show all joined queues and all the agent’s current calls, in order of arrival. For each call, the following information is displayed:
- Call number
- Calling name (if available) and calling number
- Call Length (i.e. 00:36)
Change Agent ACD state #
You can force an ACD state change for an agent. This action can only be performed on monitored agents. In order to change the ACD state you have to press the “ACD” button and from the drop-down list you can select the new state. If you select Unavailable, you may have to select the reason for their unavailability.
Barge-In on Agent’s Call #
Supervisor Barge-In allows you to barge in on an agent’s call. This is useful when you want to enter an already established call between two other people. You can only barge in on agents who you selected for phone and ACD state monitoring.
In order to Barge-In on an agent’s call you have to expand the Agents panel and select the agent. Then press the “BARGE” button to Barge-In. A Three-Way Conference is established.
When a Supervisor barges into a call there will be an audible tone that both Supervisor and Agent will hear to signify that the Supervisor is entering the call. The Supervisor can switch this on or off using their settings on the Supervisor client.
Pick-Up Agent’s Ringing Call #
Call Pickup allows you to pick up an unanswered call on behalf of an agent. This is useful when the agent is away or busy.
In order to pick-up an agent’s call you have to select the agent’s panel and then press the “ANS” button.
Speed Dial Panel #
The Speed Dial panel allows you to manage your Speed Dial 8 and Speed Dial 100 contacts. For each configured speed dial number, Call Centre displays the speed dial code and description. The description is what you entered when configuring the number. The speed dials configuration is synchronised with Horizon GUI.

In order to create/modify/delete a speed dial, click “Edit” and the “Edit Speed Dials” box will appear.
Add Speed Dial. Click the “Add” button. A new line is added below the existing entries (if any), allowing you to define a new entry. From the Code drop-down list, select a speed dial code. In the Phone Number text box, enter the phone number to assign to the code. In the Description text box, enter a description that allows you to identify the entry. To save the changes, click anywhere in the dialog box outside the entry.
Modify Speed Dial. Double-click the entry to modify in order to become modifiable. Then modify information as you want. To save the changes, click anywhere in the dialog box outside the entry.
Delete Speed Dial. Select the entry to delete and click the “Delete” button.
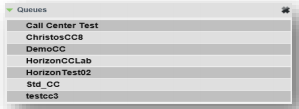
Queues Panel #
The Queues panel is available to both agents and supervisors. It lists the call centres you are staffing as an agent or monitoring as a supervisor and the associated DDI number. The primary purpose of this panel is to provide you with a quick way to transfer calls to queues.
Directories Panel #
The Directories panel consolidates the contacts from the following directories: Corporate, Personal, and Speed Dial. This panel is always visible. You can choose which directories to display in the Directories panel and you can collapse the panel, but you cannot close it.
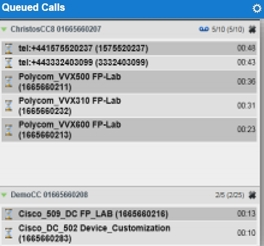
Queued Calls Panel (Supervisors) #
Call Centre allows you to manage queued calls in the selected call centres (up to five) and to monitor calls in real time. You use the Queued Calls panel to manage queued calls under your supervision. The Queued Calls panel displays the monitored call centres and lists the calls queued in each call centre.
 #
#
Each call centre is displayed in a separate panel. The panel’s header provides the following information and controls:
- Call centre name: The name of the call centre.
- Call centre number; The primary phone number of the call centre (if there is no full DDI number, then the extension number will appear)
-
Message Waiting icon (
 ): This icon is displayed if there is one or more outstanding voice messages left in the call centre’s voice mailbox. This icon performs the role of a message waiting indicator for the call centre.
Ratio of queued calls to queue length: This is the number of calls in the queue against the queue length that is displayed.
When you expand the panel for a call centre, the list of calls queued in that call centre appears. By default, calls are listed according to their position in the queue, with the oldest call first.
- The following information is provided for the state of the queued call:
- Call Status icon: A graphic representation of the state of the queued call:
-
Waiting (
 ): The call is queued, waiting to be answered.
-
Reordered (
 ): The position of the call in the queue has been changed.
-
Bounced (
 ): The call has been bounced.
- Call ID display: The destination name (or number, if the name is not available), that is, the name/number of the call centre (full DDI number- if applicable) that was called.
- Call time: The total call time, including the time in the current queue (in parentheses).
- Position: The position of the call in the queue.
- Name (if available) and phone number of the calling party.
When the call is expanded, the action buttons for actions that can be performed on the call appear.
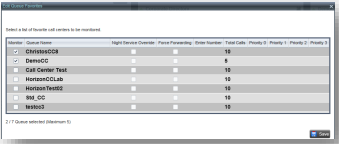
Select Call Centre to monitor #
You can select up to five call centres to monitor in the Queued Calls panel. To select call centres to monitor in the Queued Calls panel press the options (
![]() ) and select “Edit Queue Favourite Dialog”. The Edit Queue Favourites dialog box will appear where you can select the “Monitor” check boxes in the rows of the call centres to monitor.
) and select “Edit Queue Favourite Dialog”. The Edit Queue Favourites dialog box will appear where you can select the “Monitor” check boxes in the rows of the call centres to monitor.
View Queued Calls #
You can selectively expand or collapse call centre panels to show or hide calls in the monitored call centres. To view queued calls for a call centre click the expand (
![]() ) button for that call centre.
) button for that call centre.
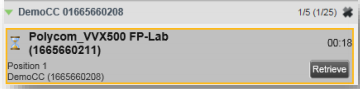
Retrieve Call from Queue #
To retrieve a call from a queue, click the call in the “Queued Calls” panel and click “Retrieve”
(
![]() ) for that call. Once you retrieve a call, the call appears in the Call Console and you treat it as any other call.
) for that call. Once you retrieve a call, the call appears in the Call Console and you treat it as any other call.
Transfer Call from Queue to Agent #
To transfer a call from a queue to an agent, select the call to transfer. In the Contacts panel, expand the agents panel, click the target agent and then click Transfer (
![]() ) for that agent. The call will be transferred and removed from the queue.
) for that agent. The call will be transferred and removed from the queue.
Transfer Call to Another Queue #
To transfer a queued call to another queue, select the call to transfer. In the Contacts panel, expand the Queues panel. Then click the target queue and click Transfer (
![]() ) for that call.
) for that call.
Transfer to a device #
To transfer a call to another number, in the Queued Calls panel, select the queued call. Then in the Dialler, enter the destination number and click Transfer. The call is transferred and removed from the queue.

Change Position of Call in Queue #
To change a call’s position in a queue, in the Queued panel select the target call to expand it. Click Reorder (
![]() ) and select the new position in the queue from the list that appears. The call will be placed in the new position.
) and select the new position in the queue from the list that appears. The call will be placed in the new position.
Note: You cannot place a call ahead of a bounced call.
Controls #
Call Centre controls are designed in a contextual manner, that is, most controls appear only when the action they represent can be taken. For example, when you enter a number or select a contact, a Dial button appears, allowing you to place a call. The contextual controls that correspond to call operations such as dialling, transferring calls, or putting calls on hold are called action buttons. They appear on the Dialler, in a call entry, in a directory entry (contact), in a call log, or on a queued call (Supervisors).
The following table lists the general controls used in Call Centre and the controls displayed on the headers.
Icon | Name | Description |
Common Controls | ||

| Options | This is located in the upper-right corner of a panel or page. When clicked, it displays a drop-down menu of options that control the display of information in that pane/page. The available options depend |

| Expand/Collapse | This shows or hides the contents of a window or panel. |

| Close | This closes an interface element, such as window, pane, or panel. |

| Edit | This allows you to edit a list of items, such as agents to monitor or speed dials. |
Dialler, Call Console, Directories Panel and Sea | ||

| ACD | This displays your current ACD state and allows you to change it. |

| Auto Answer | This allows you to turn Auto Answering on or off. |

| Call Waiting | This allows you to turn Call Waiting on or off. It is available only if you have been assigned the Call Waiting service. |

| Call History | This displays Call History. |

| End Conference | This ends a conference call. |

| Leave Conference | This disconnects you from the conference while allowing other participants to continue the call. |

| Hold Conference | This holds the conference call. |

| Resume Conference | This resumes a held conference. |

| Barge In | The supervisor can Barge-in to Agent’s call. This establishing a Three-Way Conference. |

| Emergency | This makes an emergency call to a supervisor. |

| Escalate | This escalates a call to a supervisor. |
Call Action Buttons #
Action buttons allow you to perform actions on calls, such as answering or transferring a call, or actions that result in a call being placed, such as dialling a number or contact. They appear on the Dialler, on a call line, in a call history log, in a directory entry, or (for supervisors) in a queued call entry.
Action buttons are contextual, that is, they appear on a line/entry when the corresponding action can be performed on that entry. For example, when you click a contact in the “Corporate directory”, the contact expands and the Call and Extension buttons appear on the line for that contact, allowing you to call the contact. The following table lists the action buttons available in Call Centre.
Icon | Name | Description |

| Dial | This dials the number you entered in the Dialler. |

| Call | This places a call to the selected contact or to a number from Call History. |

| Redial | This redials the last dialled number |

| Extension | This dials the contact’s extension. |

| Mobile | This dials the contact’s mobile number. |

| Transfer | This transfers a call to a number that has been entered in the Dialler. |

| Transfer | This transfers a call to a selected number or contact. |

| Answer | This answers an incoming call, answers an unanswered call for a contact, or resumes a held call. |

| Hold | This places a call on hold. |

| End | This ends a call. |

| Conference | This establishes a conference call or adds a call to a conference. |

| Escalate Call | This escalates a call to a selected supervisor. |

| Emergency Call | This places an emergency call to a selected supervisor. |
For Supervisors Only | ||

| ACD State | This allows the supervisor to change a selected agent’s ACD state. |

| Barge In | This allows the supervisor to barge in on an agent’s call, by establishing a Three-Way Call between the supervisor and the two parties involved in the call. |

| Answer | This answers an unanswered call for a monitored agent. |

| Retrieve | This retrieves a call from the queue to the supervisor’s device. When a call is manually retrieved via this action, the call is reported as an Incoming call rather than an ACD call. |

| Reorder | This changes a call’s position in the queue. |
Real-Time Statistics (Supervisor Dashboard) #
Call Centre provides you with real-time information about supervised agents and queues.
This information is displayed in the Dashboard. To access the Dashboard, click the “Dashboard” link at the top right-hand side of the main interface window. The Dashboard is launched in a separate window and can be opened at the same time as other Call Centre windows.
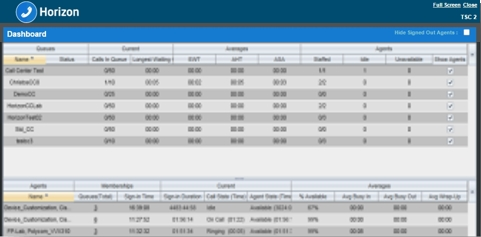
The Dashboard is designed to be used together with the Queued Calls panel and the Agents panel in the Contacts panel. The Dashboard provides you with a real-time view of agents and queues, while the Agents panel and Queued Calls panel allow you to take actions on monitored agents and ACD calls.
The Dashboard is divided into two parts with queue information in the top half and agent information in the bottom half. The information is updated in real time. By default, information about agents is hidden. To view agents staffing a call centre, check the “Show Agents” check box in the row for that call centre.
Queue Information #
The Dashboard displays each call centre queue on a separate line and provides the following information about each queue:
- Name: This is the name of the call centre to which the queue belongs.
- Status (Not Available in this version)
- Calls in Queue: This is the number of queued calls expressed as a ratio of the total queue capacity for that call centre. For example, “6/10” means that there are six calls in the queue, which can queue a maximum of ten calls.
- Long Waiting Call: This is the waiting time of the call that has been in the queue the longest.
- EWT (Expected Waiting Time): This is the expected waiting time of calls in the queue.
- AHT (Average Handle Time): This is the average handling time for calls in the queue.
- ASA (Average Speed of Answer): This is the average amount of time a caller spends in the queue before the call is offered to an agent.
- Staffed (Agents): This is the number of agents managed by you that are in Sign-In, Available, Unavailable, or Wrap-Up ACD state, as a ratio of all agents managed by you for this call centre.
- Idle (Agents): This is the number of agents who are in the Available ACD state but presently not on a call.
- Unavailable: This is the number of agents who are signed in to the call centre but not available to take calls.
- Show Agents: When this check box is selected, the agents who are joined in the call centre are displayed in the Agents area of the Dashboard.
Agent Information #
The Dashboard displays information about the agents for the selected queues. You select the queues for which you want to view agents’ information by checking the Show Agents box on the lines for the queues in the Queues area of the Dashboard. The following information is provided for each displayed agent:
- Name: This is the agent’s name.
- Queues (total): This is the total number of queues to which the agent is assigned. This number is a link, which when clicked, opens a dialog box that lists the agent’s queues.
- Sign-In Time: This is the agent’s most recent sign-in time.
- Sign-In Duration: This is the amount of time that the agent has been signed in.
- Call State (Time): This is the call state and time on the current call. The call state can be Idle, Ringing, or On a call. If an agent is in multiple calls, the call time reflects the time of the longest running call. When a call is released, then the call time reflects the time on the remaining calls.
- Agent State (Time): This is the agent ACD state and time. If an agent is unavailable, the unavailable code is shown.
- % Available: This is the time that the agent was available to take calls shown as a percentage of the duration of the current sign-in.
- Avg Busy In: This is the average time spent by the agent on an incoming ACD call.
- Avg Busy Out: This is the average time spent by the agent on an outgoing ACD call.
- Avg Wrap-Up: This is the average time spent by the agent in a post call wrap-up.
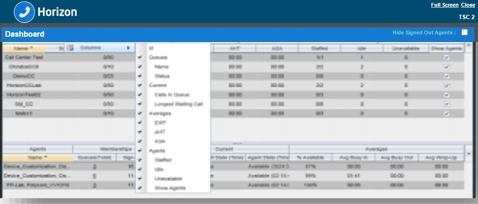
Display Information #
By default, Call Centre displays information about call centres and agents as it has been described above. However, you may modify what information you want to appear in the Dashboard. To select information to display, right-click the first row in the queued calls or agents table. Then from the menu that appears, select “Columns”. From the list of available columns, uncheck the columns you want to hide and check the columns you want to be visible. When you are done, click anywhere in the Dashboard outside the menu.
Configure Call Centre client settings #
You can use the Settings page, accessed via the “Settings” link at the top right-hand side of the main page to configure various aspects of the Call Centre application. To return to the main interface, click the “Back To Application” link.
Do not use the internet browser’s back button to return to the main interface.
General Settings #
You use the General tab to configure miscellaneous settings that improve the usability of Call Centre.
Workspace:
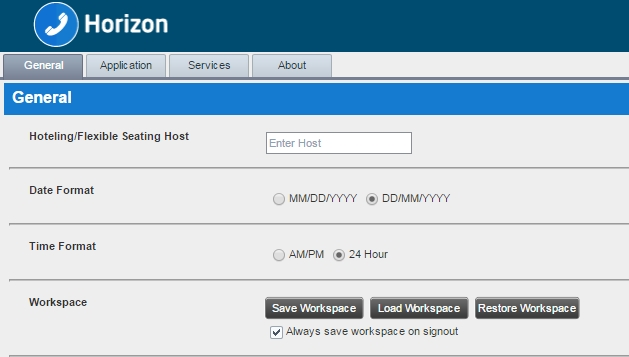
Call Centre allows you to customise elements of your workspace, such as the size and placement of windows on the desktop. The system remembers the setup between sessions.
- Save Workspace: This button, when clicked, saves the current workspace.
- Load Workspace: This button, when clicked, arranges your workspace according to the last saved configuration.
- Restore Workspace: This button, when clicked, restores the workspace to the system default configuration.
Always save workspace on sign out. When you sign out from the client, Call Centre asks you whether you want to save your current workspace. To save your workspace automatically when signing out, without being asked, check the Always save workspace on sign out box.
To customise your workspace:
- Arrange the windows the way you like.
- Click the Save Workspace button to save the current configuration. To restore the system default, click Restore Workspace.
- At any time to return to the last saved configuration, click the Load Workspace button.
This functionality does not work in Internet Explorer, due to a technical limitation of Internet Explorer.
The Hotel Guest feature is disabled (it can’t be hidden) and cannot be used.
Application Settings #
You can use the Application tab to configure your application settings. The settings are different for agents and supervisors.
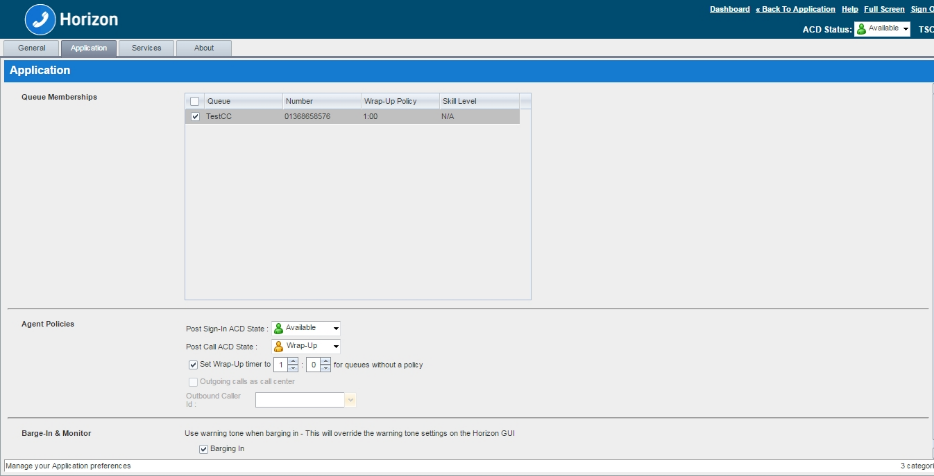
Queue Memberships (Agent) #
These settings allow you to select the call centre queues you wish to join.
To join a call centre queue, select the check box on the line for the call centre.
To join all queues, select the check box in the header.
Note: If you are not allowed to join/leave a queue, the line for the queue is dimmed and you can only view your join status in the queue.
Agent Policies (Agent) #
You use agent policies settings to specify your post sign-in ACD state, post call ACD state, wrap-up timer.
- Post Sign-In ACD State – To configure your post sign-in ACD state, select a state from the Sign-In State drop-down list. Your ACD state is automatically set to the selected state when you sign in to Call Centre. (If you selected Unavailable and unavailable codes are enabled for your organization, select an unavailable code from the drop-down menu).
- Post Call ACD State – To configure your post call ACD state, that is your ACD state upon completion of a call, select a state from the Post Call State list. (If you selected Unavailable and unavailable codes are enabled for your organization, select an unavailable code from the drop-down menu. In most cases, when you select Wrap-Up, you must also configure your wrap-up timer).
- Set Wrap-Up Timer to – To set your post call wrap-up timer, check the Set Wrap-Up Timer to <mm:ss> for queues without a policy and enter the time in minutes and seconds. Your ACD state automatically changes from Wrap-Up to Available after the specified period of time.
Note: Your post call wrap-up timer setting may be overridden if your administrator sets the timer to a smaller value on Horizon (relevant parameter: “Enable Maximum ACD Wrap-up timer: X Seconds”).
Users will not be able to enable the Outgoing Calls as call centre option to define an outbound caller ID.
Barge-In (Supervisor) #
The supervisors (with a supervisor client licence) will be able to barge-in to agent’s calls.
The supervisors can select whether they want a warning tone to be played to the agent while they Barge-in or not.
![]()
Barging In –When this option is set, the agent hears a warning tone when you barge in on their call.
Note: Users will not be able to make any changes to the ‘Monitor’ option in this call centre version
Service Settings #
From the settings tab the DND (Do not Disturb) and Call Forwarding Always features can be activated/deactivated.
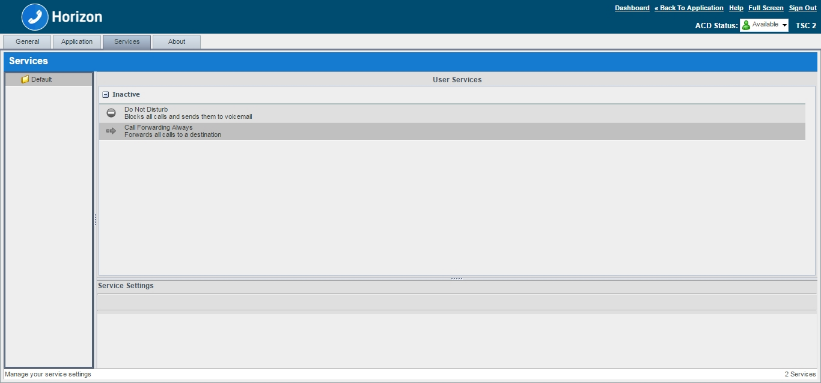
Below are the available options:
- Do Not Disturb: When you activate this service, you are not available to take calls.
- Call Forwarding Always: When you activate this service, you must provide the phone number to forward your calls to. When the service is active, all your calls are forwarded to the specified number.
To activate a service:
- Select the service and check the “Active” box. The service is moved from the Inactive to Active category.
- If you enabled the Call Forwarding Always service, in the “Forward To” box that appears, enter the number to forward your calls to.
- To generate a ring splash for incoming calls, check the “Ring Splash” option.
- To save your changes, click “Save”.
Tip: If you receive any error message because of the java settings on your PC, an easy way to create a shortcut on your desktop is to drag and drop the Call Centre favicon from the web browser to your desktop.
About Settings #
You can use the “About” tab to view the information about Call Centre.
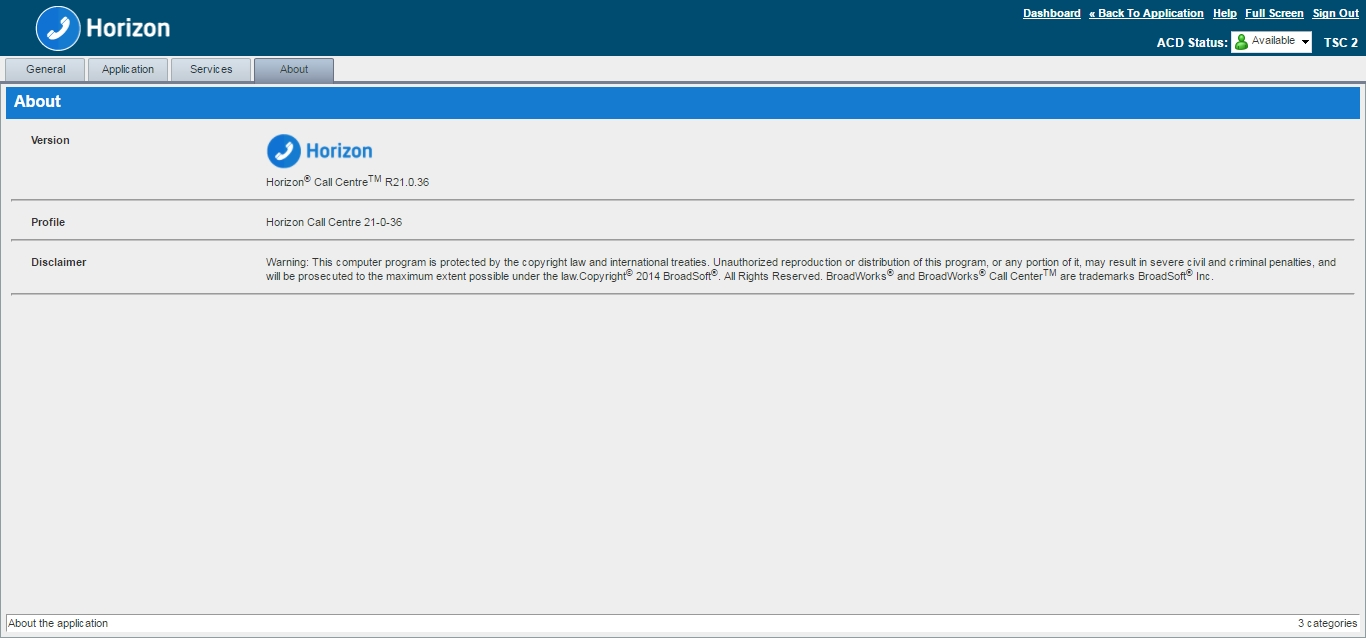
The following information is provided on this page:
- Version – This is the name and software version of Horizon Call Centre client.
- Profile – This is the Call Centre client profile used.
- Disclaimer – This is the Call Centre copyright information.
Horizon PC Client #
Queues (Call Centre & Call Queue Groups) #
The PC Client can be used with Call Queue Groups and Call Centre on Horizon (the corresponding agent licence is required for each). The queues menu can be accessed from the settings options at the bottom right of the client. Once selected the following options are available for an agent:
Sign In/Out #
- Sign-In: Agent can sign in to the call centre.
- Sign-Out: Sign out of the call centre
Agent Status #
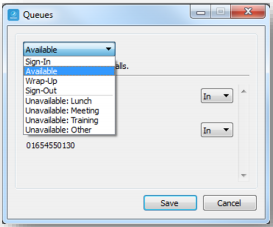 #
#
An agent can also change their status:
- Available – Calls will be routed to the agent
- Wrap Up – Calls will not be routed to the agent for a period of time set by the administrator. Once this time has expired, the agent will change to available.
- Unavailable – Calls will not be routed to the Agent
Unavailable Codes #
In the example above right, the administrator has switched unavailable codes on and pre-set some options. When the agent selects unavailable, they will now have to choose a reason for the change.
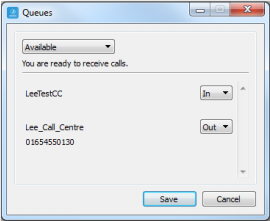
Log in and Out of Queues #
If the administrator has set “Allow Agents to Join Call Centres” in the Horizon GUI, then the PC Client can be used by the agent to select which call centres/queues groups they want to join.
In the example below, this agent is a member of “LeeTestCC” but has not joined “Lee_Call_Centre”. Only calls for “LeeTestCC” will be routed to this agent, assuming their status was available.
Internet Explorer Settings for Full Screen Mode #
The following instructions provide set-up guidance on how to use the Call Centre and Receptionist client on Full Screen mode via Internet Explorer.
Internet Explorer must be configured as follows to enable the Full Screen link in Receptionist. Otherwise, the link has no effect; Receptionist is not displayed in full-screen mode when the Full Screen link is clicked and no error message is displayed to the user.
- On the Internet Explorer Menu bar, select the Tools menu and then click Internet Options.
- In the Internet Options dialog box, click the Security tab and then click the Custom level… button.
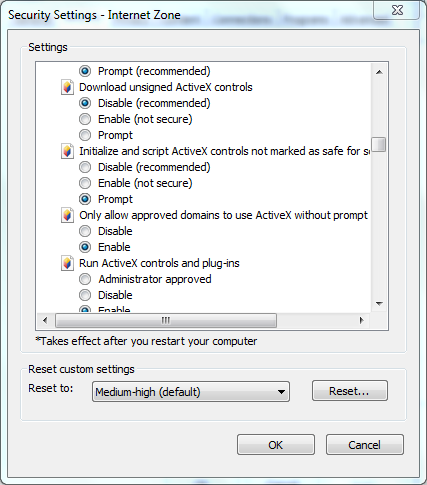
- In the Security Settings – Internet Zone dialog box, scroll down to Initialize and script ActiveX controls not marked as safe for scripting setting in the ActiveX controls and plug-ins section.
- Select Enable or Prompt.
- Restart Internet Explorer.
End devices vs. clients (Functionalities) #
In order for the agent/supervisor to serve a call centre it is mandatory to have a Polycom VVX (310, 410, 500, and 600) or a Cisco SPA504G device to be able to receive calls. However, the use of the agent/supervisor client is optional.
The table below compares the call centre’s most important features that the user can use from the end device and the client:
Features | Devices (Polycom & Cisco) | Agent Client | Supervisor Client | PC Client |
Sign In | Yes | Yes | Yes | Yes |
Sign Out | Yes | Yes | Yes | Yes |
Wrap-up | Yes | Yes | Yes | Yes |
Barge in | Yes (Using FAC *33) – Supervisor Client bolt-on is mandatory | No | Yes | Yes (Using FAC *33) – Supervisor Client bolt-on is mandatory |
Agent time on duty | No | No | Yes | No |
Agent time in state | No | No | Yes | No |
Agents list | No | No | Yes | No |
Call Centre Joined list per agent | No | No | Yes | No |
Live Report (Supervisor Client – Dashboard) | No | No | Yes | No |
Pickup Call | Yes (Using FAC *97) | Yes (Using FAC *97 from Click to Dial) | Yes | Yes (Using FAC *97 from Click to Dial) |
Transfer Call | Yes | Yes | Yes | Yes |
Hold/Resume Call | Yes | Yes | Yes | Yes |
Escalate call to Supervisor | Yes (Using FAC #83) | Yes | No | Yes (Using FAC #83) |
Emergency call to Supervisor | No | Yes | No | No |
Queues List | No | Yes | Yes | Yes – you can see the list of the Call Centres you are a member of |
Queued Calls | No | No | Yes | No |
Sign in/out to/from specific CC (Join/Un-Joint) | No | Yes | Yes | Yes |
Enable / Disable Auto Answer | No | Yes | Yes | No |
Enable / Disable Call Waiting | Yes (Using FAC *43 / #43) | Yes | Yes | Yes (Using FAC *43) |
Recorder Calls (Supervisor Clients) | No | No | Yes | No |
Troubleshooting #
This section describes some common problems and suggests possible solutions.
Problem/Issue | Likely Cause | Suggested Action |
Agent cannot receive calls from Call Centre | The agent has not joined the call centre or he is not in the available state | Check if the agent serves the specific call centre (joined) and also the state of the agent (Available). For more information, please refer to the Agents section. |
User does not receive the email with the client password | Another client is already assigned/enabled to the user | If the end user has been assigned with another client before (pc/mobile client, integrator, receptionist) then he will not receive a new password for the call centre client. He has to use the same password to login. |
Supervisor cannot monitor an agent | The agent has not been assigned to the list with the monitored users for that supervisor or the supervisor simply is not monitoring the agent |
|
Cannot add shortcut from client to desktop | The Java is not up to date on that PC or the Java settings are blocking the client to create a shortcut |
|
