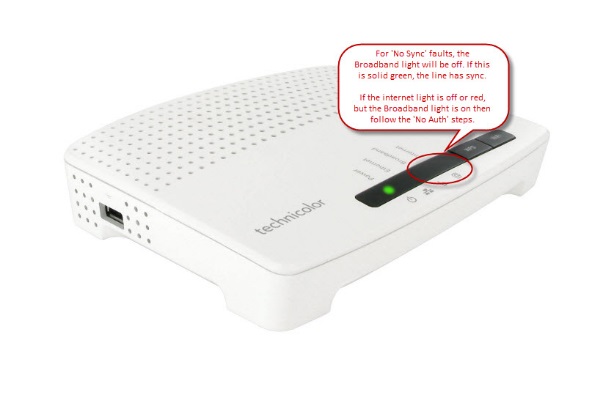
No Auth faults can generally be identified by checking the lights on the customer’s router. Please see below for a screenshot of Gamma supplied router for assured and notes as to which lights you should see present.

Step 1
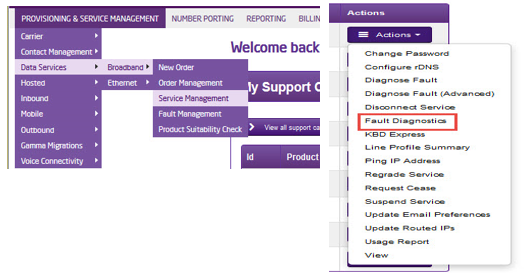
From the Gamma Portal, go to “Provisioning and Service Management”, “Data Services”, “Broadband” and then select “Service Management”. Select the relevant account, and search for the affected line using the one of the available search options available. Once you’ve found the line, using the Actions menu select “Fault Diagnostics”.
Step 2
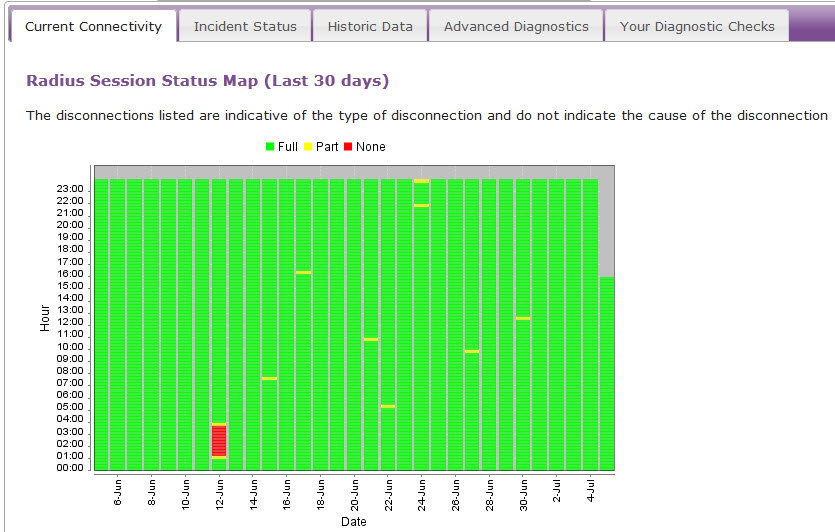
Check the Radius Session Map to see if there has been any connection in the 15 minute segment that is affected. A red segment means that there is no service and you should continue to Step 3.
If the segment is green, go to the No Web Pages section of the technical support guide by clicking here, and start from Step 3.
Step 3 (Only Applicable for ADSL)
Scroll to the bottom of the page and look at the xDSL Status Check and ensure that the follow fields are above zero (it doesn’t matter what the value is):
- Loop Loss
- SNR Margin
- Cell Count
- Speed

**Please note this step only applies to ADSL.
Step 4
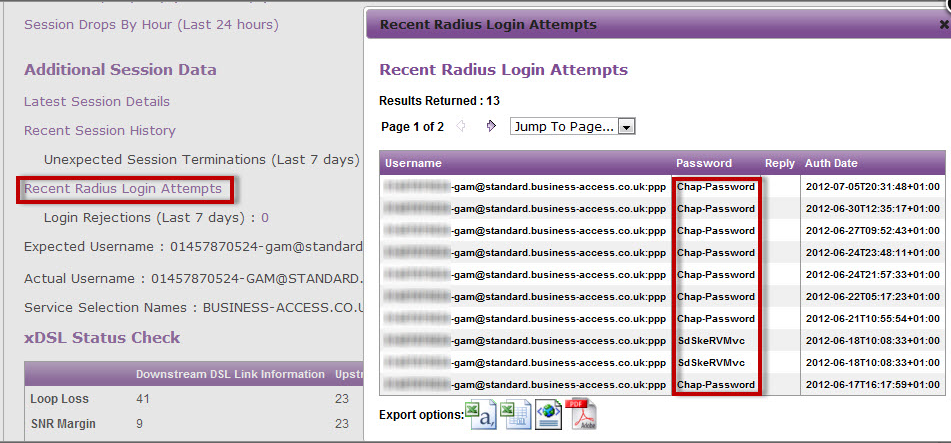
Click the “Recent Radius Login Attempts” hyperlink under the “Additional Session Data” to see if there are any error messages in this (such as password reject etc).
Step 5
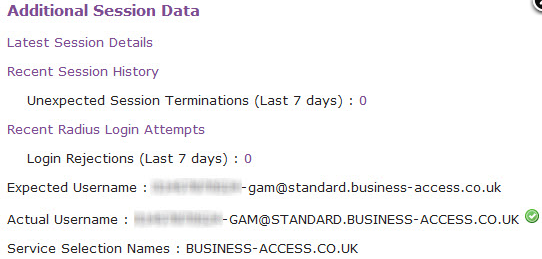
Check to see that the Expected Username and Actual Username in the “Additional Session Data” section match.
Step 6
Check the physical phone line.
**Please note that these tests only apply to ADSL & VDSL and do not apply to SOGEA and FTTP as there is no voice component of the line to carry these tests out on. Skip these tests SOGEA & FTTP circuits.
To check the physical phoneline:
- Plug a telephone into the test socket, lift the receiver and listen for any audible noise
- Dial 17070 and press option 2, this will carry out a quiet line test
- Make a phone call and ensure the quality of the call is good
- If you own the line, carry out a WLR line test
If all of these checks are OK, proceed to Step 7.
If you hear noise or the line test fails, you should raise a fault with the line provider before further diagnosing any broadband issues.
Step 7
Power off the router for 30 seconds, then power back on. This can be done by removing the power supply. You should then monitor your connection to see if the router obtains a connection. If the service has obtained a connection the issue has been resolved.
If you are still experiencing no sync connection, please proceed to Step 8.
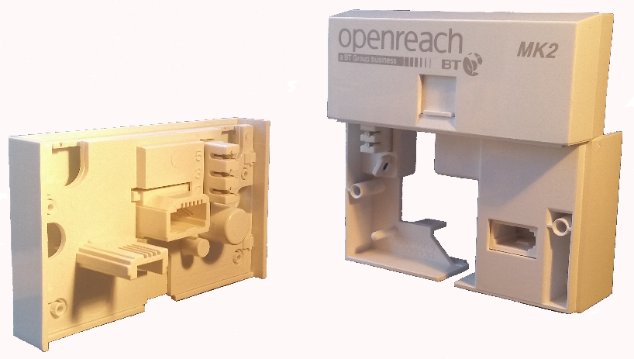
Step 8
Connect your broadband to the NTE5 test socket, you should remove the faceplate of your socket and connect your filter directly into the socket as shown. If the service has come back online, the issue has been resolved and the problem lies with internal wiring, not the broadband.
If you are still experiencing no authentication, please proceed to Step 9.
Step 9
Change the micro filter, Gamma routers come with 2 x micro filters, you should switch to the second or if this is already used, purchase a new micro filter. If the service has come back online the issue has been resolved and the problem lies with a faulty micro filter.
If you are still experiencing no authentication, please proceed to Step 10.
Step 10
Try an alternate router on the connection, if you have an alternate router, test this on the connection. If this is not possible, proceed to Step 11.
If the service has obtained a connectivity the issue has been resolved and the problem lies with a faulty router. If the service still fails, please proceed to Step 12.
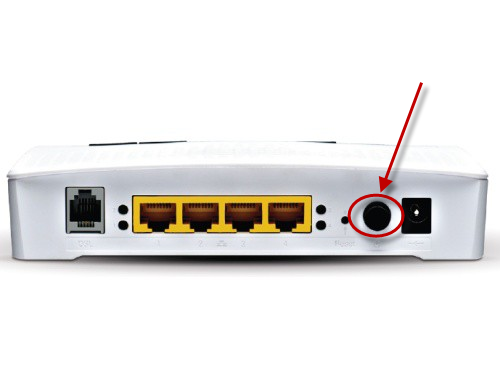
Step 11
Carry out a factory reset on the router.
This can be done by holding the reset button (as pictured) until the lights on the front change.
You will need to reconfigure the router after this, the settings can be found in the description box where you opened this guide from.
If the service has come back online the issue has been resolved and the problem lay with the router.

Step 12
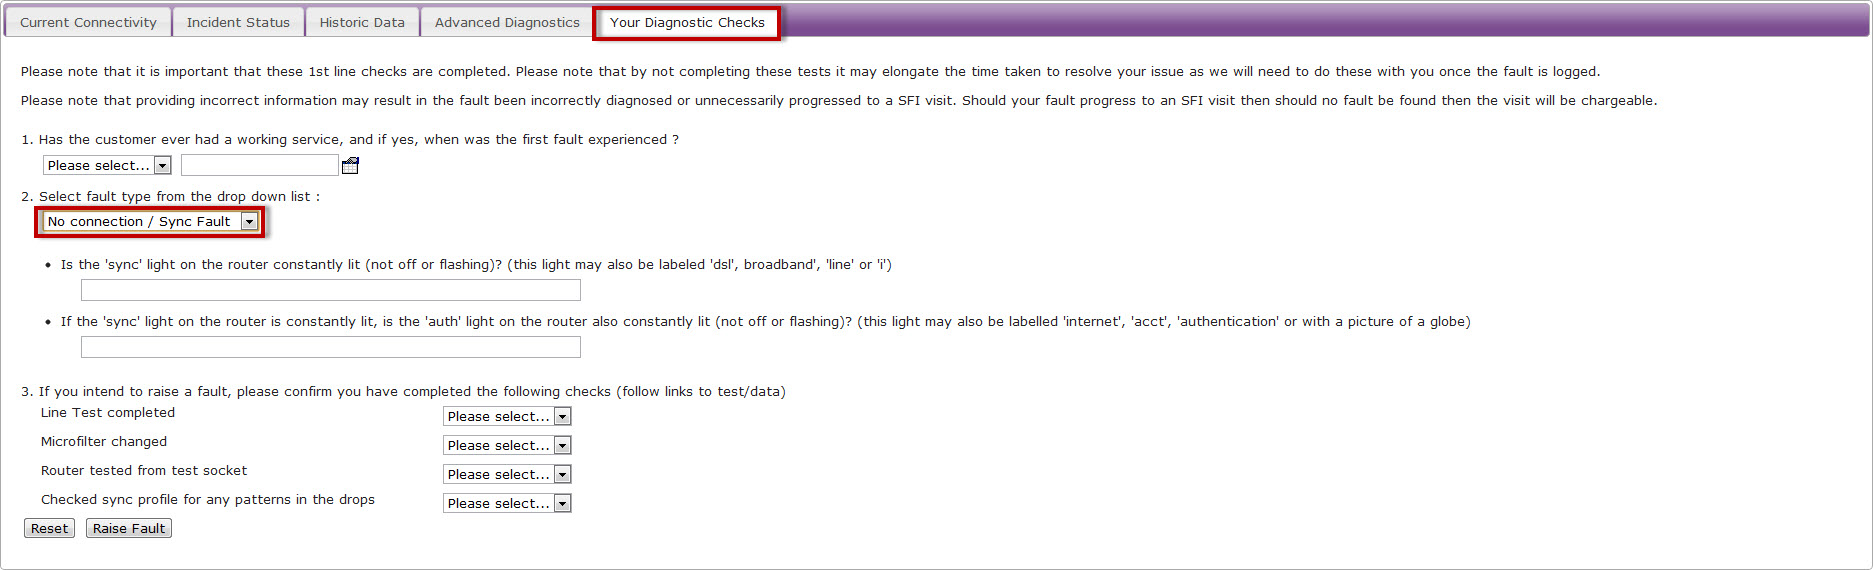
If none of these checks have worked, you’ll need to raise a fault on the Advance Diagnostics page.
Select the “Your Diagnostic Checks” tab and follow the drop down menus.