
Device Customisation allows you to set up the line keys and soft keys of your Horizon hardware. Device Customisation is available on the following handsets.
| Cisco | Polycom | Yealink |
|---|---|---|
SPA504G | VVX250 | T46U |
SPA525G | VVX410 | |
MPP 8841 | VVX450 | |
MPP 8851 | VVX500 | |
MPP 8861 | VVX600 | |
VVX601 |
*Please note the VVX150, Trio 8500 and 8800’s do not support Device Customisation.
The options you have with Device Customisation are:
| Option | Meaning |
|---|---|
Speed Dial | A key that quickly dials a number. This could be a number that is on the Horizon company or a different number |
Busy Lamp Field | Sets up a Busy Lamp Field key so you can monitor a user’s line |
Call Park | Allows you to park a call against your own extension or to another defined extension |
Call Retrieve | Allows you to retrieve a parked call from either your own extension or another defined extension |
Group Call Park | Allows you to park a call again the call park group that you are in. Other users within the group will be able to pick up a call parked by using Group Call Pickup |
Call Pickup | Allows you to pick up a call that has been parked against this extension or another defined extension |
Group Call Pickup | Allows you to pick up a call that has been parked in the Call Park Group that you are in. |
Page Group | This allows you to call the Page Group that the user is a member of. The user must be a Page Group sender. |
Call Pull | This feature gives the opportunity to the user to retrieve a call that has been answered from a desktop client. |
Empty | This will leave aa empty line key. |
Last Call Redial | This will allow you will be able to redial they last call you have made. |
Call Return | This will allow you to call the last received or missed call. |
Voicemail | This will allow you to dial out to your voice portal using the mailbox number and voice pin you supply |
If your user is using the Receptionist Console, Speed Dials set up within Device Customisation won’t show in the Receptionist Console.
Give a user access to set up Device Customisation #
A company Administrator can give a user permission to do their own device customisation.
Step 1
Log into the Gamma Portal and go to Provisioning and Service Management, Hosted, Horizon and Horizon Manage Company.
Step 2
Select your account and login to the company that you want by using the “Actions” button to select “Login to Horizon”.
Step 3
Click the “Users” option and then select “List Users” so you can search for the user that you want to give device customisation permissions to.
Locate the user and click the “Edit” button.
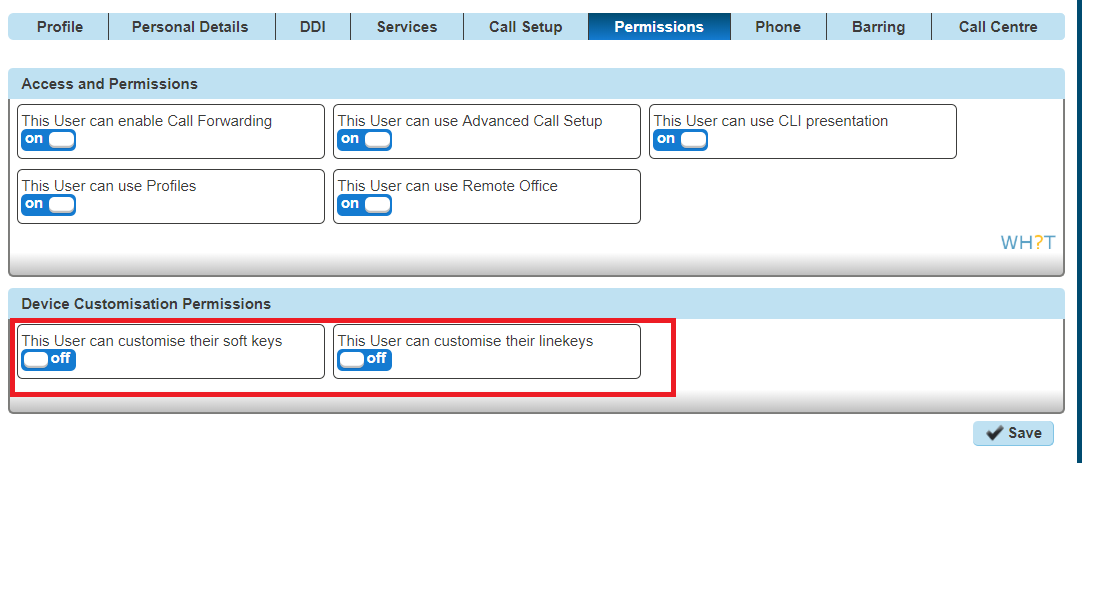
Step 4
Click the “Permissions” tab and enable “This User can customise their soft keys” and “This User can customise their line keys”
Device Customisation as a Company Admin #
Step 1
Log into the Gamma Portal and go to Provisioning and Service Management, Hosted, Horizon and Horizon Manage Company.
Step 2
Select your account and login to the company that you want by using the “Actions” button and selecting “Login to Horizon”.
Step 3
Click the “Users” option and then select “List Users” so you can search for the user that you want to give device customisation permissions to.
Locate the user and click the “Edit” button.
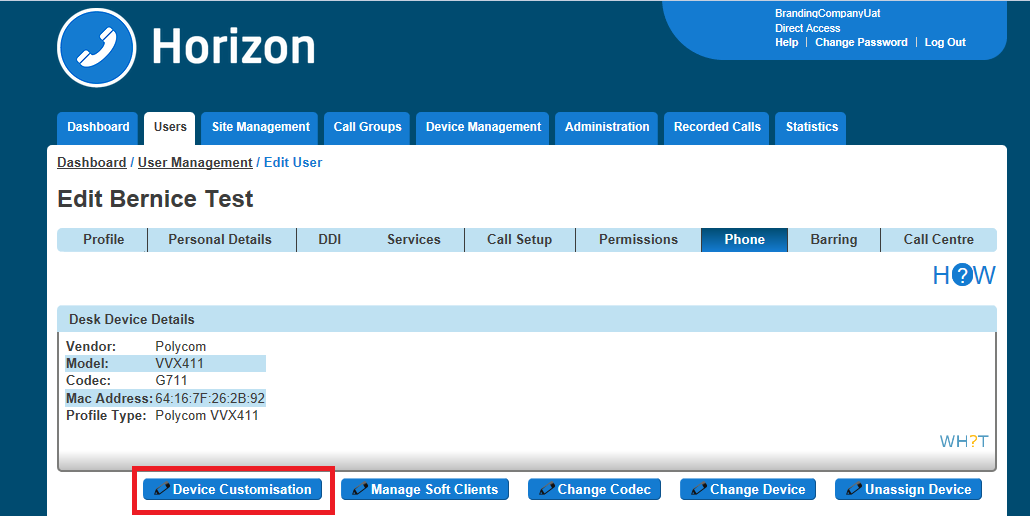
Step 4
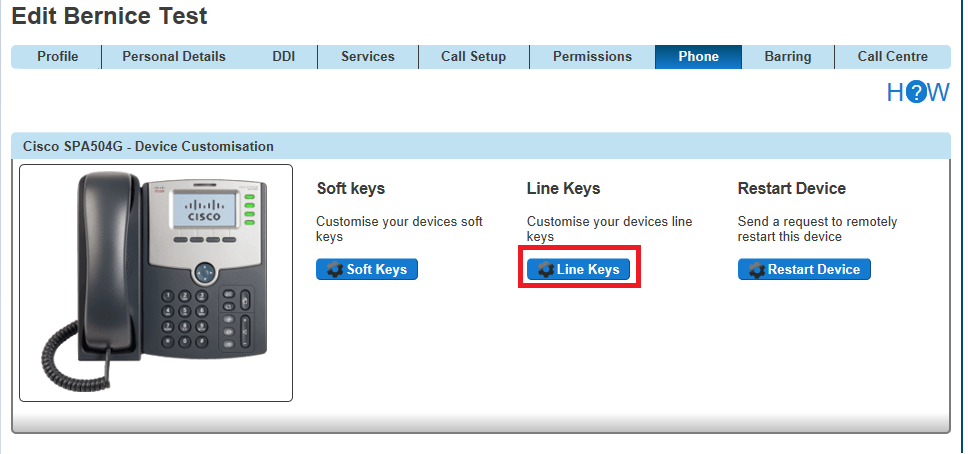
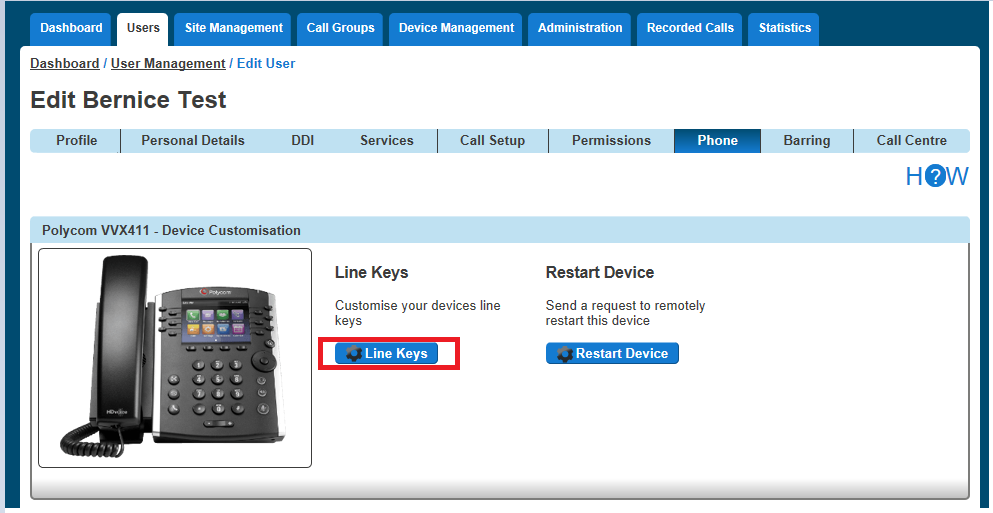
Click the “Phone” tab and then select “Device Configuration”.
Now refer to the Configure My Device sections for Cisco, Polycom VVX or Polycom Soundpoint
Configure my Cisco Device #
For full user guides of Cisco devices, please see the Knowledge Base.
Assigning Soft Keys #
Soft Keys are the buttons that go horizontally across your phone.
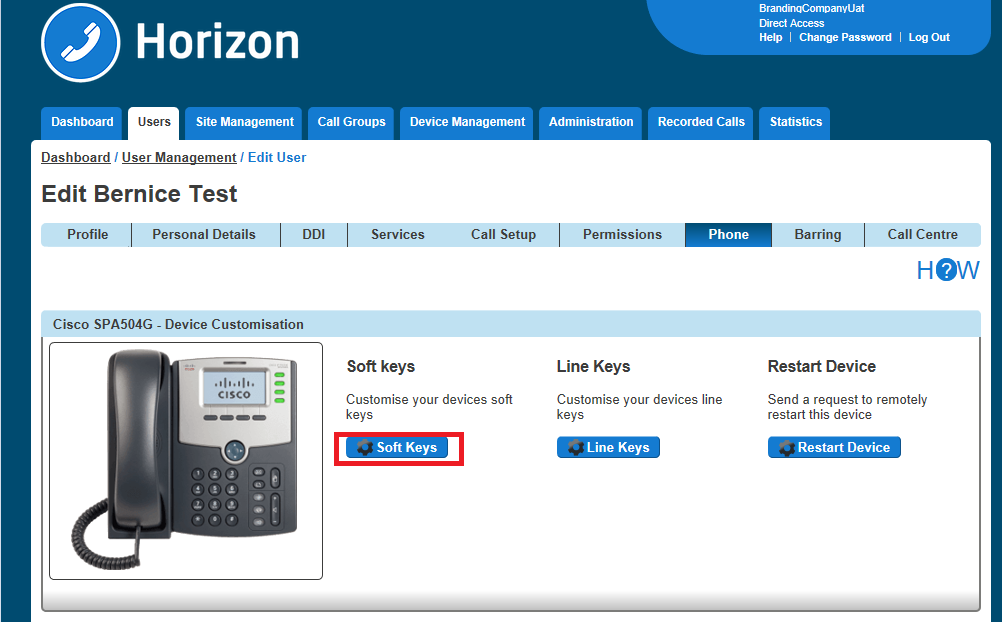
Step 1
When on the Device Customisation page for your Cisco device, select the “Soft Keys” option.
Step 2
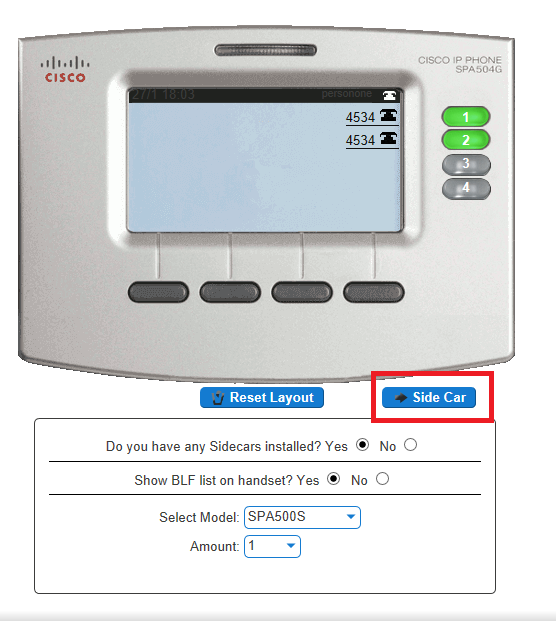
Select a Soft Key that you want to configure
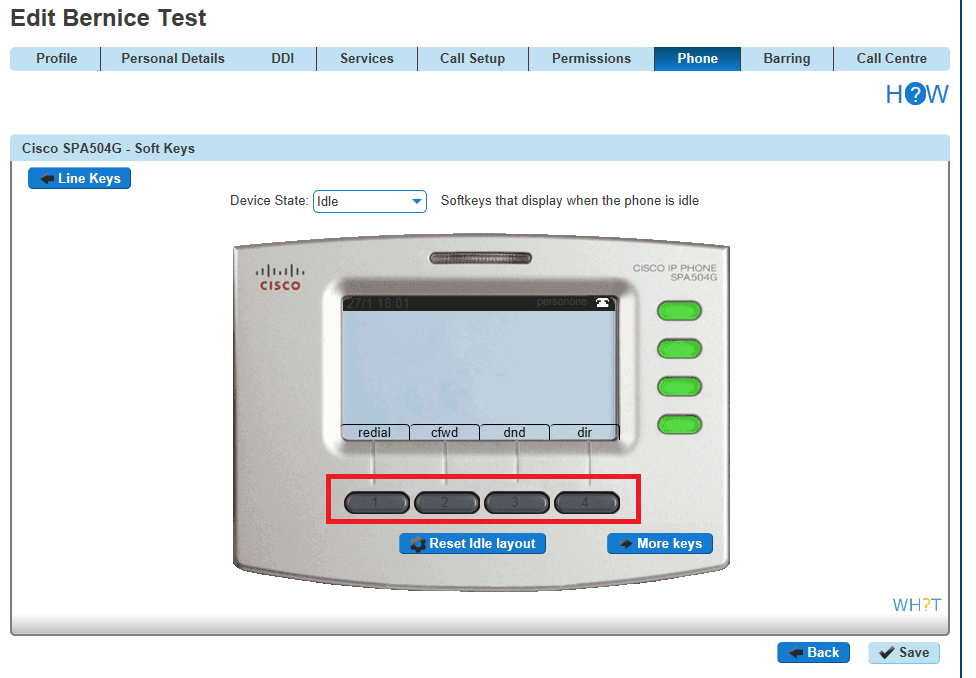
Remember to select the Device State that you want to configure (Idle or In Call).
If you have a Side Car set up and would like to configure the line keys on the Side Car, click “Side Car” to load up the buttons of the sidecar.
Step 3
Now select what you want that key to do. Please see the table in the Device Customisation section of this guide.
Clicking “Save” will restart the device(s) that you’ve configured to download the latest configuration file with your new handset setup.
Please note for newer Cisco models such as the MPP 8851 and MPP 8861 the device customisation screen is as follows:

Step 4
Select a type of Soft Key that you want to configure, either “Idle” or “Connected”


Assigning Line Keys #
Line Keys are the buttons that go horizontally across your phone.
Step 1
When on the Device Customisation page for your Cisco device, select the “Line Keys” option.
Step 2
Select a Line Key that you want to configure
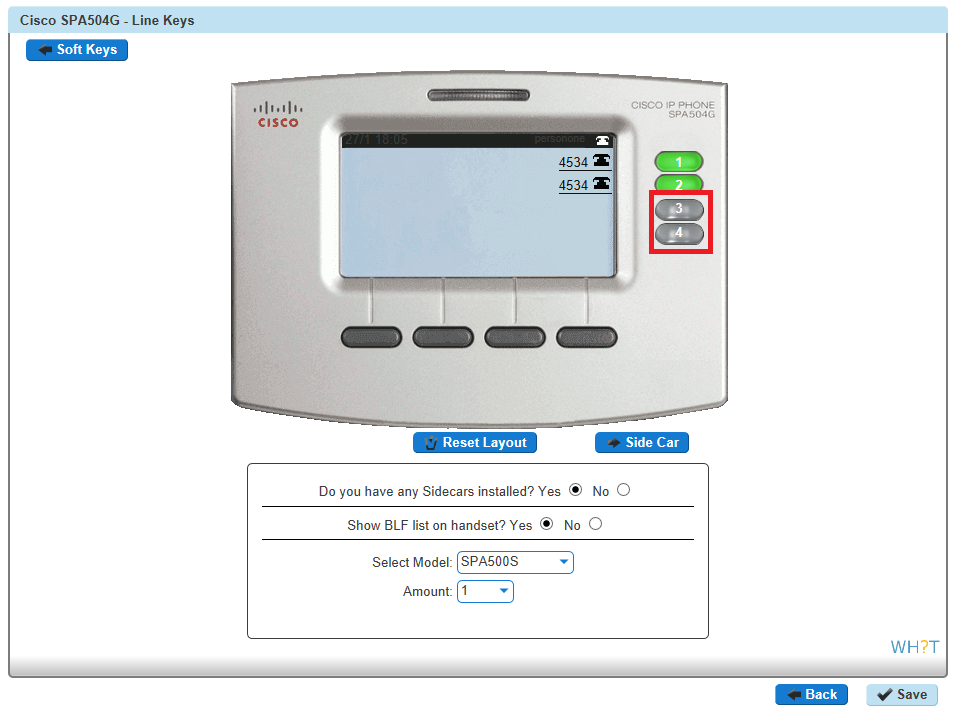
If you have a Sidecar set up and would like to configure the line keys on the Sidecar, click “Side Car” to load up the buttons of the sidecar.
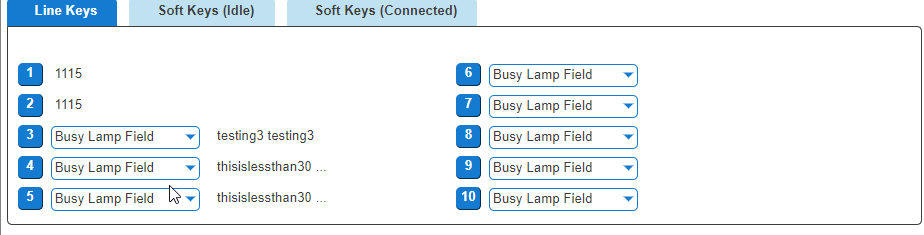
Step 3
Now select what you want that key to do. Please see the table in the Device Customisation section of this guide.
Clicking “Save” will restart the device(s) that you’ve configured to download the latest configuration file with your new handset setup.
Please note for newer Cisco models such as the MPP 8851 and MPP 8861 the device customisation screen is as follows:

Step 1
When on the Device Customisation page for your Cisco device, select the “Line Keys” option.
Step 2
Select a Line Key that you want to configure
For full user guides of Polycom VVX devices, please see the Knowledge Base.
Configure my Polycom VVX Device #
For full user guides of Polycom VVX devices, please see the Knowledge Base.
Assigning Soft Keys #
Soft Keys are the buttons that go horizontally across your phone. These are pre-set and you cannot currently change these options.
Assigning Line Keys #
Line Keys are the buttons that go horizontally across your phone.
Step 1
When on the Device Customisation page for your Polycom VVX device, select the “Line Keys” option.
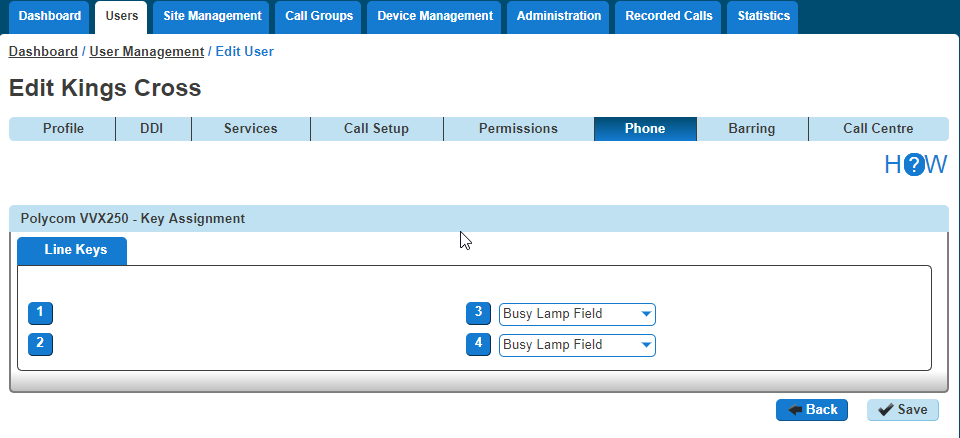
Please note for newer Polycom models such as the VVX250 and VVX450 the device customisation screen is as follows:

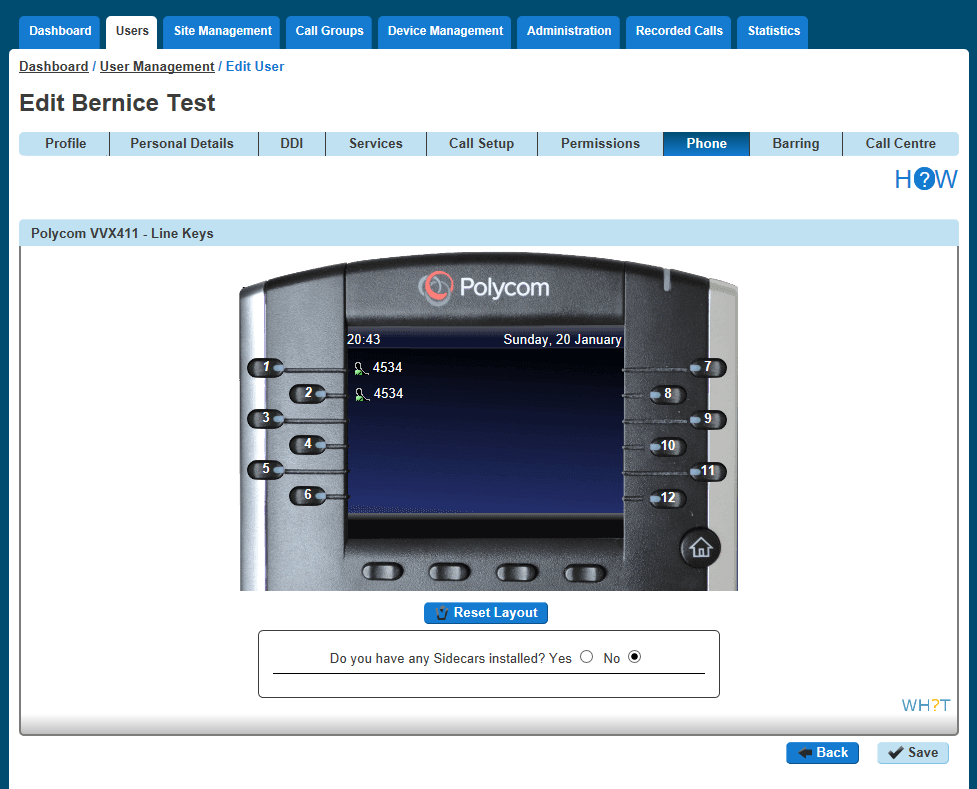
Step 2
Select a Line Key that you want to configure
Please note for newer Polycom models such as the VVX250 and VVX450 the device customisation screen is as follows:
Step 3
Now select what you want that particular key to do. Please see the table in the Device Customisation section of this guide.
Clicking “Save” will restart the device(s) that you’ve configured to download the latest configuration file with your new handset setup.
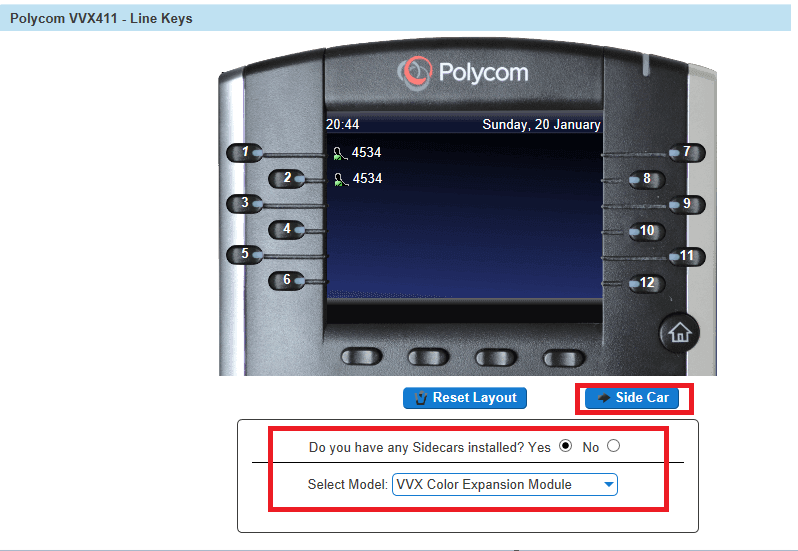
If you have a Sidecar set up and would like to configure the line keys on the Sidecar, click “Side Car” to load up the buttons of the sidecar.
Configure my Polycom SoundPoint Device #
For full user guides of Polycom SoundPoint devices, please see the Knowledge Base.
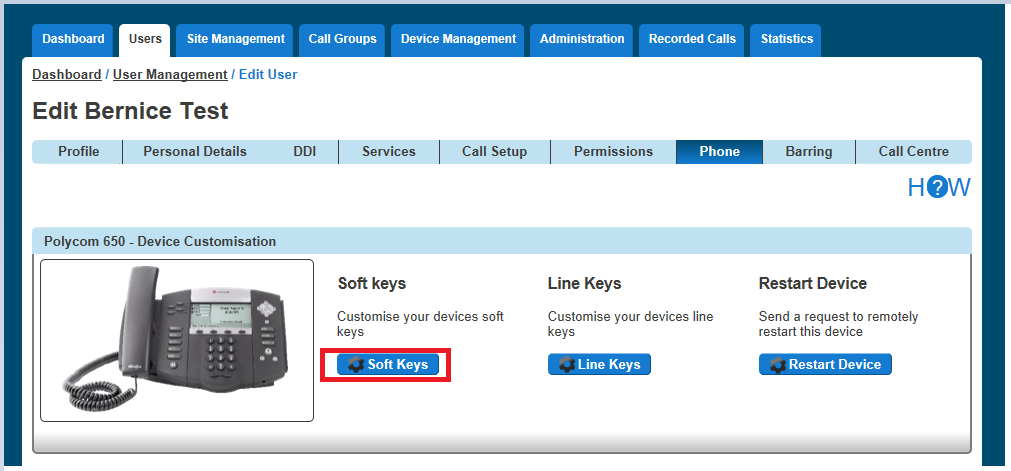
Assigning Soft Keys #
Soft Keys are the buttons that go horizontally across your phone.
Step 1
When on the Device Customisation page for your Polycom SoundPoint device, select the “Soft Keys” option.
Step 2
Select a Soft Key that you want to configure
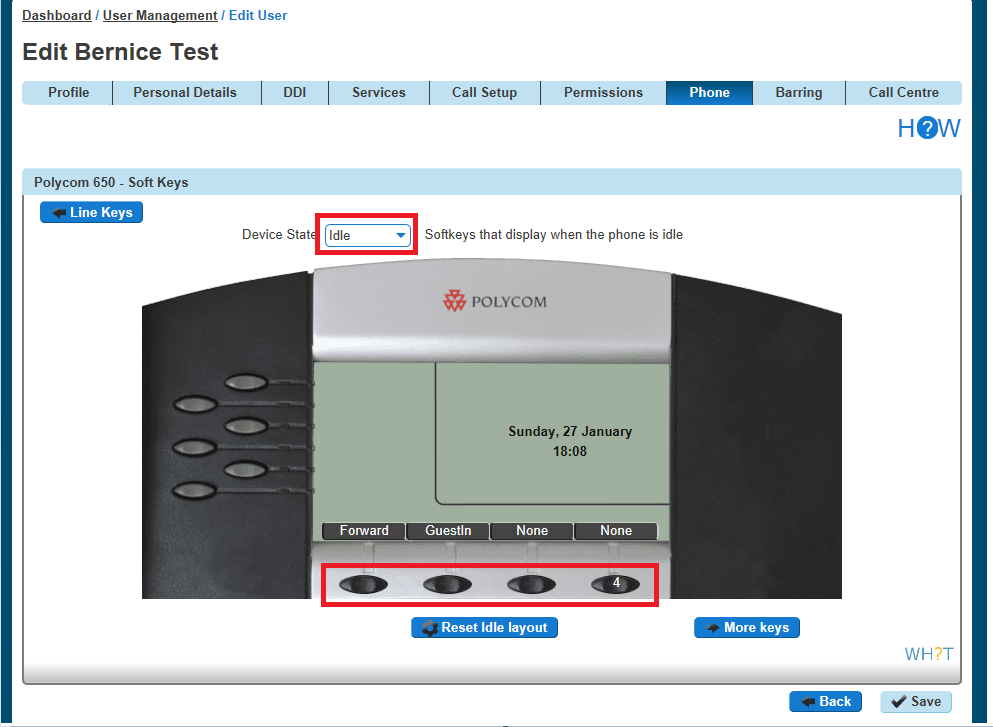
Remember to select the Device State that you want to configure (Idle or In Call).
If you have a Sidecar set up and would like to configure the line keys on the Sidecar, click “Side Car” to load up the buttons of the Sidecar.

Step 3
Now select what you want that particular key to do. Please see the table in the Device Customisation section of this guide.
Clicking “Save” will restart the device(s) that you’ve configured to download the latest configuration file with your new handset setup.
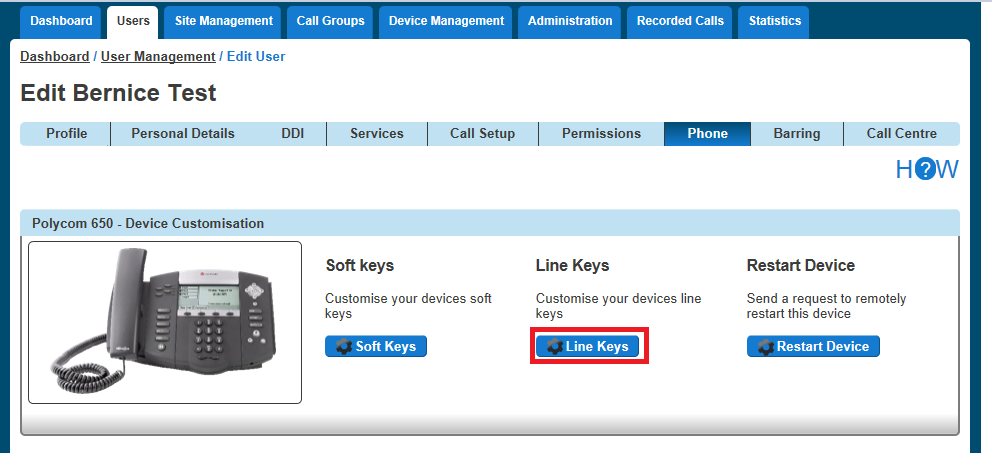
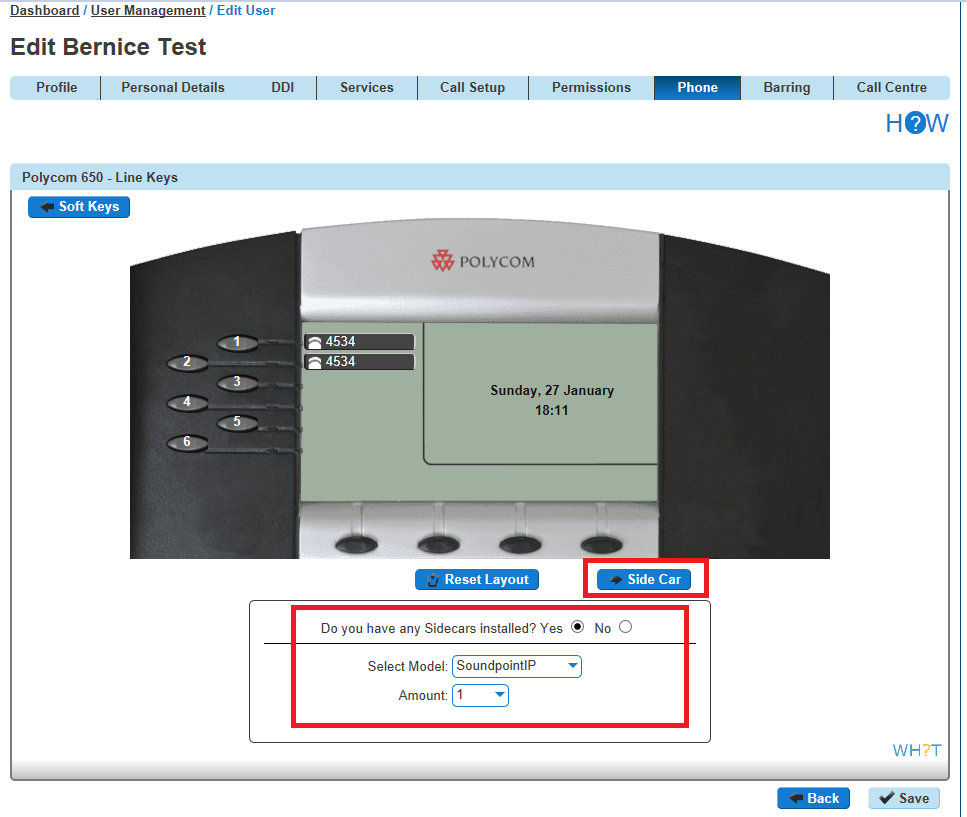
Assigning Line Keys #
Line Keys are the buttons that go horizontally across your phone.
Step 1
When on the Device Customisation page for your Polycom SoundPoint device, select the “Line Keys” option.
Step 2
Select a Line Key that you want to configure
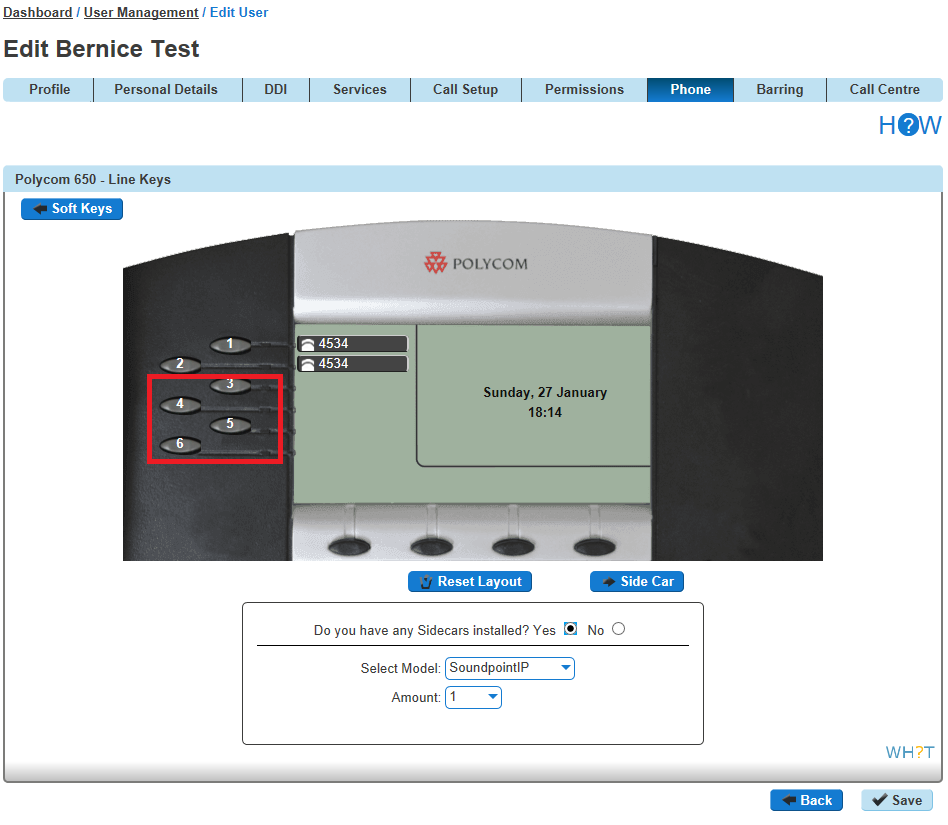
If you have a Sidecar set up and would like to configure the line keys on the Sidecar, click “Side Car” to load up the buttons of the Sidecar.
Step 3
Now select what you want that particular key to do. Please see the table in the guide.
Clicking “Save” will restart the device(s) that you’ve configured to download the latest configuration file with your new handset setup.
