
The Auto Attendant feature allows callers to your company to be automatically transferred to a person or group without the intervention of an operator or receptionist.
There is no limit on the number of Auto Attendants a Company can have, however there is a limit of up to 3 levels of Auto Attendants (for example you can have one auto attendant going to another auto attendant three times).
You can record the Auto Attendant messages using either your Horizon phone, or create a sound file on your computer and upload this. See our guide on the Knowledgebase on how to “Convert Audio File”.
Setup Auto Attendant #
Before you start to set up your Auto Attendant, you need to make sure that you have an Auto Attendant Add-on to do this. This is done by completing the following actions:
- Log into the Gamma Portal and go to Provisioning and Service Management, Hosted, Horizon and Horizon Manage Company.
- Select your account and locate the company that you want to set up an Auto Attendant for.
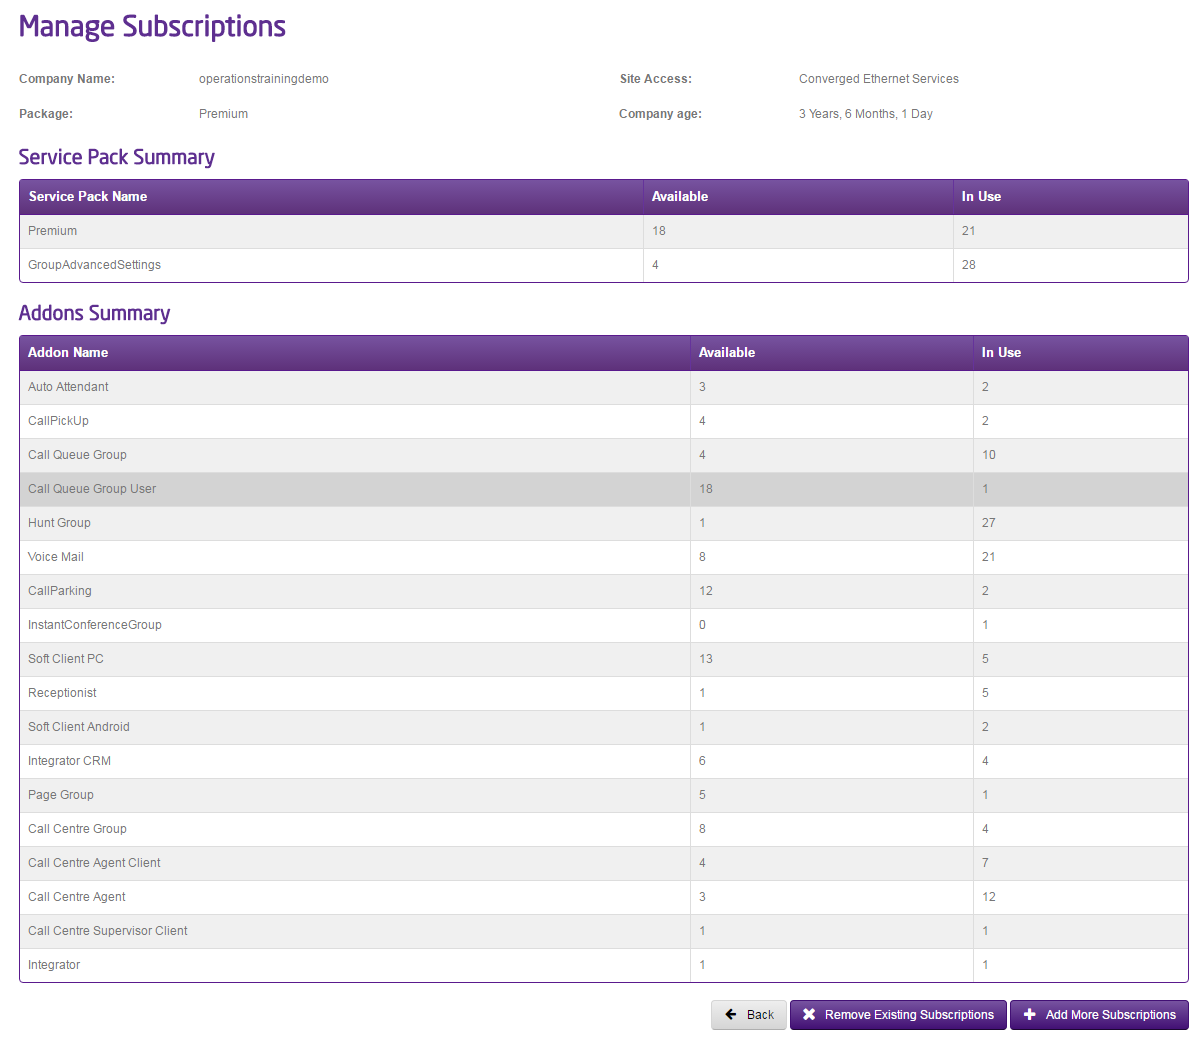
- Using the “Actions” drop down select “Manage Bolt Ons”.
From here you can see what bolt-ons you have and how many are currently in use. If you need to add any more Auto Attendant add-ons, scroll to the bottom of the page and click “Add More Bolt Ons” and then you can add as many bolt-ons as you need.
Step 1
Log into the Gamma Portal and go to Provisioning and Service Management, Hosted, Horizon and Horizon Manage Company.
Step 2
Select your account and locate the company that you want to set up an Auto Attendant for by using the “Actions” button and selecting “Login to Horizon”.
Step 3
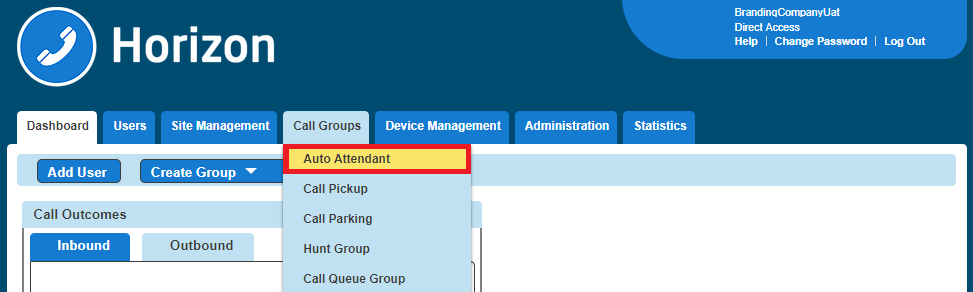
Once you’re in the Horizon Portal select “Call Groups” and then “Auto Attendant”.
Step 4
From here you can add a new Auto Attendant by clicking the “Add” button. This will load up the wizard to set up the Auto Attendant.
From here you should:
- Select the Site you want your Auto Attendant to be on
- Give the Auto Attendant a name and username
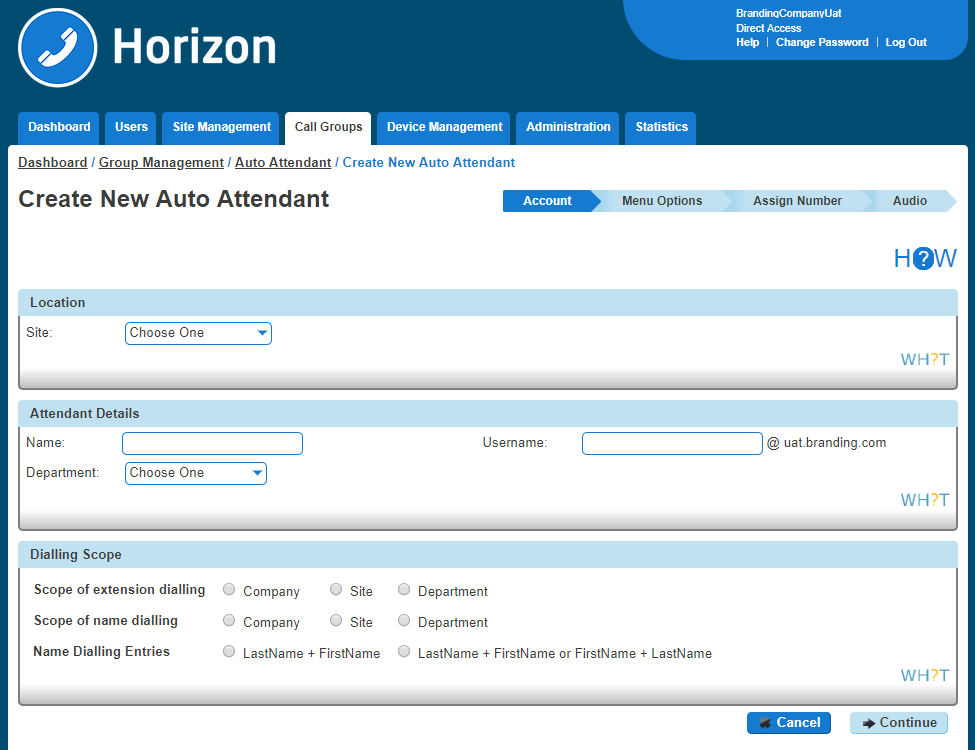
The Dialling Scope is: #
Scope of extension dialling #
If extension dialling is selected as an option, this specifies where Horizon should limit its search to for the entered extension – either the department, site or company.
Scope of name dialling #
If name dialling is selected as an option, this specifies where Horizon should limit its search to for the entered name – either the department, site or company.
Name dialling entries #
If name dialling is selected as an option, what format must the caller enter the name of the user they wish to speak to.
Step 5
The top half of the screen is there in order to ensure the auto attendant links to the right “Schedule” for your company. You can either select “Use the same menu all the time” or “Use different menus during and after business hours”.
If you select “Use different menus during and after business hours”, you can then select from the drop-down menu the “Schedules” that defines open and closed hours.
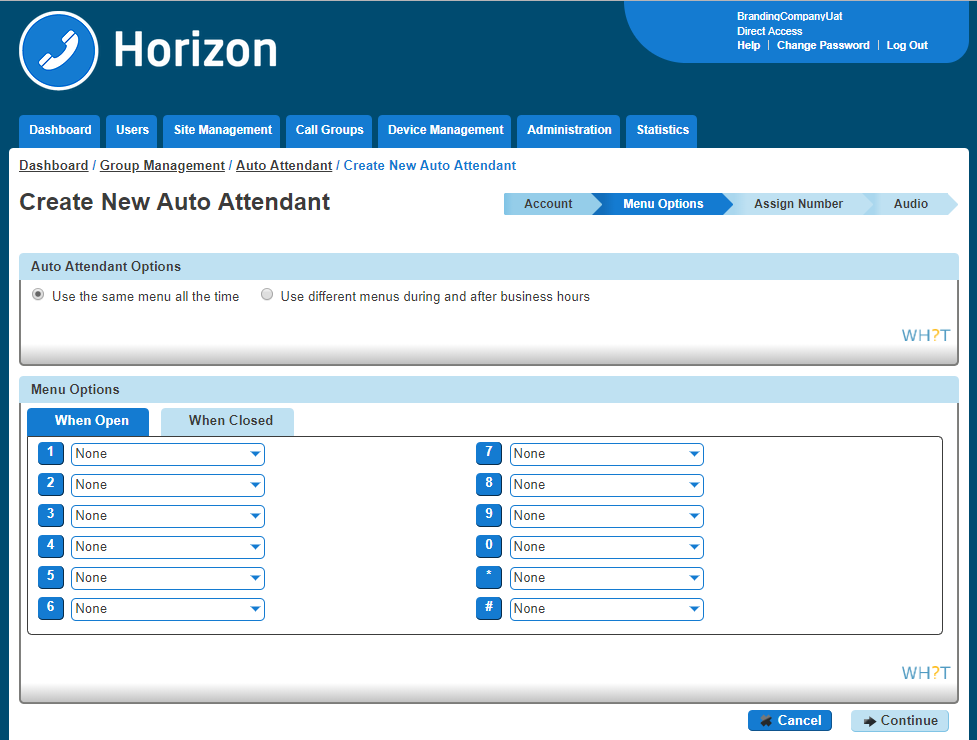
The second half of the Menu Options screen is a grid which corresponds to the buttons on a telephone keypad, and you’ve got two options: Open Hours and Closed Hours.
The options for each button are:
Menu Option | Description |
Transfer with prompt | This will allow the user to hear a recorded message played once they have selected a menu item (“Please hold whilst we connect you”). This option also plays the recorded voicemail message that a user sets. If your user has recorded more than their name for the voicemail greeting, then this message will play here. |
Transfer without prompt | This will forward the call to the required destination once a menu item is selected. This destination could be a user, hunt group or new auto-attendant. |
Transfer to operator | This option will replay the call recording associated with this auto attendant to effectively replay the menu items to the caller. |
Name Dialling | This will allow a caller to type in a name based on your dialling scope through the Horizon handset i.e. the first name Mike would be “6453” and the last name Green would be “47336”. |
Extension Dialling | This will allow the caller to type in a user’s extension, allowing the call to connect to this extension based on your dialling scope. |
Repeat Menu | This option will replay the call recording associated to this auto attendant to effectively replay the menu items to the caller. |
Exit | This will terminate the call on behalf of the calling party. |
The “Transfer” options will load up the “Search Directory” screen so you can search for the exact number you want to transfer the call to.
Step 6
You then need to define a number for the auto attendant, an extension number for internal call routing and a display name for presentation once the call is delivered.
Step 7
The final step is to upload an audio file to be played when the call is connected. If you are going to record the message with your Horizon phone then you don’t need to upload anything here and go to the Recording an Auto Attendant message with my Horizon Phone.
You can use our guides “Create Audio Files to use with Horizon” and “Convert Audio Files to use with Horizon” on the Knowledgebase.
Recording an Auto Attendant message with my Horizon Phone #
If you have set up your Auto Attendant without adding an audio file you can use a Horizon Phone that is allocated to the same site as your Auto Attendant to record your Auto Attendant message. You will also need to have the extension number of the Auto Attendant to hand.
To do this you need to make sure that you have your Company Voice Portal set up.
- Dial your Company Voice Portal.
- At the prompt you should:
- Enter the Voice Portal digit extension if dialling from an external phone.
- Press the * button and then enter the Voice Portal digit extension if dialling from a Horizon handset.
- Enter the Voice Portal passcode.
- Select option 1 (Change Auto Attendant Greeting).
- Enter the extension number of the Auto Attendant.
- Press 1 if you want to record the business hours greeting.
- Press 2 if you want to record the out of hours greeting.
- Save the recording.
- This will add the recording(s) to the Auto Attendant you selected.